
|
|
|
#1
 12-22-2013, 01:16 AM
|
||||
|
||||
|
I absolutely meant to post these months ago.
During the same course (Zoology 450 - Evolution of Form and Function at the University of Alberta. I highly recommend it to any UofA students that might be reading this.) that I learned to use the SEM (See my SEM photo thread here: http://www.canreef.com/vbulletin/showthread.php?t=95984) I undertook a histology project where I got to slice and dice some Seriatopora hystrix or pink birds nest. Exploration of the cellular anatomy of the scleractinian coral Seriatopora hystrix 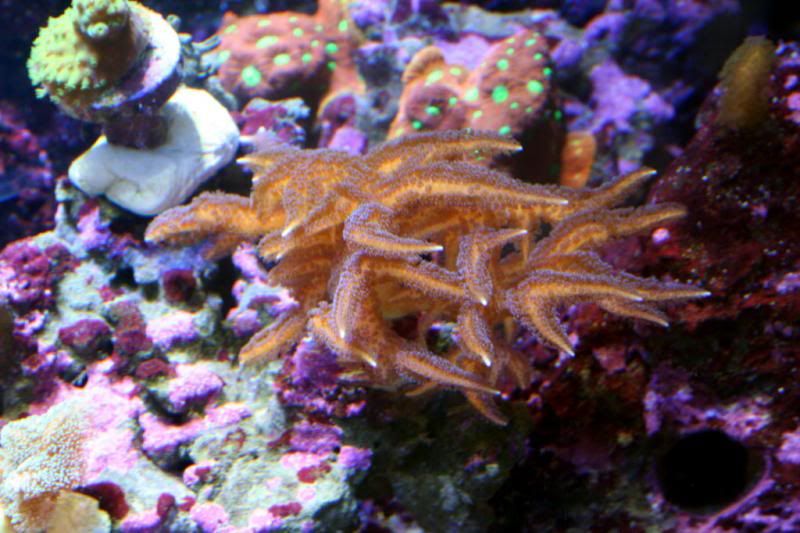 So this mini-colony was the tissue donor I utilized. At the time he was living in a 30 gallon lit with a TMC Aqua Ray 1000 light tile. I fragged off ~2cm branches using the grip and snap methodology. The frag was then placed 50:50 MgCl2:tank water (MgCl2 is anesthetic commonly used with marine invertebrates, this allowed to my frag, transport and process the coral without its polyps retracting). Once I got my frags to the university they were preserved in 4% paraformaldehyde. 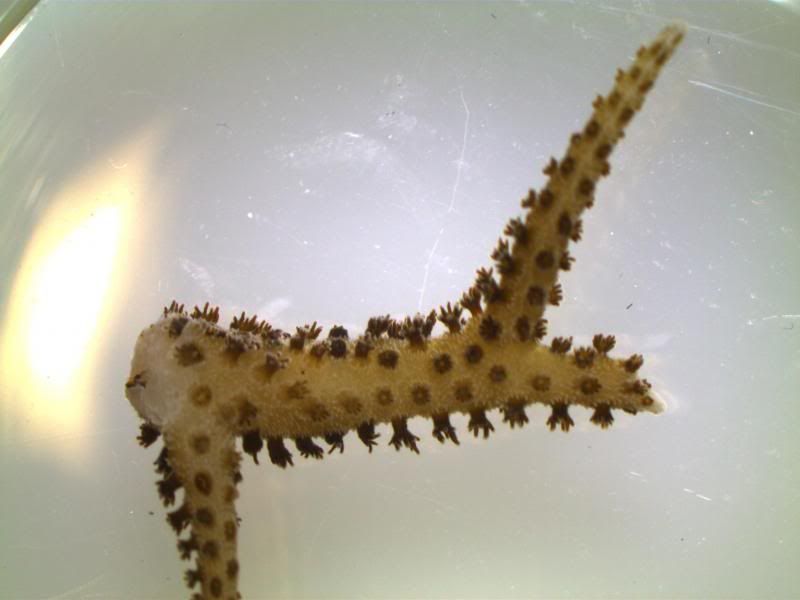 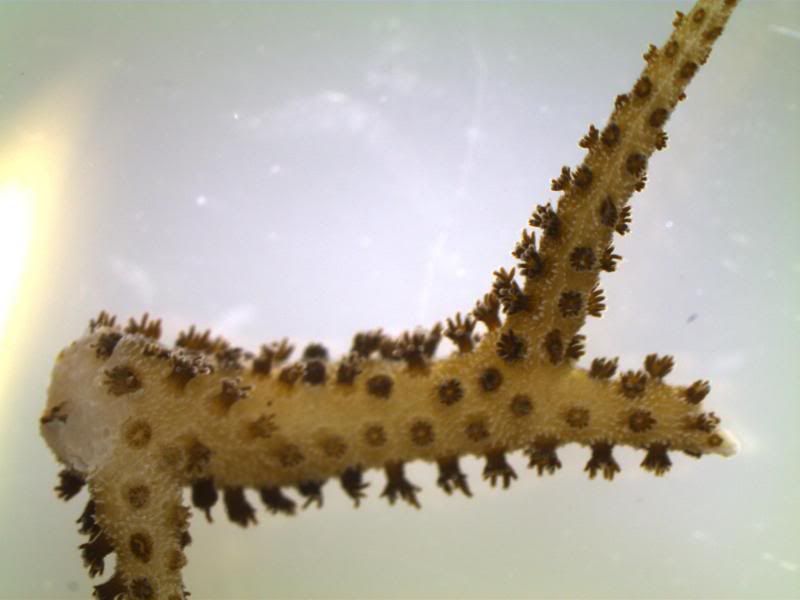 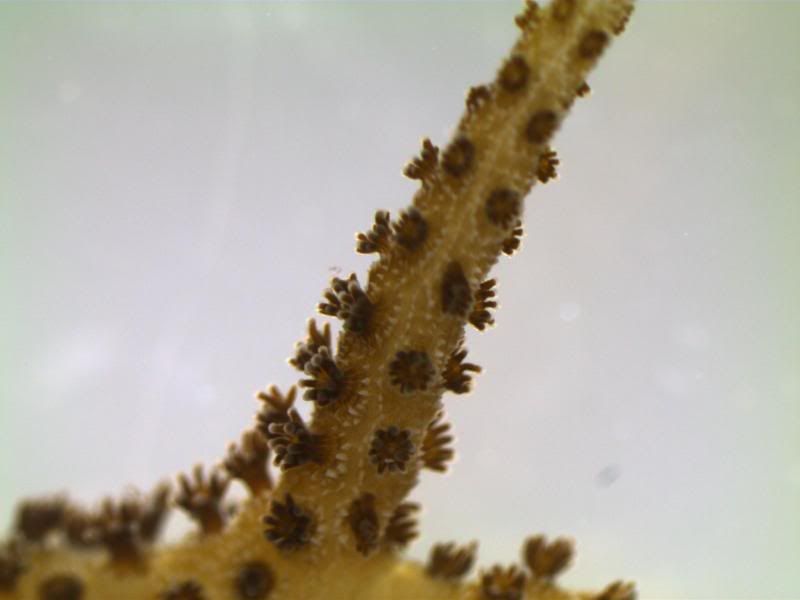 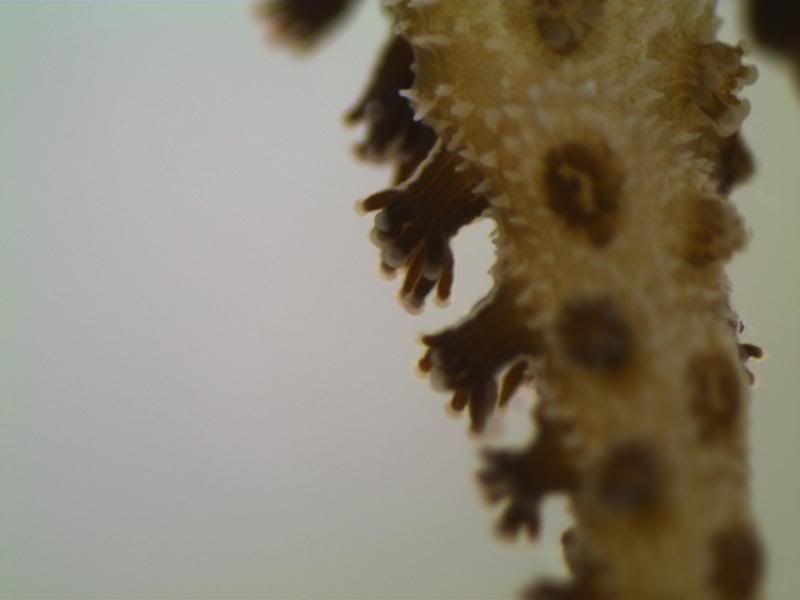 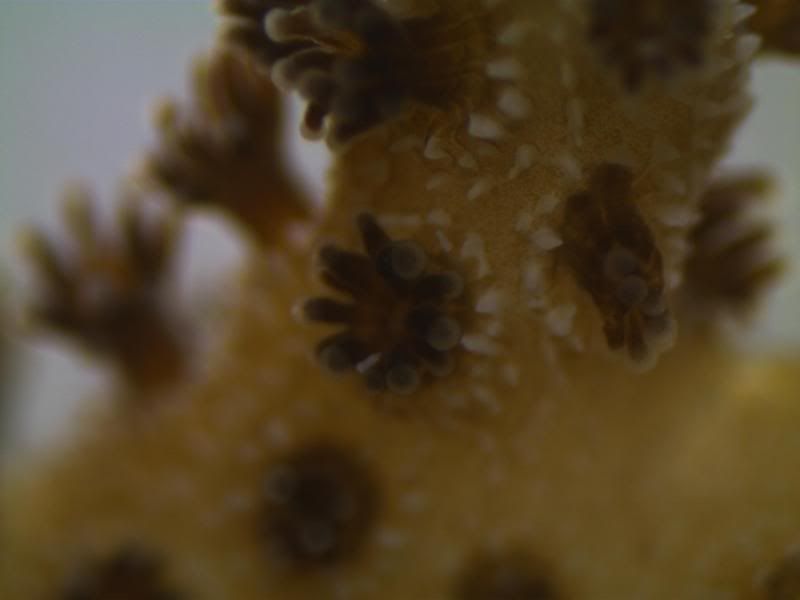 The above photos were taken with an infinity one camera mounted on a Olympus SZ61 dissecting scope. These ones I shot just fun and as result they have no scale bars. I did of course pay attention to scale for some of my images. 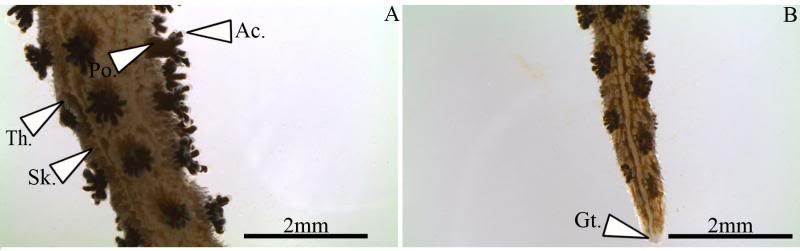 Figure one: Compound light microscopy images taken of S. hystrix prior to decalcification .A Extend polyps (Po.) and their acrosphere's (Ac.) are visible, as well as a retracted polyp that reveals the theca (Th.). B. Show's a growth tip (Gt.) at the terminal end of the coral branch. Once I was done having fun with the dissecting scope it was time to get one with the meat of my project. Getting a look at the insides of the coral tissues. How was I going to do this? By Histology of course! Histos - "tissues" ologia - "Science". What histology boils down to is getting a biological structure you're interested in, finding a way to cut it into very very thin strips, staining those strips so you can see all of the cellular structures inside of them and then looking at them under a microscope. Step one is covered. I have a bunch of S. hystrix frags. Now to accomplish step two (cutting said frags up) I needed to decalcify my frags, as you can imagine cutting through the calcium carbonate skeleton isn't easy. Decalcification was accomplished using a Fisher sciencetific product called Cal-Ex (which is essentially a bunch of calcium chealators and hydrochloric acid) 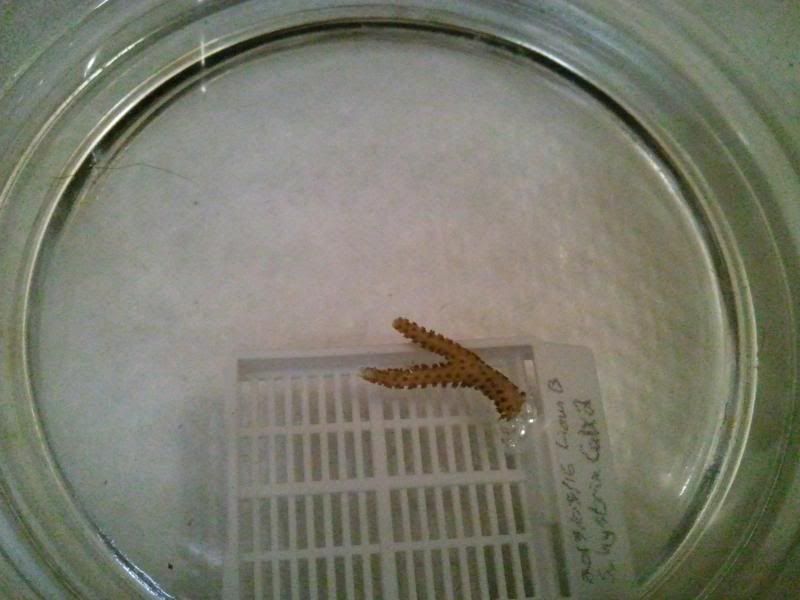 See those bubbles? That's the Cal-Ex dissolving away the skeleton. It started at the base their and worked its way in. The frag bubbled and jerked around the specimen cup until I was left with the sock of tissue that surrounds the skeleton. Okay so what's that white thing below the frag about? 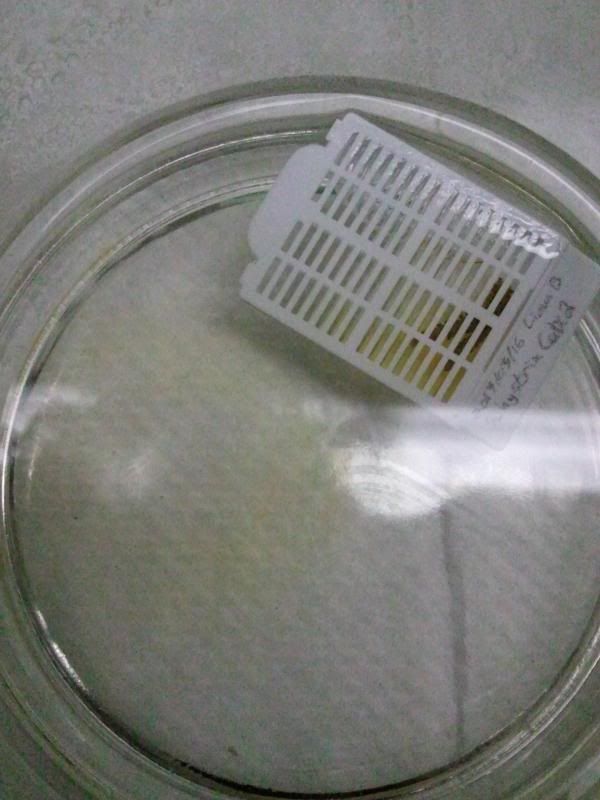 Its an embeddeding cassette! It holds my now skeleton-less coral tissue as I put it through a series of ethanol baths to dehydrate the tissue in preparation for embedding in parafin. 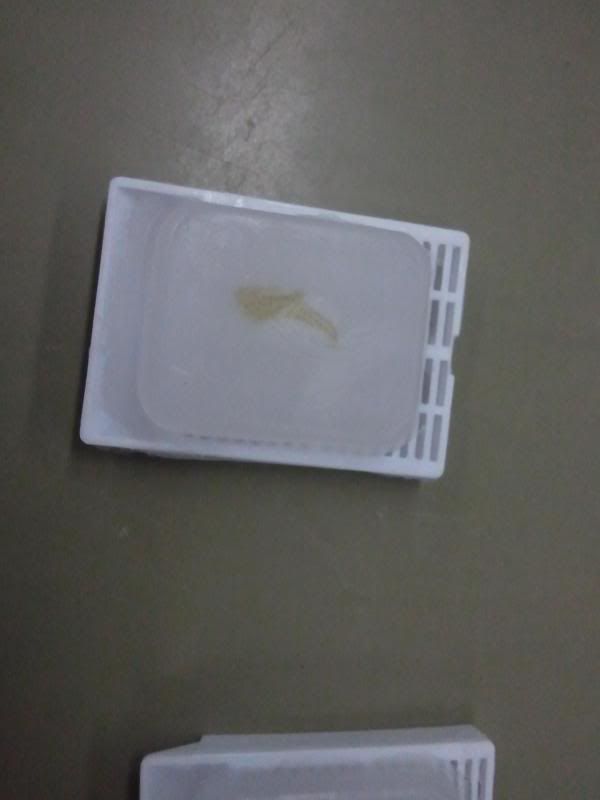 Shazam! Coral tissue in a block of wax. You then take that lovely block of wax and slap it into a microtome. In my case it was the Leica RM2125 RTS Rotatry Microtome. 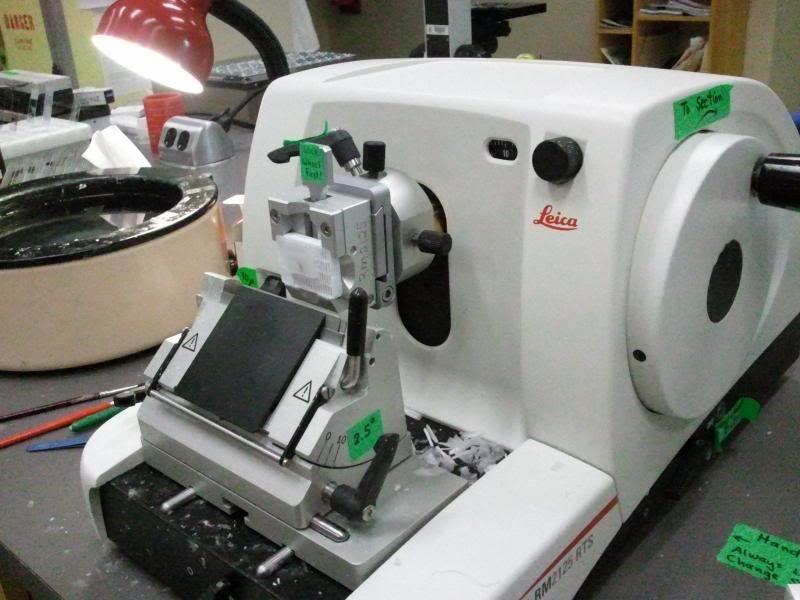 I spent many many hours in front of this beauty. How does it work? Well, the chuck (the metal clamp holding my wax block) moves down and forward a set distance (that's what the black knob controls) towards a razor blade. The number 10 you can see next to black knob stands for 10 micrometers (0.001cm), every time I cranked that handle I cut a 10 micron section of my coral tissue. 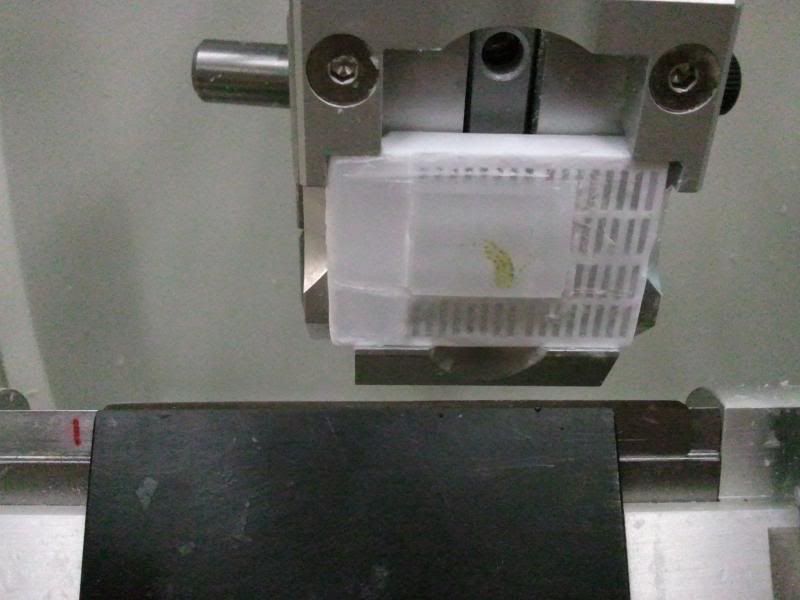 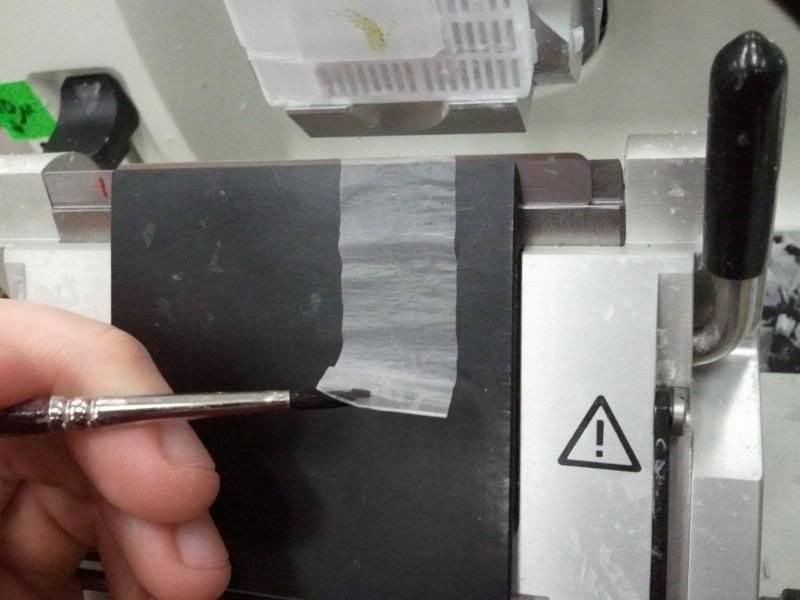 Usually you'll cut a "ribbon" or a series of sections through your tissue. You then lift this ribbon using two paint brushes into a liquid gelatin bath after which you scoop them onto a microscope slide. Sadly I do not have photos of this process but rest assure it was as fiddly as it was sticky. After ENDLESS amounts of sectioning I had myself a box full of glass slides with 10 micron sections of S. hystrix on them. Only problem, they're clear. You can't see a whole lot when you throw them under a microscope. To fix this we stain them. I also do not have photos of this but really all it involves is taking you slides and placing them in a series of baths to: First. Dissolve away the wax Second. Rehydrate the tissue Third. Apply your stain Fourth. Re-dehydrate Then cover slip. Now for my prettiest pictures. To start, a stitched together image of several shots to give you an idea of what I was seeing. 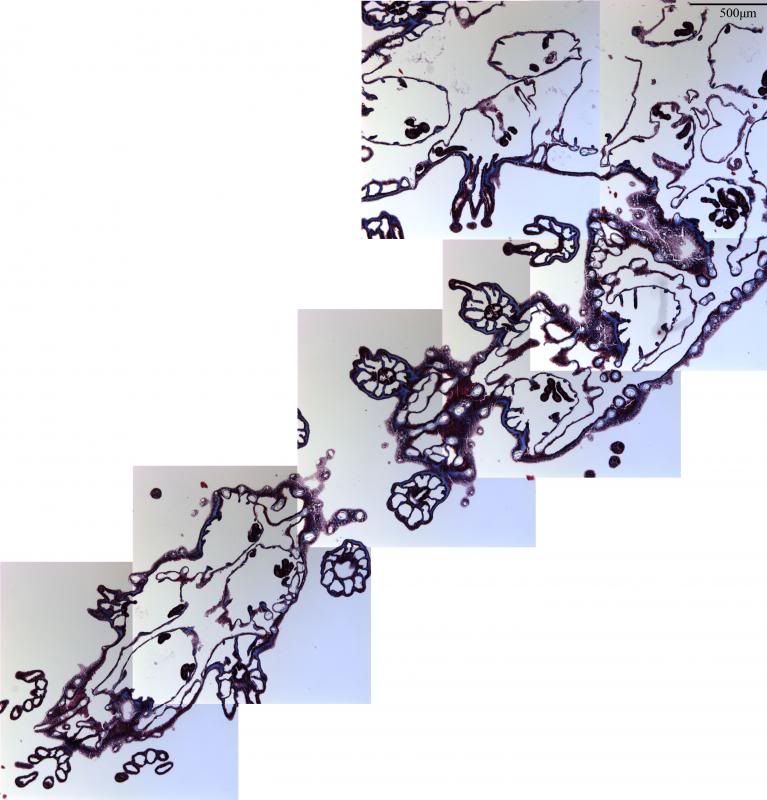 So this is a branch S. hystrix stained with Masson's trichrome. 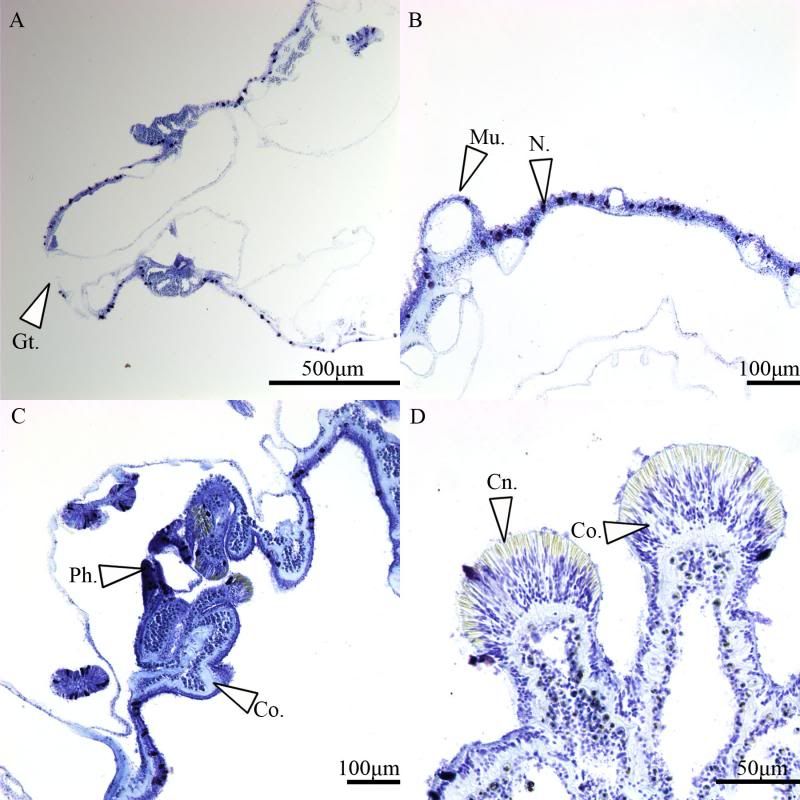 Here's a figure plate of some tissue stain with thionine. As you can see the acidity of this stain turned the Cnidae (Cn.) a lovely yellow. Other visible structures are some mucocytes (Mu.), collagen bands (Co.) and what are possibly nissil bodies (a type of nerve cell). The following photos will have less exposition as I have run out of time for this evening. Stay tuned for more detailed figure legends (and spelling/grammar corrections). 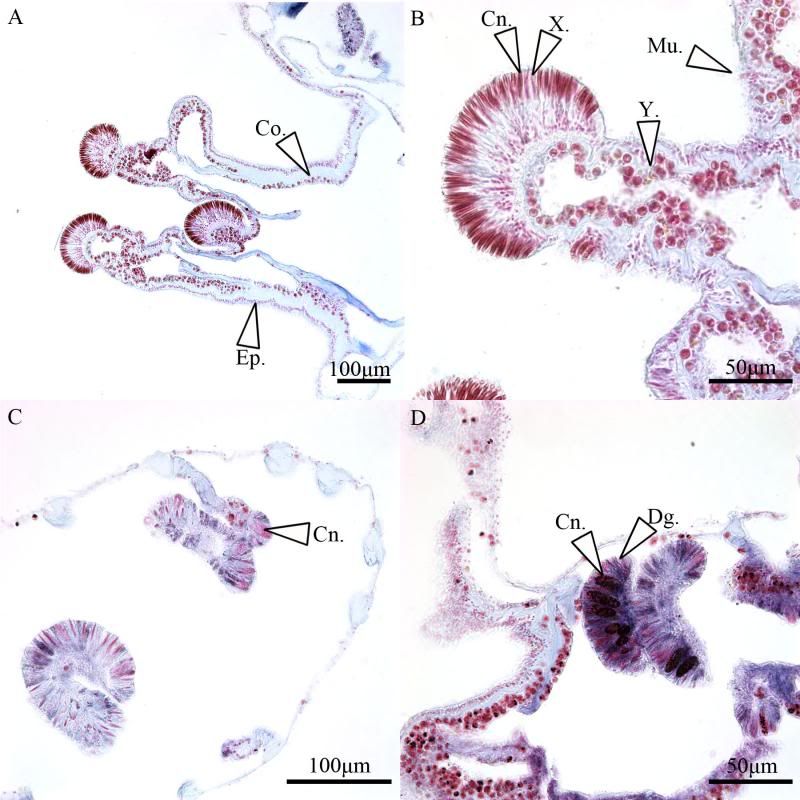 Figure plate of Azan staining. 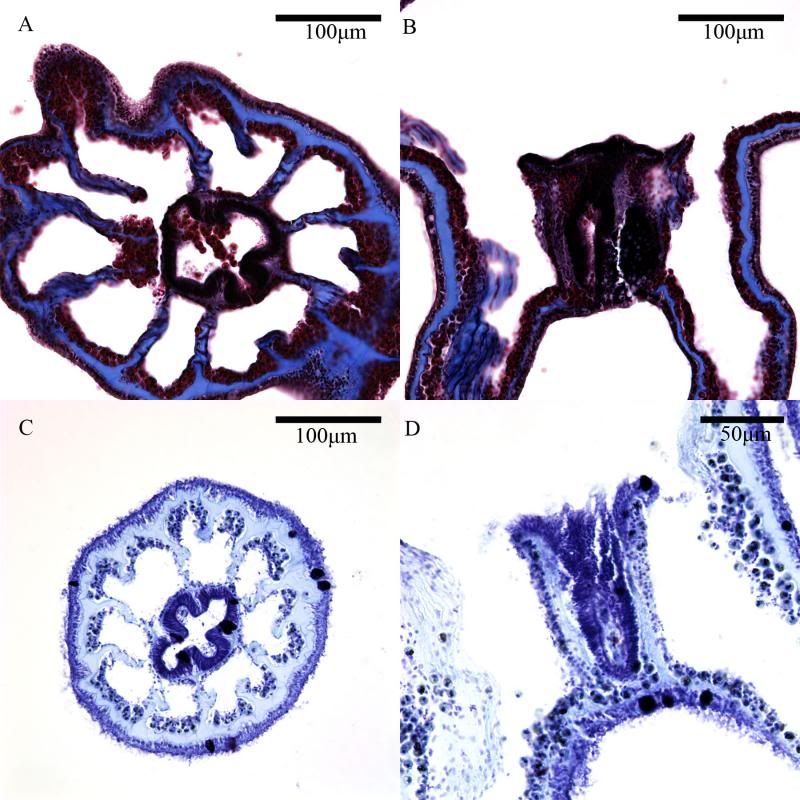 Top two are masson's trichrome. Bottom are thionine. All four show polyp pharynx's cut in different orientations. 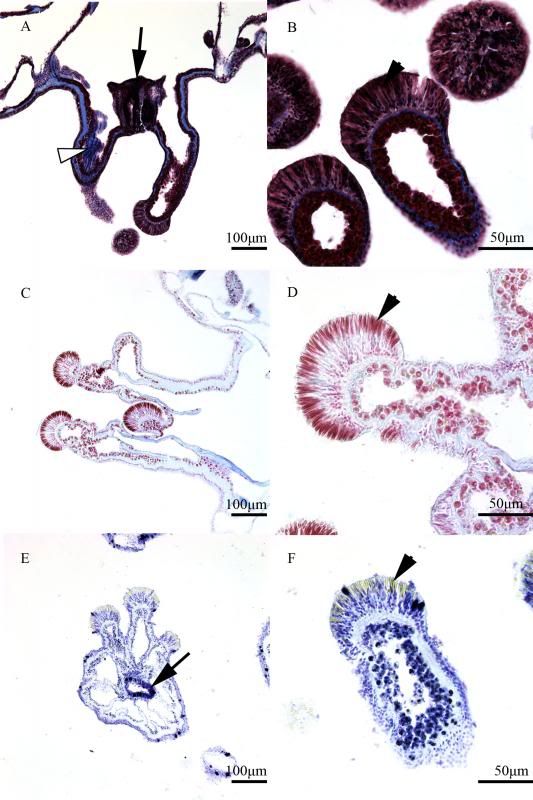 Some shots of polyps stained with Masson's trichrome, modified azan, and thionine respectively. 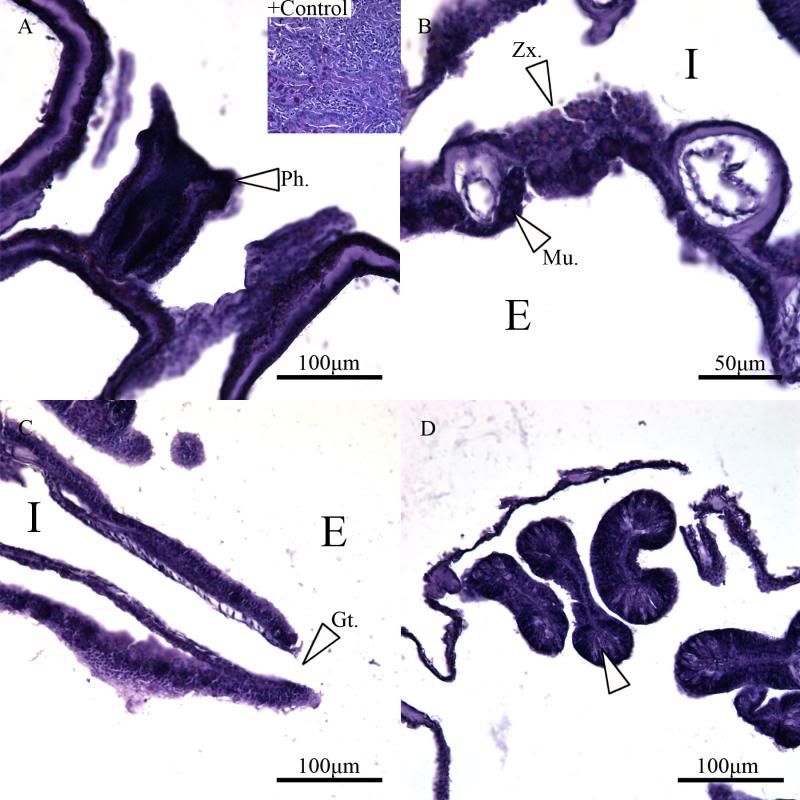 PAS staining 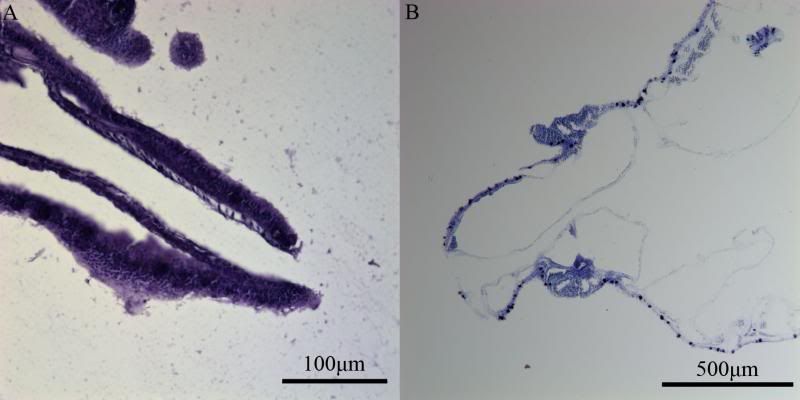 Growth tips stained with PAS and thionine.
__________________
><((((º>`·.¸¸.·´¯`·.¸.·´¯`·...¸><((((º>¸. ·´¯`·.¸. , . .·´¯`·.. ><((((º>`·.¸¸.·´¯`·.¸.·´¯`·...¸><((((º> 
|
|
#2
12-22-2013, 01:29 AM
|
|||||
|
|||||
|
Wow thats awesome! I do fish and shellfish histology for a living, never thought to take a chunk of coral in and play with it though (or clam for that matter). How long did you leave it in the cal-ex?
__________________
Christy's Reef Blog My 180 Build Every electronic component is shipped with smoke stored deep inside.... only a real genius can find a way to set it free.
|


 Linear Mode

