
|
|
|
#1
 05-29-2009, 01:16 AM
|
||||
|
||||
|
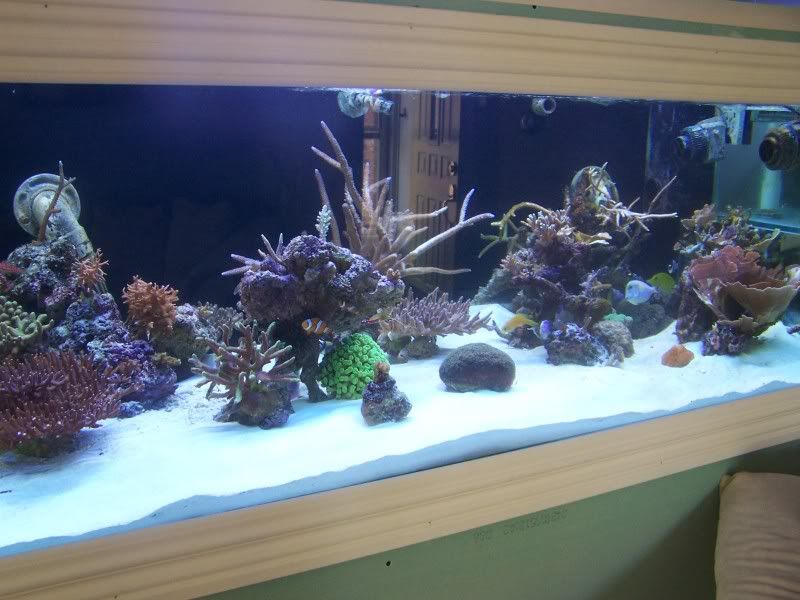
Well I recently had the chance to upgrade from a 150 gallon 72x18x30 to a 270 gallon 72x36x24. I decided to take a few pictures and start a build thread because I like to look through other build threads and see what others have done. So here it goes.
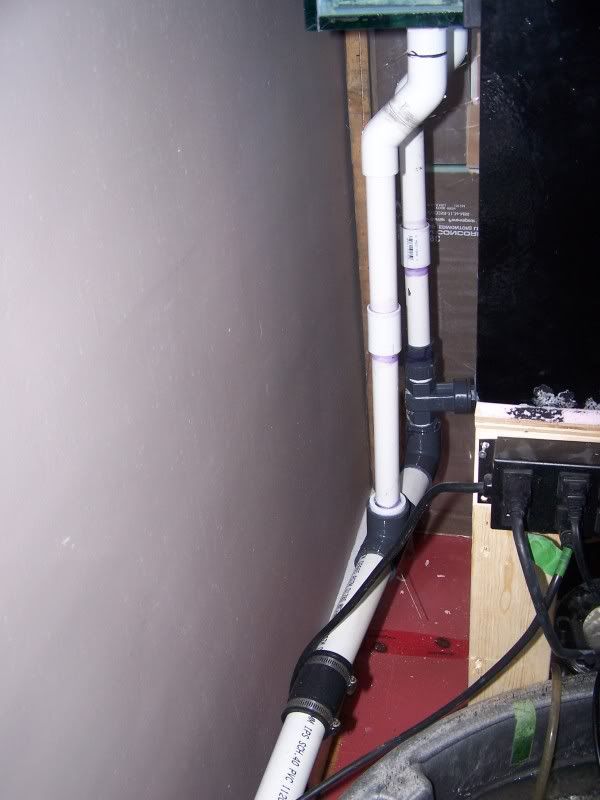
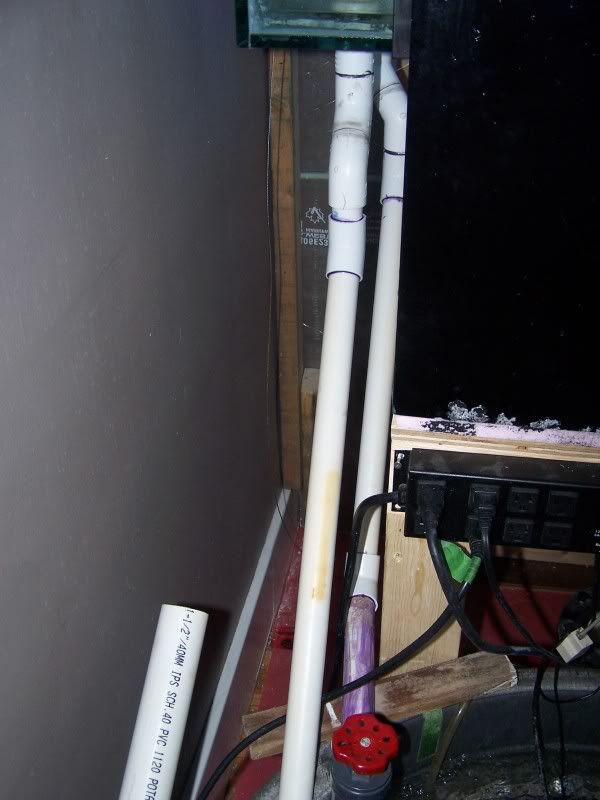
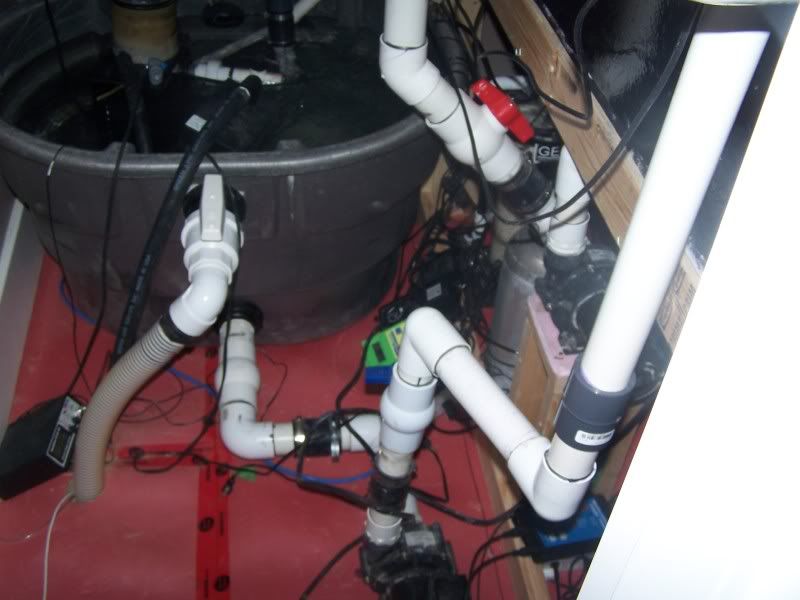
Here is the old tank and where it sat.  And a pic of the sump in the basement directly under the tank. Notice the extra support, that much weight kind of scares me on the second floor. I only use the basement for storage anyways. 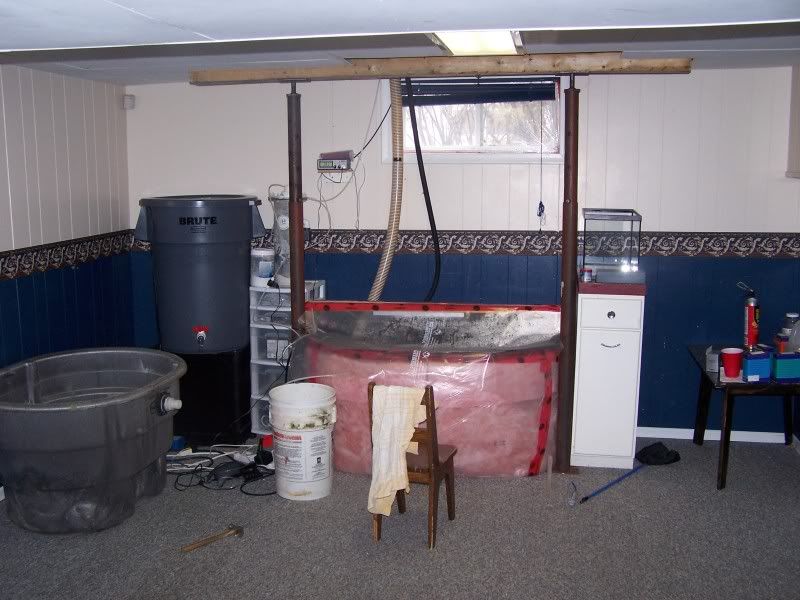 First I removed some of the laminate flooring. I wanted to set up the 270 and keep the 150 running because I really didn't know where to store all the live stock if I took down the old tank before putting up the new one. 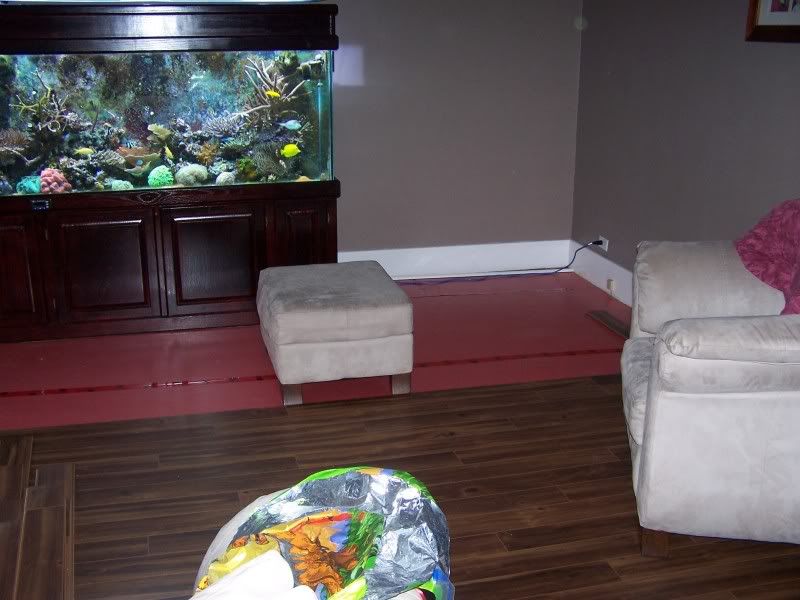 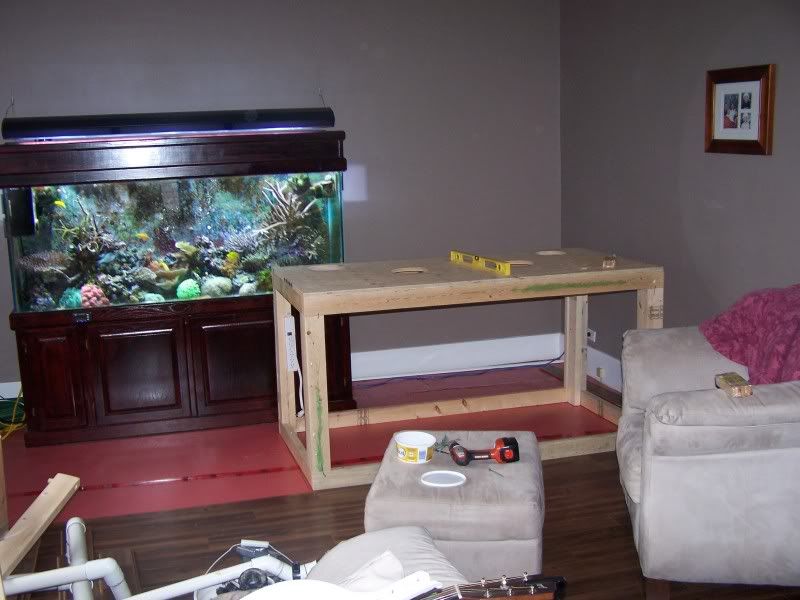 I bought the tank from crtzry from Saskatoon here on saskreef. He was moving house and all I had to do was get it to Moose Jaw. The movers were there moving all his stuff out so they just grabbed the tank and threw it in my vehicle. Nice. We took apart the stand and then I reassembled it back home. Here is some pics of the plumbing 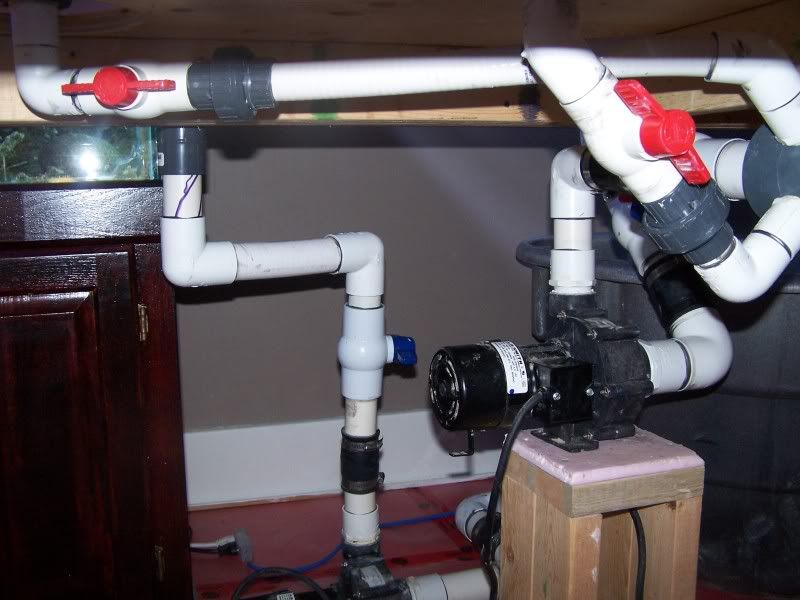 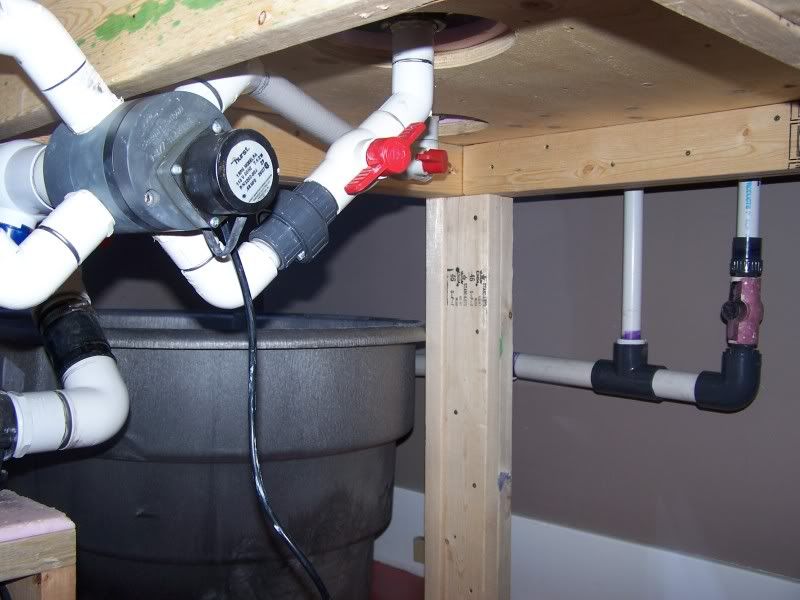 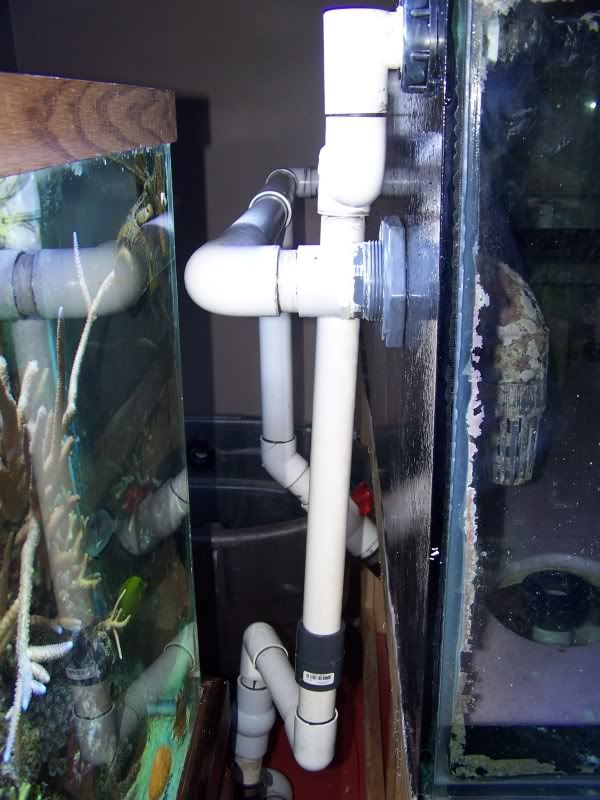 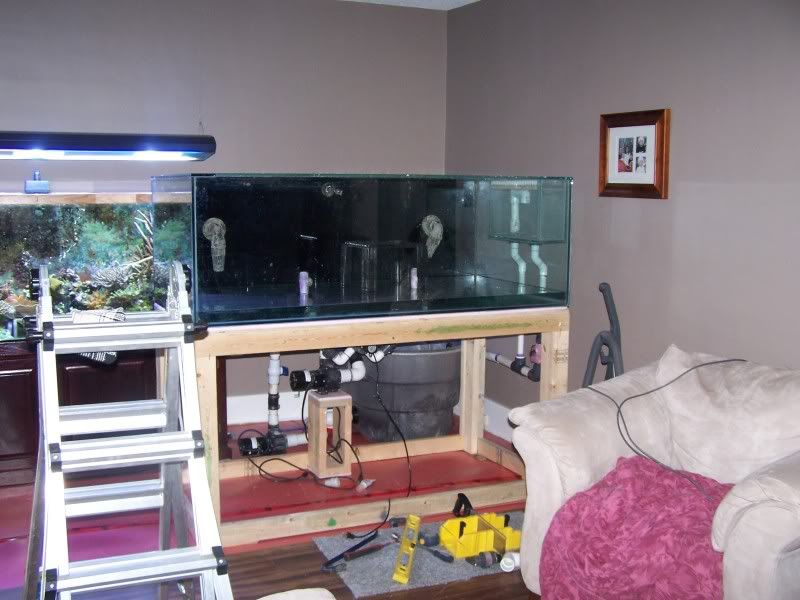 
|
|
#2
05-29-2009, 01:17 AM
|
||||
|
||||
|
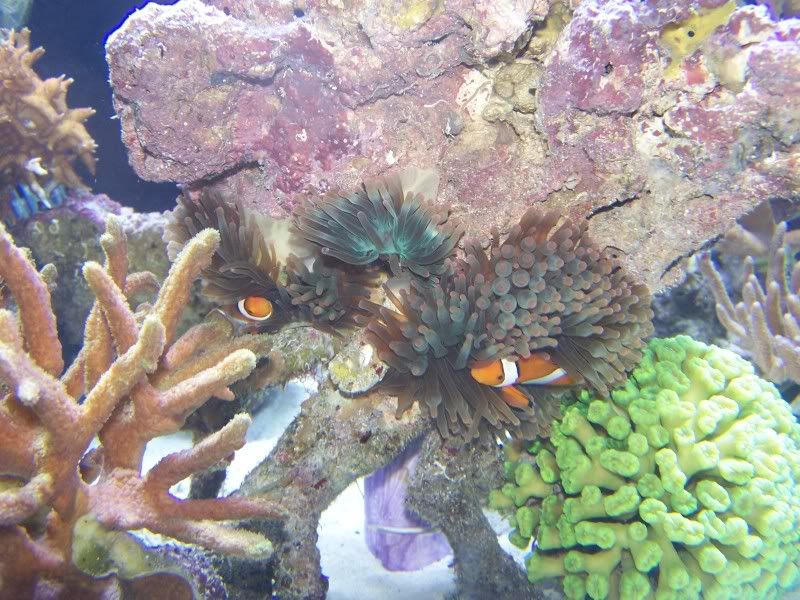
The next morning my big green bubble tipped anenome split 3 ways.
 Then I took out the old tank and started framing the new tank 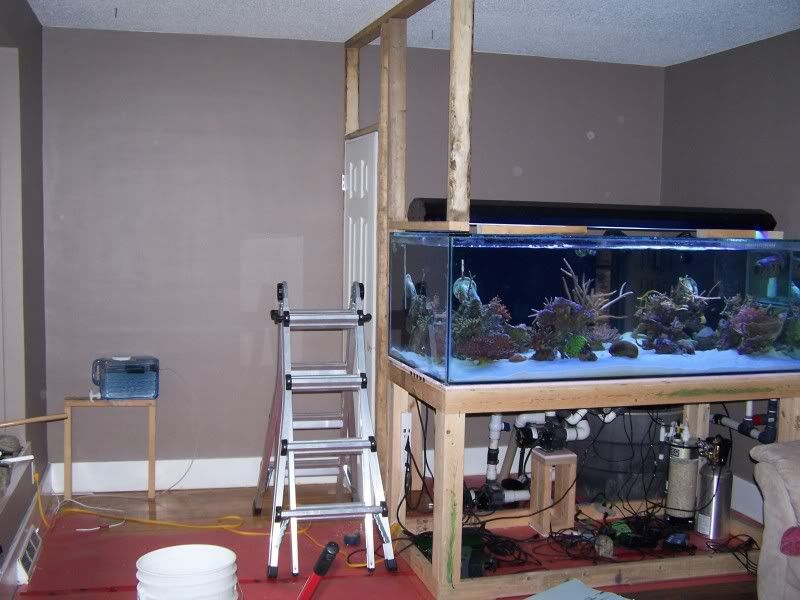 Got some nice moulding from Home Depot. I kept trying to decide if I should have some sort of access from the front and I'm glad I did it will be much easier to clean and reach the front of the tank now. 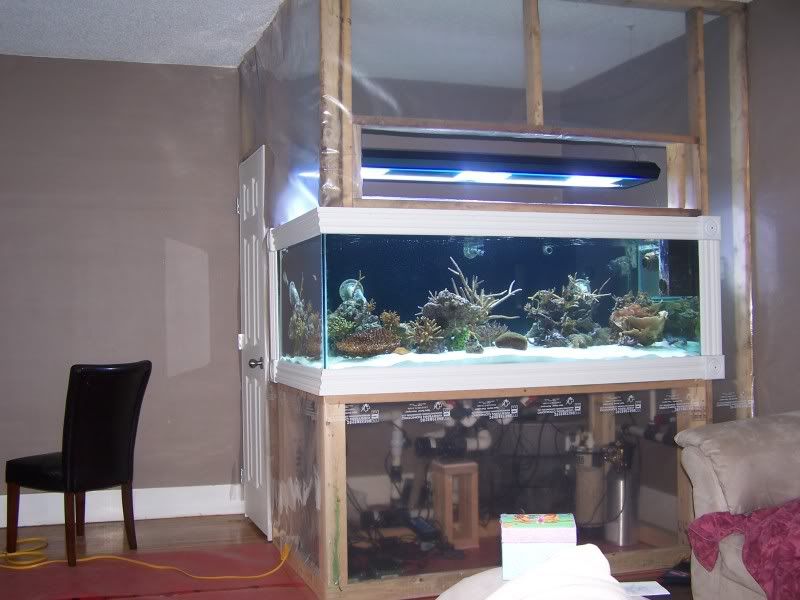 I got the gyprock and boarded it up yesterday. You can see there is a door to get into the back of it. My master carpentry skills are a little lacking, I'm a farmer by trade. 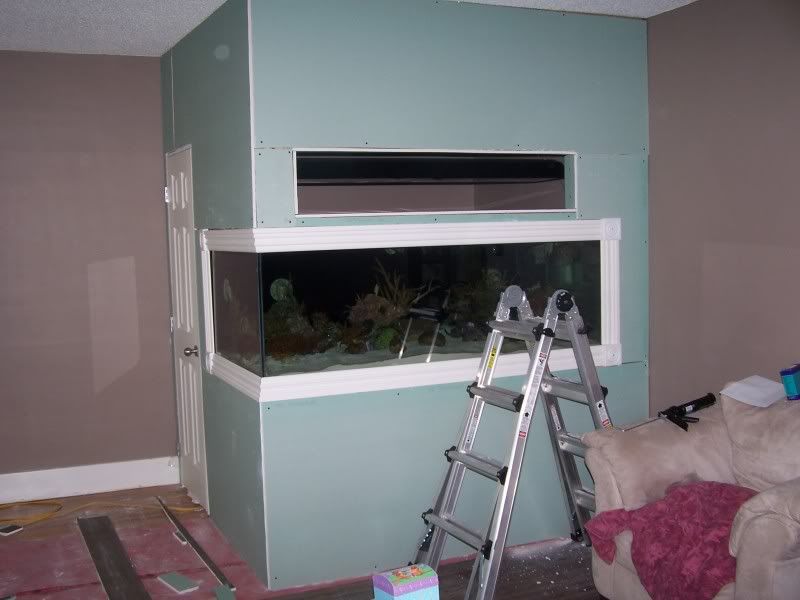 And today I finished the floor and cleaned that damn room I spend so much time in. Just need some mud, tape a little paint and some type of door to finish the hole in the front there. 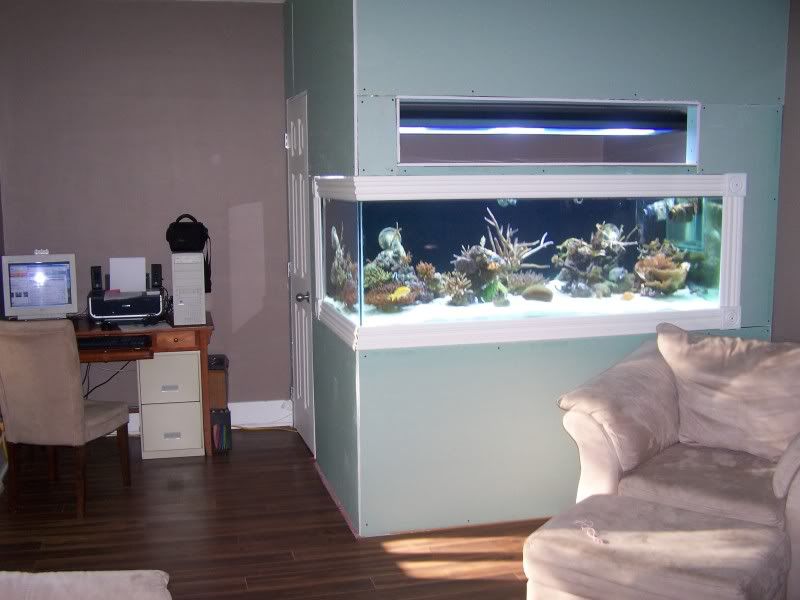 I'll show some more of behind the tank and equipment in the next post.
|
|
#3
05-29-2009, 01:48 AM
|
|||||
|
|||||
|
Wow that looks awesome!!! Nice job! I love the trim, gives me ideas for my own tank upgrade
__________________
Christy's Reef Blog My 180 Build Every electronic component is shipped with smoke stored deep inside.... only a real genius can find a way to set it free.
|
|
#4
05-29-2009, 02:08 AM
|
|||||
|
|||||
|
its so awesome to see so many cool setups like this one i cant wait to get a bigger house and do my own.....so exciting
__________________
freshwater 55gallon bowfront Saltwater 55gallon column seahorse tank saltwater 65G mixed tank w/ 30G sump
|
|
#5
05-29-2009, 04:13 AM
|
|||||
|
|||||
|
Agreed. I love the idea of having a "fish room" in behind the tank. One day... thats what I keep telling myself. It looks great, really like how that crown molding turned out.
|
|
#6
05-29-2009, 04:59 PM
|
||||
|
||||
|
Thanks for the positve feedback. It sure is nice to have that room in back of the tank. I need to put a vent in there to get rid of the heat and moisture. I can't beleive how hot and humid that room feels. Now I know why there was so much ice on my windows in the winter with the 150 just open top in the room.
|
|
#8
05-29-2009, 07:25 PM
|
||||
|
||||
|
Wow, the way this thread is put together, it sounds like you filled the new tank and 20 minutes later it looked that great after moving your old stock in. I'm assuming if you gave us the details there were days and days of work and stress there, right?
By the way, it does look great!
__________________
Mark...  290g Peninsula Display, 425g total volume. Setup Jan 2013.
|
|
#9
05-29-2009, 08:52 PM
|
||||
|
||||
|
Actually I picked the tank up from Saskatoon on May 9. So I have put in quite a few hours in the last 3 weeks. Some things still don't work right. I have to change my overflow plumbing. I have a herbie style overflow with 2 x 1" drains that join into an inch and a half pipe that goes to the sump. Can't turn the return pump on full, so I'll have to try 2 x 1" drains that go directly to the sump. Pics probably explain it better.
|


 Linear Mode

