Canreef Aquatics Bulletin Board  

Go Back   Canreef Aquatics Bulletin Board > General > DIY

Reply
 
Thread Tools Display Modes
  #1  
Old 09-30-2011, 02:34 AM
Jaws's Avatar
Jaws Jaws is offline
Member
 
Join Date: Feb 2004
Location: Victoria
Posts: 1,255
Jaws is on a distinguished road
Default 6 Foot LED Build

Hey guys. I've had this vision of an LED build in my head for quite a while now and its finally coming to life. It's a total of 216 3W Cree LED's. 144 royal blues and 72 cool whites. I'm putting it above a 180G tank which I realize is way too much light at 100% but the idea is flexibility to upgrade to a bigger tank if I want to one day, as well as being able to turn the LE.d's on one foot at a time starting on the left side of the tank to the right similar to a Vertex light but for half the cost. Since I already have a Profilux, it will integrate with that and the lighting and intensity will ramp up and ramp down from left to right as the sun rises and sets. It will also have full storm simulation like cloud cover and lighting.

Gareth from Progressive Reef was the biggest help in this build. He helped me design it, order the parts, and is heading up the build as well. I'm hoping he can jump in here with some insight and maybe some pictures to talk about the build. Thanks again Gareth.
__________________
Jason
Reply With Quote
  #2  
Old 09-30-2011, 03:16 AM
Hustler's Avatar
Hustler Hustler is offline
Member
 
Join Date: May 2011
Location: edmonton
Posts: 260
Hustler is on a distinguished road
Default

Im watching
Ive seen the hydro UFO's going on a reef and they seemed to kick butt.... I know someone out there could build a bigger version....
Reply With Quote
  #3  
Old 09-30-2011, 03:40 AM
StirCrazy's Avatar
StirCrazy StirCrazy is offline
Member
 
Join Date: Oct 2001
Location: Kamloops, BC
Posts: 7,872
StirCrazy is on a distinguished road
Default

going to be cool, but thats going to be a very blue tank.

Steve
__________________
*everything said above is just my opinion, and may or may not reflect the views of this BBS, its Operators, and its Members. If cornered on any “opinion” I post I will totally deny having ever said this in a Court of Law…Unless I am the right one*

Some strive to be perfect.... I just strive.
Reply With Quote
  #4  
Old 09-30-2011, 03:59 AM
Jaws's Avatar
Jaws Jaws is offline
Member
 
Join Date: Feb 2004
Location: Victoria
Posts: 1,255
Jaws is on a distinguished road
Default

That's the nice thing about that many LED's though. You can play with the intensity of each spectrum to try and get the right color temperature.
__________________
Jason
Reply With Quote
  #5  
Old 09-30-2011, 04:45 AM
StirCrazy's Avatar
StirCrazy StirCrazy is offline
Member
 
Join Date: Oct 2001
Location: Kamloops, BC
Posts: 7,872
StirCrazy is on a distinguished road
Default

Quote:
Originally Posted by Jaws View Post
That's the nice thing about that many LED's though. You can play with the intensity of each spectrum to try and get the right color temperature.
but if a 50/50 of cool white and rb gives you 14Kish what are you going for LOL.. have you bought the LEDs already? might want to give the true vilote and nutral whites a look.

Steve
__________________
*everything said above is just my opinion, and may or may not reflect the views of this BBS, its Operators, and its Members. If cornered on any “opinion” I post I will totally deny having ever said this in a Court of Law…Unless I am the right one*

Some strive to be perfect.... I just strive.
Reply With Quote
  #6  
Old 09-30-2011, 08:24 PM
TheManicFishkeeper TheManicFishkeeper is offline
Junior Member
 
Join Date: May 2009
Location: Victoria
Posts: 15
TheManicFishkeeper is on a distinguished road
Default

This is going to be the largest build I have ever been a part of (LED wise). There were a number of challenges. First of all, WEIGHT. This many LED's needed some serious heatsink action to bleed off the heat produced by this many diodes.

We went with 6 x 23" x 7" Heatsinks to control the heat. This will quite adequately cool this many LED's (with some extra fans) but moutning them was a bit daunting. This much Aluminum is fairly heavy and to further complicate things, the wiring was going to span across multiple heatsinks. We had to attach them in pairs for the wiring to work for "left to right" style dimming.

I decided to use Angle Anluminum to anchor the two together. I drilled 4 holes per heatsink and used self tapping metal screws to attach the angle aluminum to the ends. This actually proved to be fairly difficult choosing the right sized pilot hole for the screws. After a few turns through the thick aluminum the screws would start to bind. Third times a charm apparently and I was able to sink them in nice and tight.

I have to mention this right off the bat. Whenever possible, when drilling aluminum this thick, use a drill press. It can be very difficult to keep the drill steady enough to drill through 3/8" of aluminum.


Here is the bracket/angle aluminmum installed after several attempts. Sunk nice and tight to the heatsinks this prevents them from wiggling around and puttin tension on the wiring (to be installed later today).


And the first pendant is ready for LED's. This is the first of three I am building today. My plan is to finish one completely, so I can iron out any bugs for the remaining two before commiting.

.
Reply With Quote
  #7  
Old 09-30-2011, 08:50 PM
TheManicFishkeeper TheManicFishkeeper is offline
Junior Member
 
Join Date: May 2009
Location: Victoria
Posts: 15
TheManicFishkeeper is on a distinguished road
Default

Wiring and LED placement.

This is where things get finicky and time consuming. It took several days of scratching my head and tinkering to really figure out how best to string this many led's together. Jason came up with a fantastic mouting pattern and had a good chunk of it mapped out ahead of time, but I needed to translate it a bit more for how it was going to connect to the drivers and GHL Profilux EVG-AP-2F Ballast control boards.

The whole idea for this build, was to have a very distributed array of leds that can really shine with left to right style dimming. Vertex LED fixtures already do this, but in a DIY build it's fairly complicated to achive without a 3rd party controller. Thankfully Jason has a GHL Profilux III (which can do this dimming behavior really easily with one of the more current firmware releases.).

The Array is broken down so there is a Blue channel, and a White Channel every 12 inches. This will alow for a whopping total of 12 individualy dimmable sections of the fixture. The Profilux can use this with time shifting to simulate clouds going left to right, sunrise/sunset etc. Its surprisingly easy to program, but more on that later.

Here is the basic wiring pattern for each of the three 2 foot pendants (sorry this is hand drawn, I had to sketch it out while drawing with my 3 year old niece):


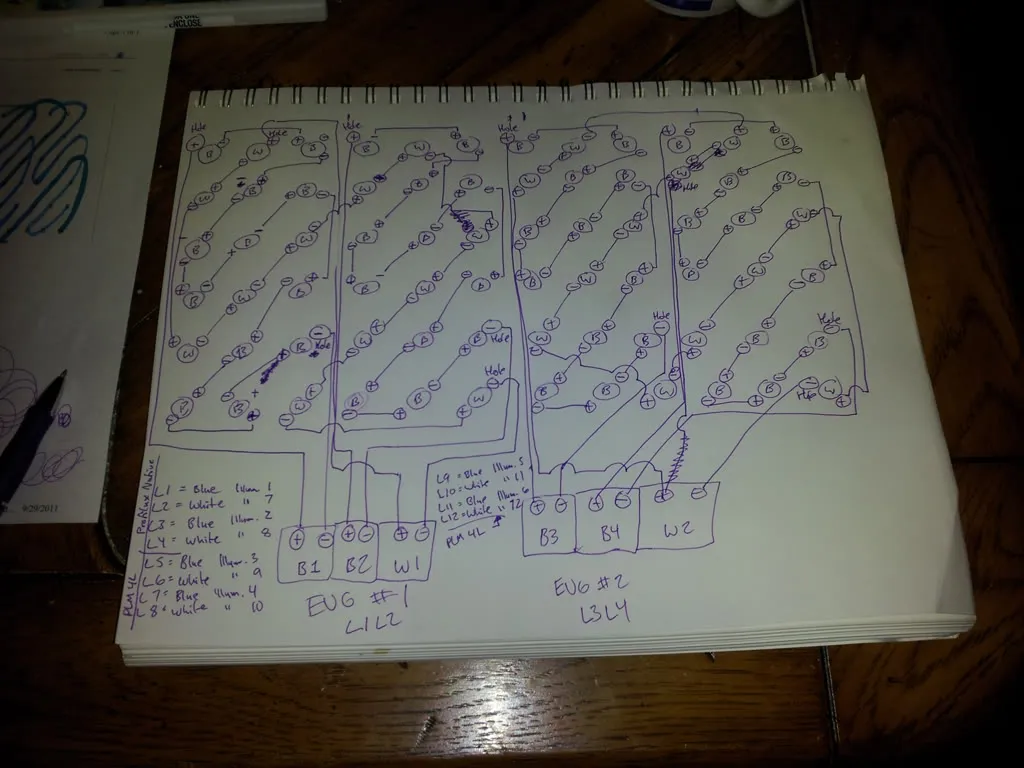
Then here is a rough idea of what I have to wire for the interface for the profilux.


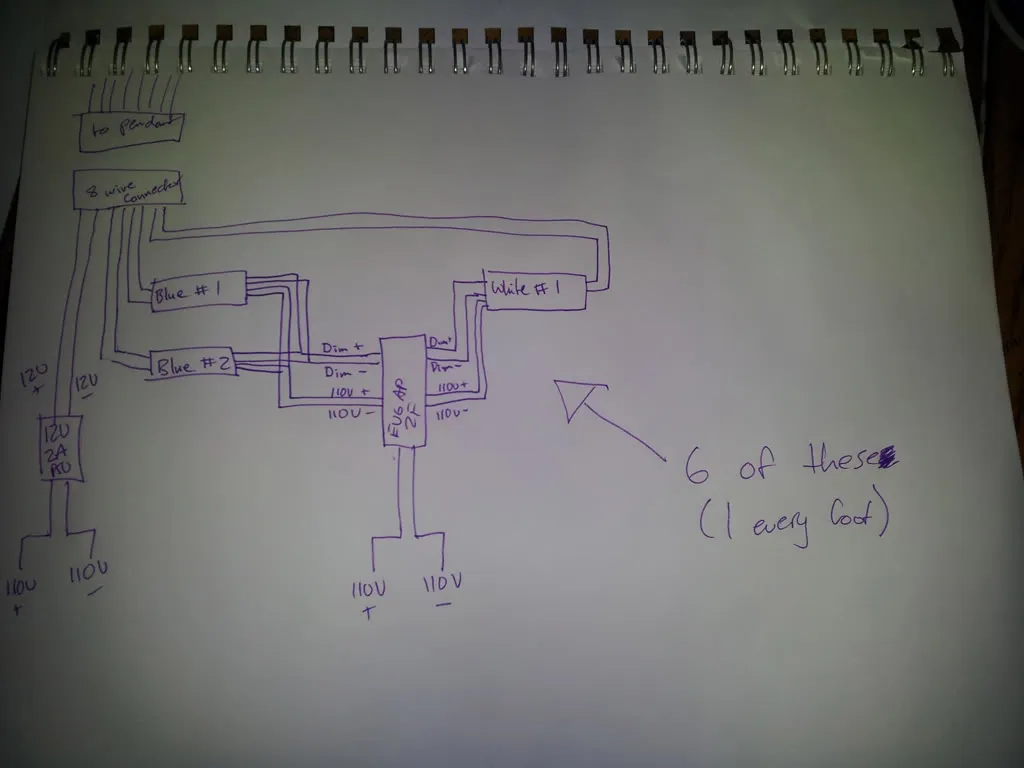
Each pendant will require the use of two EVG-AP-2F Boards. Each board will be responsible for powering and dimming 3 Drivers (2 Blue bound to single channel and a Single White Driver). So basically there will be 1 EVG Boards every 12 inches.

Every 12 inches of light fixture is going to yield a wire harness with an 8 wire connector. This connector will will be waterproof (I usually use Marine boat trailor harnesses) and carry power for the 2 x Blue banks, 1 x White Bank, and 12V to power the cooling fans. This way I can build each pendant the same way, with the same wiring harness. They can be taken out, cleaned and maintained easily, and will be interchangeable with each other.

On a more simple LED build I used 4 wire connectors:


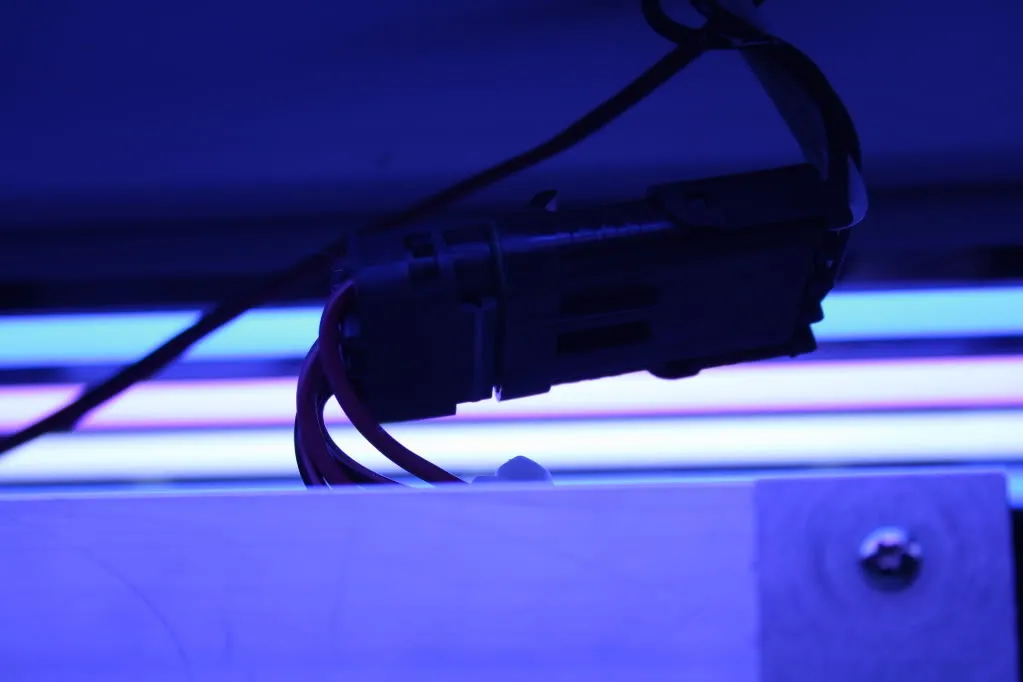
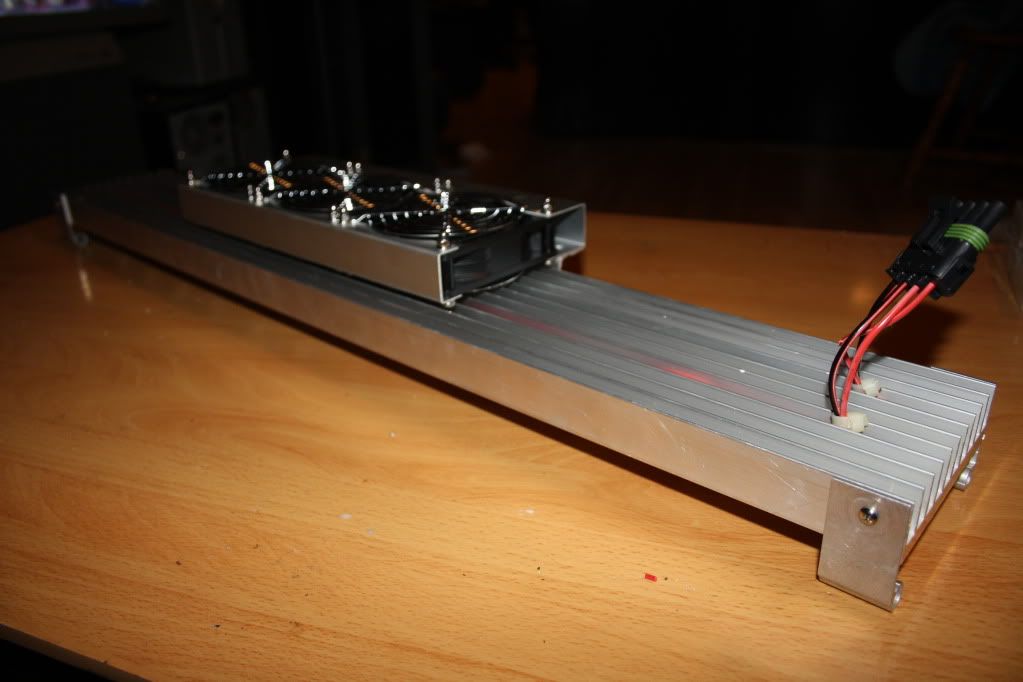
These are not photos of Jasons build, just examples of the connectors I plan on using.

I am still looking for a set that will be the most appropriate, but I think Lordco will have what I need. I'm hoping 6 of them dont set us back too much, but this is one of those touches that can make a DIY build much more durable (no corroding contact points).

Last edited by TheManicFishkeeper; 09-30-2011 at 09:01 PM.
Reply With Quote
  #8  
Old 09-30-2011, 08:56 PM
StirCrazy's Avatar
StirCrazy StirCrazy is offline
Member
 
Join Date: Oct 2001
Location: Kamloops, BC
Posts: 7,872
StirCrazy is on a distinguished road
Default

looking good so far.

heres a handy chart for next time you use self tapping screws
http://aaronsself-tappingscrews.com/...rill_sizes.htm


Steve
__________________
*everything said above is just my opinion, and may or may not reflect the views of this BBS, its Operators, and its Members. If cornered on any “opinion” I post I will totally deny having ever said this in a Court of Law…Unless I am the right one*

Some strive to be perfect.... I just strive.
Reply With Quote
  #9  
Old 09-30-2011, 09:49 PM
TheManicFishkeeper TheManicFishkeeper is offline
Junior Member
 
Join Date: May 2009
Location: Victoria
Posts: 15
TheManicFishkeeper is on a distinguished road
Default

Thanks for the link, that will make it easier for sure!

Let the tedium begin... Thermal Adhesive time. This stuff has a very quick curing time so you have to make really small batches and work very fast. Its a good idea to map out your LED positions well ahead of time to prevent wasted material.

Reply With Quote
  #10  
Old 09-30-2011, 10:28 PM
TheManicFishkeeper TheManicFishkeeper is offline
Junior Member
 
Join Date: May 2009
Location: Victoria
Posts: 15
TheManicFishkeeper is on a distinguished road
Default

First one done all the adhesive. Time for a quick break. Probably gonna start the next pendant while the adhesive cures.

Reply With Quote
Reply


Posting Rules
You may not post new threads
You may not post replies
You may not post attachments
You may not edit your posts

BB code is On
Smilies are On
[IMG] code is On
HTML code is Off
Forum Jump


All times are GMT. The time now is 03:13 AM.


Powered by vBulletin® Version 3.7.3
Copyright ©2000 - 2024, Jelsoft Enterprises Ltd.