
|
|
|
#12
 01-25-2009, 04:47 AM
|
||||
|
||||
|
Quote:
Oh ya, back on topic, great for you guys Kevin and Doug, I guess I'm gonna have to check out that toyota dealership when the tank is all setup.
__________________
RSM 250. Clownfish, Fox face, Blue tang, Yellow tang, Kole tang, Clown tang, Coral beauty angel, French Angel, splendid dottyback. CUC, softies, lps, sps. 
|
|
#13
01-25-2009, 02:28 PM
|
||||
|
||||
|
Quote:
Cool Tank build guys, just down the road from work so I will be watching the progress. Colin
|
|
#14
01-25-2009, 04:57 PM
|
||||
|
||||
|
Thank You all for the encouragement and the kind words.
Quote:
Quote:
Quote:
The projected opening date for Stampede Toyota is April 2009 so we must have everything set up, the tank cycled and viewable by then. - A little more about the setup. The tank will be viewable from 3 sides with an overflow built on one complete end. A "herbie" setup will nearly eliminate noise. Feeding and lights will be on timers. Cycle- To help the cycle along we will be using cured live rock and adding around 200 gallons of water from fish bank tanks from the store. The live rock will have sat in this water for 6 weeks or more before placement into the tank. Due to the tanks minimal depth Red Coral will be making PVC structures to place the live rock down the middle of the tank as it is viewable on both large sides. The stand has been constructed (trigger coatings) and delivered and set up. Information about the stand (from the trigger coatings mouth) and pictures will be put up this evening Jan 25th. Kevin Last edited by Red Coral Aquariums; 01-25-2009 at 05:00 PM.
|
|
#15
01-25-2009, 07:09 PM
|
|||||
|
|||||
|
I'm very curious to know what "oversized" skimmer you think is required. Are you going to try to fit this skimmer under the tank? That will be a trick.
__________________
400 gal reef. Established April, 2007. 3 Sequence Dart, RM12-4 skimmer, 2 x OM4Ways, Yellow Tang, Maroon Clown (pair), Blonde Naso Tang, Vlamingi Tang, Foxface Rabbit, Unicorn Tang, 2 Pakistani Butterflies and a few coral gobies My Tank: http://www.canreef.com/vbulletin/showthread.php?t=28436
|
|
#16
01-25-2009, 07:43 PM
|
||||
|
||||
|
Quote:
Performer 3000 26 in height 16.5x21.5 in footprint 793 gal heavy stocking 1057 gal normal stocking 3 recirc pumps 1 feed pump With the inside of the sump at 17" and the possibility of going 21" inside and inside height of stand at 38.5" and also since the sump is dedicated to the P Skimmer we should have lots of room for maintenance. Any suggestions would be helpful. We do not want to carry a skimmer that there could be a possibility of not having readily available parts for and don't really have the room or financing to hold an additional one. Kevin
|
|
#17
01-25-2009, 11:11 PM
|
|||||
|
|||||
|
Quote:

|
|
#18
01-26-2009, 02:36 AM
|
||||
|
||||
|
The stand was delivered and will be permanently set up when work on the counter top (that runs from the open end out) begins.
We fastened pressure treated 3/4" plywood on top and bottom of the stand. Here is a detailed description from Francis (Trigger Coatings) on the dynamics and details of the stand. "For the steel, I used two dimensions of what industry calls HSS (which stands for "hollow structural sections") The uprights (legs), diagonal braces and the floor perimeter were made with 1 1/2" x 1 1/2" x 1/8" wall square tube. I used this based on it's rating of 13 Kips for a 3' column (1 Kip = 1000 lbs) so each leg supports about 13,000 lbs of concentric load! In a real world the forces may not be 100% centred straight down so this is why I tend to "over engineer" things. For the top frame I used 3" x 1 1/2" x 1/8" wall. This unfortunately doubles the steel cost but was used because of the requirement of the 49" wide opening to fit the sump through. A 4' span (beam) in 1 1/2" square isn't even listed in my references, the max width shown is 3' which is only rated at 1800 lbs and almost a 1/4" deflection in the center...too much risk in my opinion with 4000 lbs of water and tank. The 3"x 1 1/2" I used is rated at 3500 lbs over a 4' span with only 0.17" deflection. This is why the stands at BXXXls scare me..4' wide with 1 1/2" tube that not even rated for structural use (less than 1/8" wall) Enough technical steel info..boring you to death right? Corners were all mitre cut at 45 deg. so that both pieces of steel are sitting on the uprights (legs)...not relying on just welds to support weight of the tank. Completely seal welded so that no moisture can collect inside the tubes and cause corrosion (another problem with the cheapo stands) After welding was completed, the entire stand was sandblasted, this removes any rust and/or welding contaminants and also provides a surface that improves paint adhesion. For paint I used Endura's Intermix 3:1 two-part epoxy primer. This was topcoated in Endura EX-2C polyurethane (Black 160) For more info on Endura's paints check out their website: http://www.endura.ca/ This is the same paint I use for painting about 90% of the time. We use it for oilfield equipment, trailers and heavy trucks." 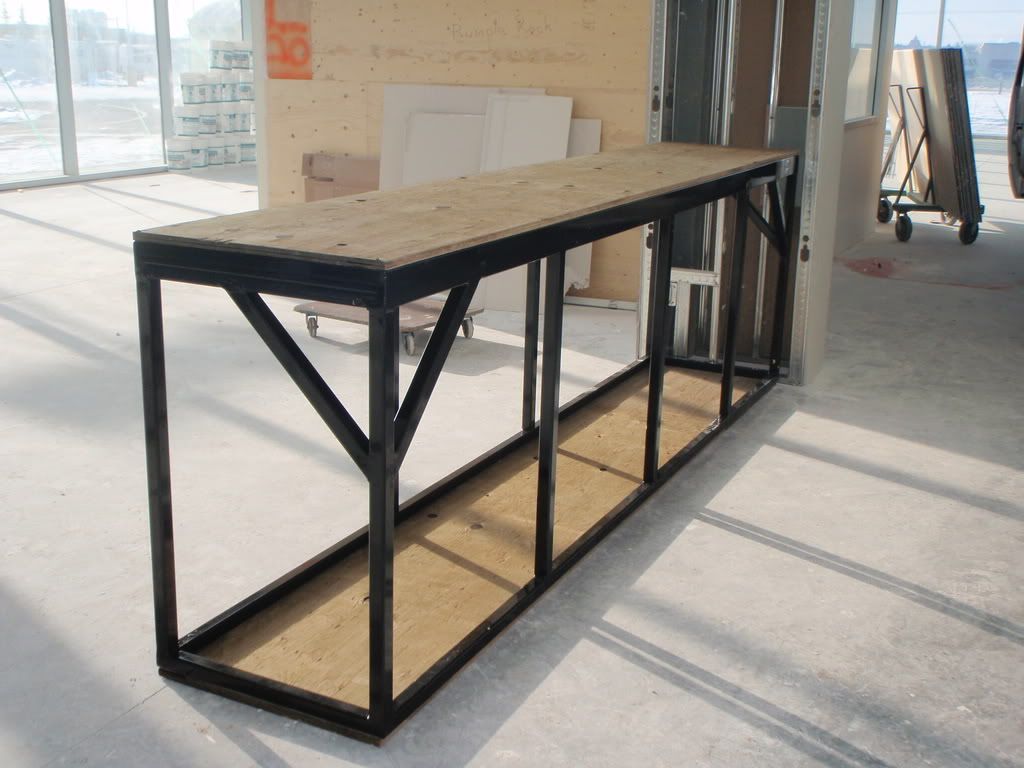 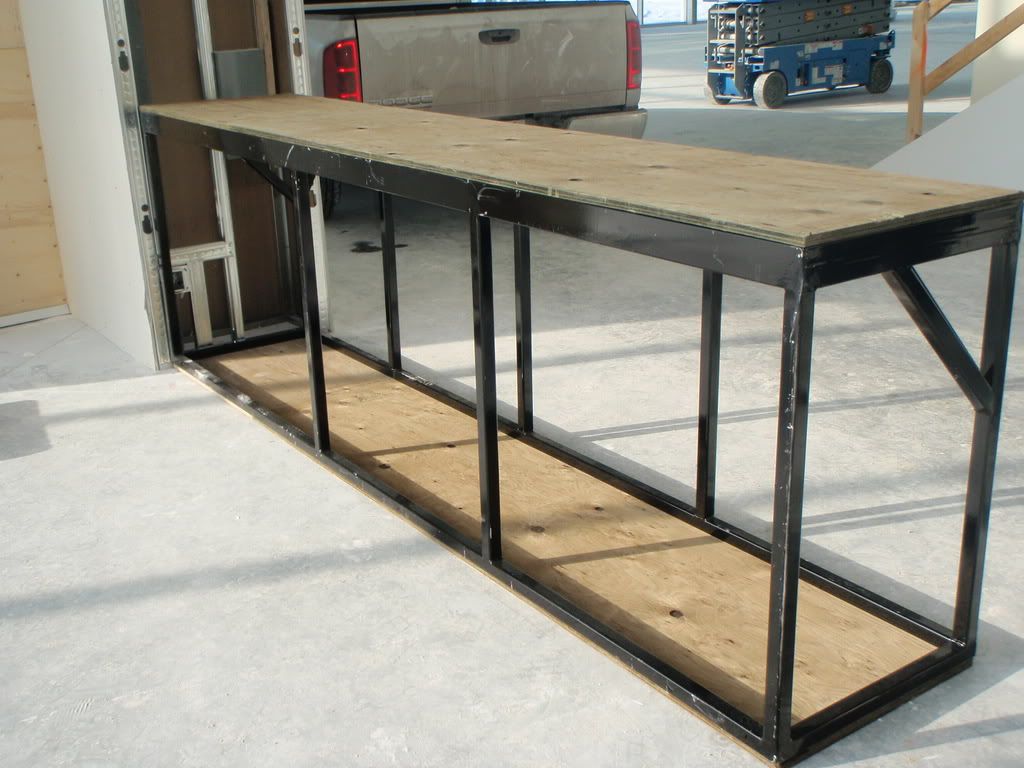 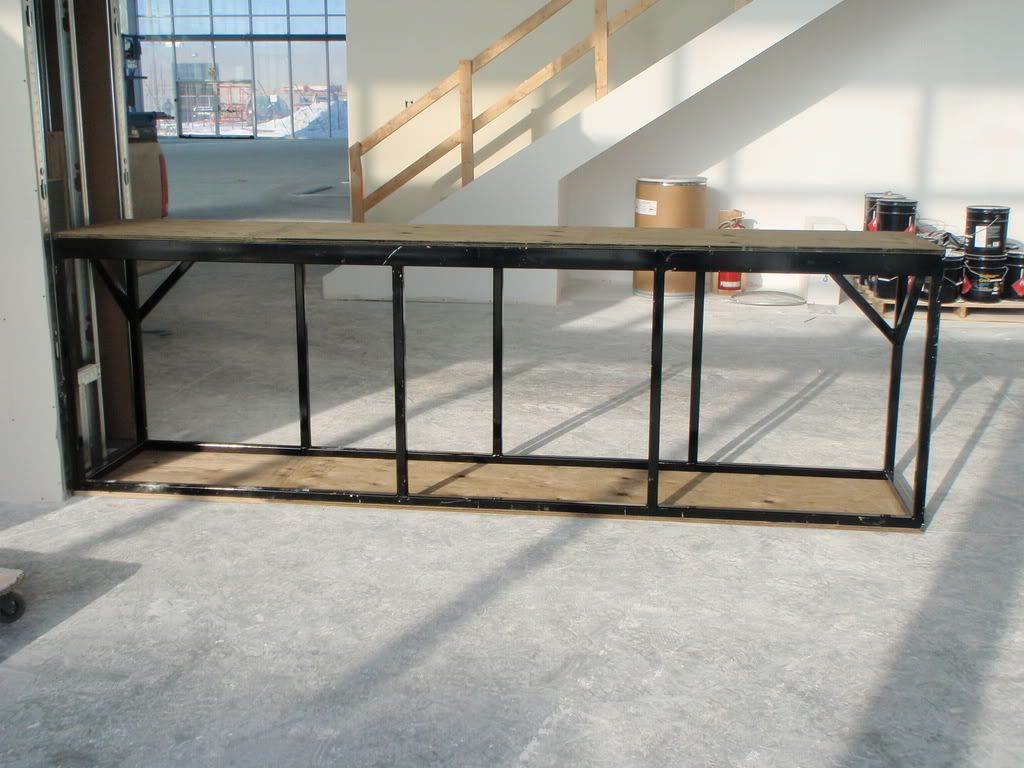  Cheers Kevin
|
|
#19
01-26-2009, 02:41 AM
|
||||
|
||||
|
Quote:
__________________
RSM 250. Clownfish, Fox face, Blue tang, Yellow tang, Kole tang, Clown tang, Coral beauty angel, French Angel, splendid dottyback. CUC, softies, lps, sps.
|
|
#20
01-26-2009, 03:29 AM
|
||||
|
||||
|
you got it right on the skimmer kevin...hydor is no problem for me to get you parts...been using one on my personal tank for a while now, and I am going to start switching over all of my customers tanks to them now. They are a great skimmer.
|


 Linear Mode

