
|
|
|
||||||||
| Portal | PhotoPost Gallery | Register | Blogs | FAQ | Members List | Calendar | Search | Today's Posts | Mark Forums Read |
 |
|
|
Thread Tools | Display Modes |
|
#51
 11-21-2006, 10:24 PM
|
|||||
|
|||||
|
Just tagging along. Nice work so far, can't wait to see more pics as you go along.
__________________
THE BARQUARIUM: 55 gallon cube - 50 lbs LR - ASM G3 skimmer - 30 Gallon sump - 22 Gallon refugium / frag tank - 4x 24 watt HO T5's - Mag 9.5 return - Pin Point PH monitor - 400 watt XM 20K MH in Lumenarc reflector - Dual stage GFO/NO3 media reactor - 6 stage RODI auto top up -Wavemaster Pro running 3 Koralia 2's. Fully stocked with fish, corals and usually some fine scotch http://www.canreef.com/vbulletin/showthread.php?t=55041 
|
|
#52
11-21-2006, 10:39 PM
|
|||||
|
|||||
|
Quote:
|
|
#53
11-25-2006, 12:28 AM
|
|||||
|
|||||
|
In order to make the overflows run as quietly as possible, I used the following design for both overflow boxes.
Each overflow box has two 1.5" outlets. The primary outlet has a gate valve which chokes off the flow until the water starts to rise in the overflow box. In this way, the primary essentially siphons water out of the overflow box. As no air is drawn into the siphon it is silent. The primary outlet water is released into the sump below the water line resulting in no splashing or bubbling. The secondary outlet has a stand pipe that is higher than the water level in the overflow box. This outlet is not in use as the primary carries away all of the volume. Should the primary outlet become blocked, the water level in the overflow box will rise until the secondary outlet becomes active. I can simulate a worst case scenario by shutting the primary gate valve off completely. At that point, the secondary outlet carries 100% of the flow and does so with typical noise! Using this system, the ONLY sound is the sound of the water falling 1-2" inside the overflow box. I can probably muffle that by adding some sponge to the overflow box so the water has a softer landing. 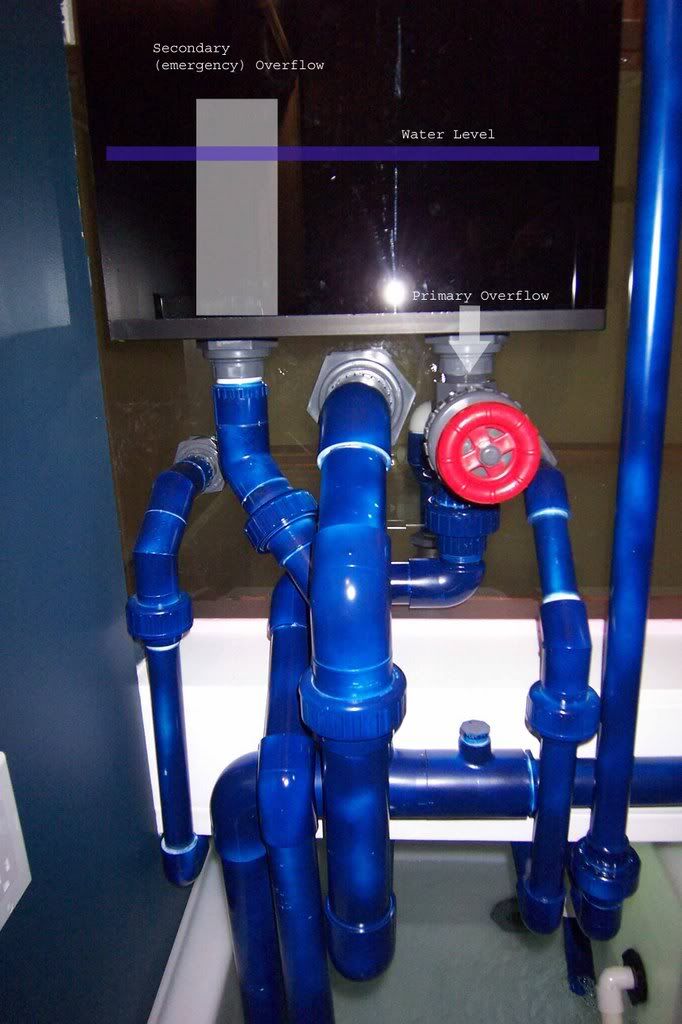 This is a side view of one of the overflow boxes. You can see how the water level stays well above the primary oulet in the bottom, but short of the secondary outlet standtube in the background. What little noise there is was caused by some of those bubbles you see getting sucked down into the primary. This has since been corrected by adding a layer of foam at the surface above the primary outlet. 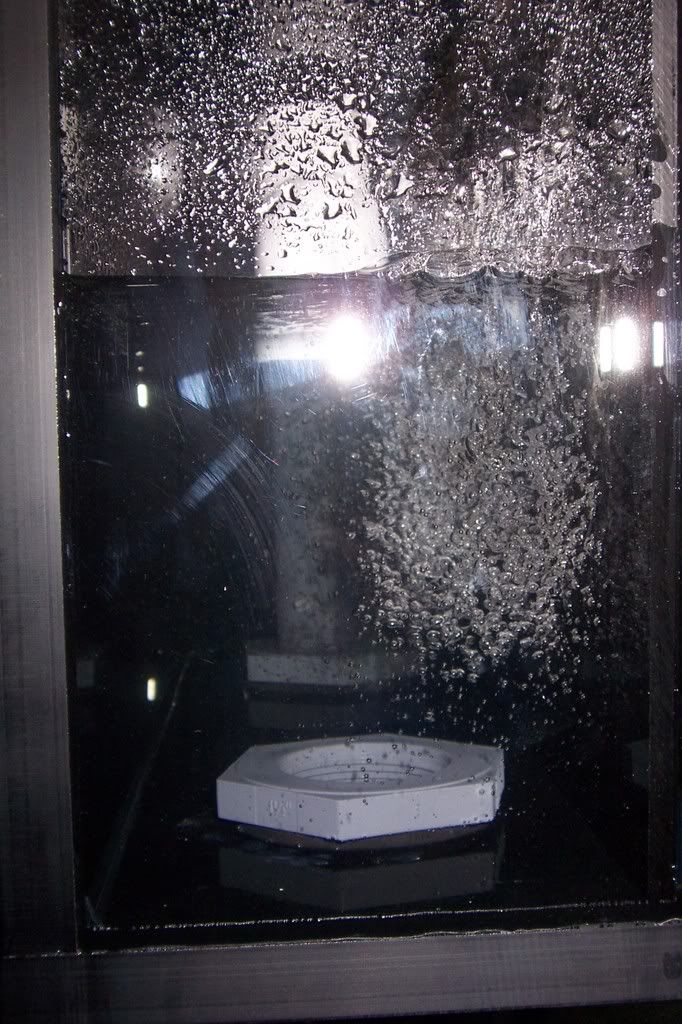 Last edited by untamed; 03-21-2007 at 11:58 PM.
|
|
#54
11-25-2006, 03:56 AM
|
|||||
|
|||||
|
truely amazing ,but I have to ask why isn't there a euro reef or a H&S or even a Deltec there or even a BUBBLE KING....
sorry man why why why is there a ASM skimmer there jk love the plumbing too and its blue too. Why is that a different type
__________________
180 starfire front, LPS, millipora Doesn't matter how much you have been reading until you take the plunge. You don't know as much as you think.
|
|
#55
11-25-2006, 05:53 AM
|
|||||
|
|||||
|
Quote:
Plumbing is regular class 160 and 200 pipe. It is just painted blue. This was mainly done because some of the plumbing might be visible through the back wall of the tank and I didn't want it to be distracting. Once I got started, I just kept painting....
|
|
#57
11-27-2006, 12:30 AM
|
|||||
|
|||||
|
Progess is steady...but slow. (I suppose it didn't help getting buried by snow this weekend)
I've managed to get the front-access doors installed. The idea behind these doors is to get the look of an in-wall tank, but still have front access when I need it. The doors will be painted to match the beige walls. Still no high-tech solution to holding the doors up. As you can see, a simple prop actually does a very good job. I think I'll try to make some nice props out of stainless steel or something. 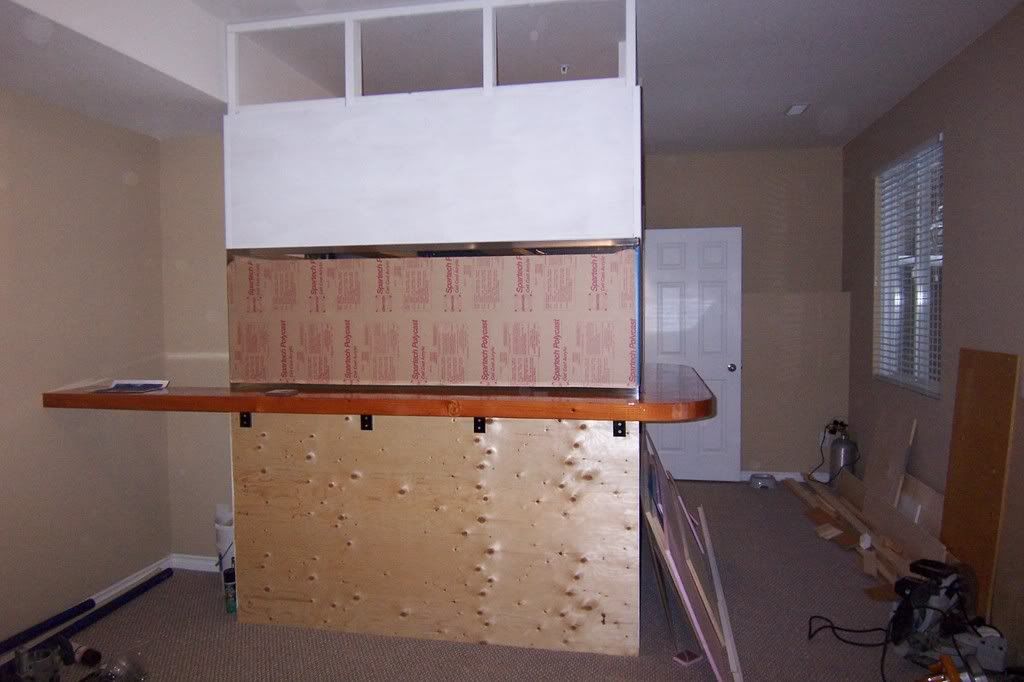 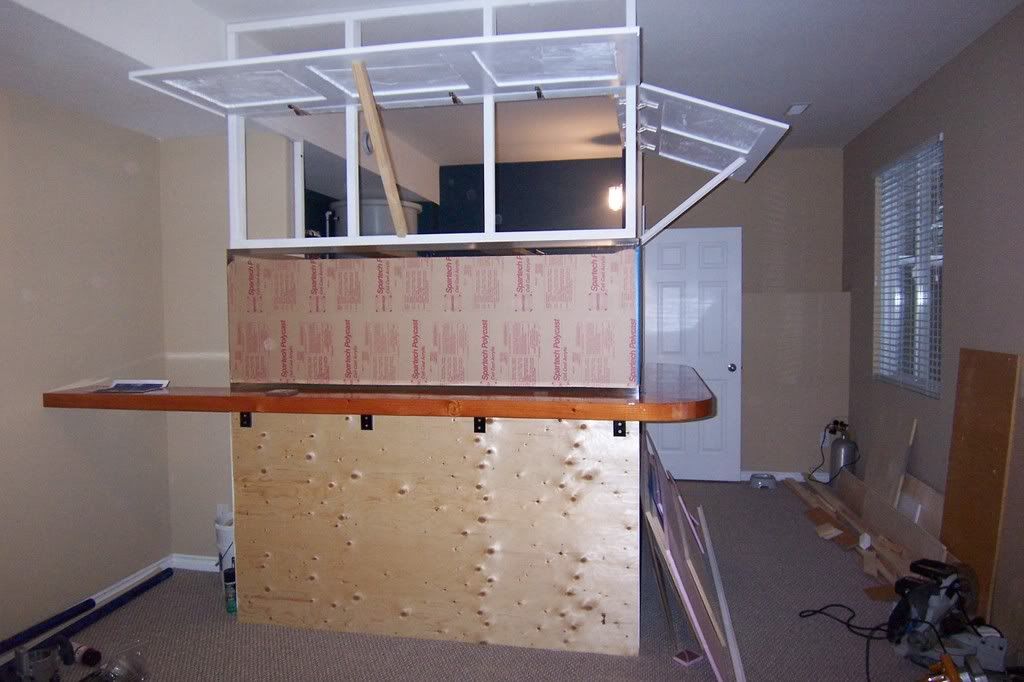
|
|
#58
11-27-2006, 03:28 AM
|
|||||
|
|||||
|
sometimes simple is best. what are the little white spots in the picture??? or is that jsut me, maybe you need to clean your lens or something, doesnt really matter, everything is still amazingly fantastic. keep us posted
__________________
Jordan
|
|
#59
11-27-2006, 03:39 AM
|
|||||
|
|||||
|
Hi Brad
This is quite the project. You have done a fantastic job. I am looking forward to the tours. Your system along with a number of other mega tanks in the area give us all something to look forward to. Tom R
|
|
#60
11-28-2006, 08:53 PM
|
|||||
|
|||||
|
Quote:
|
|
| Thread Tools | |
| Display Modes | |
|
|


 Linear Mode

