
|
|
|
|
|
#1
 01-24-2011, 08:48 PM
|
||||
|
||||
|
Some of you may have seen this on other forums I am on. I Figured it was about time to put this up as a journal here on CanReef since I am getting some great information from all of you and will definitely be looking for more advice as things progress. Much appreciated! Here it is:
So I decided to pick up a used Fluval Edge tank some time ago with the intent of making a small SW tank as a test run to see if I enjoy marine/reef keeping setups. I have seen some nice examples on the net and figured I would give it a shot so I started researching a bit.. I knew that small water volumes in SW are generally hard to start/keep especially when you are a SW newb like I am so I decided to make a sump and over flow system. After a month or so I found a few examples and came across a really nice set up by a fellow member (Thanks for your input Cale262!) and decided to follow his innovation and maybe work in a couple of my own minor improvements. Last edited by CGY_Betta_Guy; 09-26-2011 at 06:47 PM. Reason: Updated title 
|
|
#2
01-24-2011, 08:49 PM
|
||||
|
||||
|
20101201 - First thing after doing some research was to go out and find some acrylic sheet in order for me to fabricate my own custom overflow box. Finally located some black acrylic and also got my hands on some black silicon so that the overflow would not be so noticeable when seen from the display side of the tank.
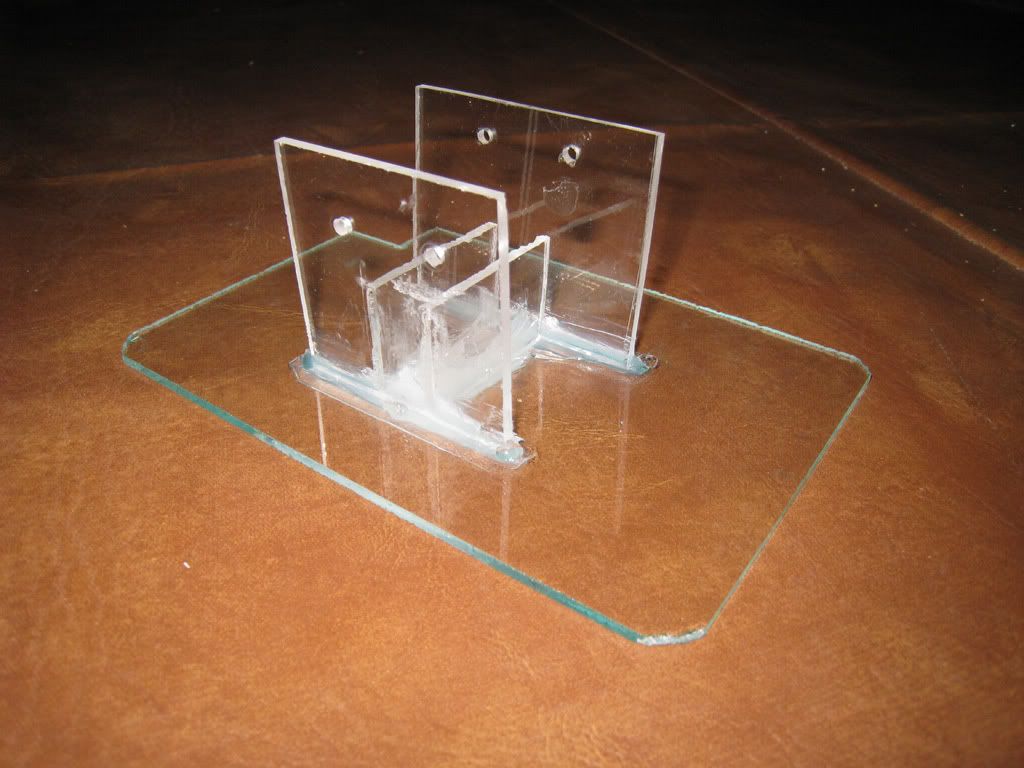
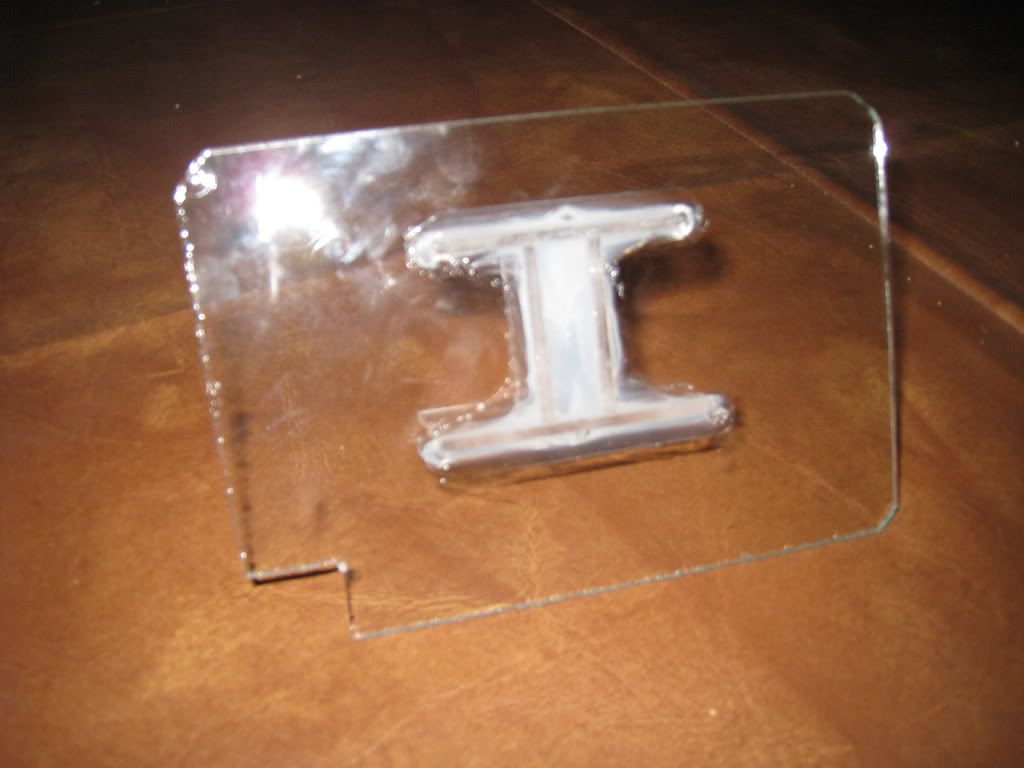
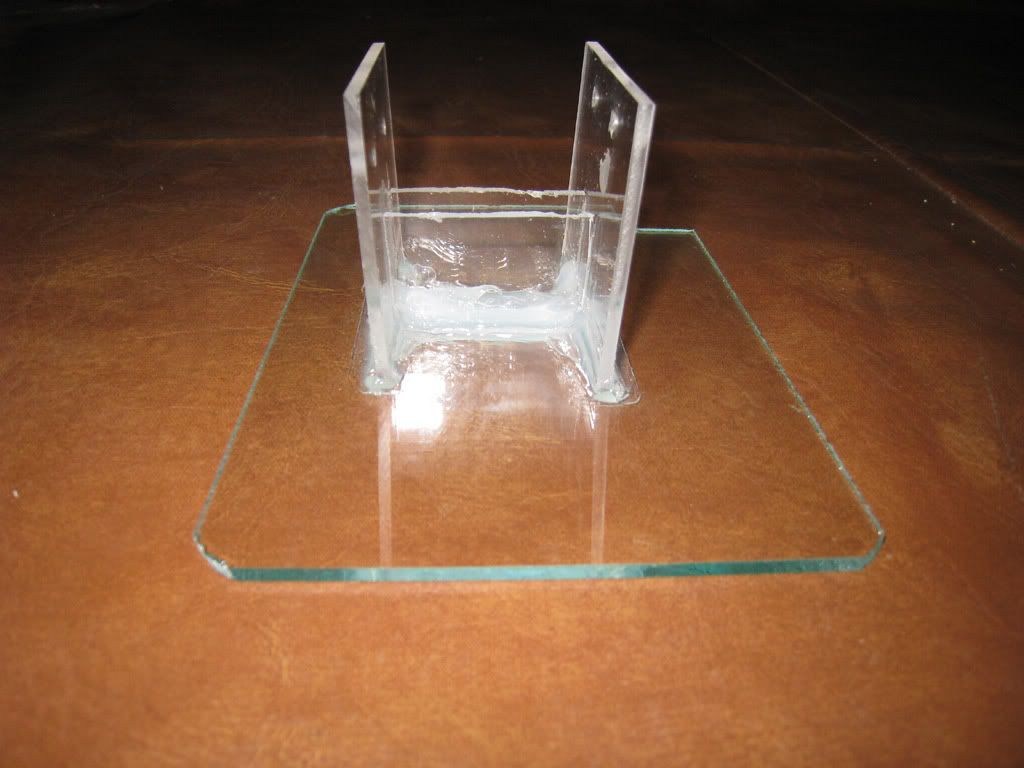
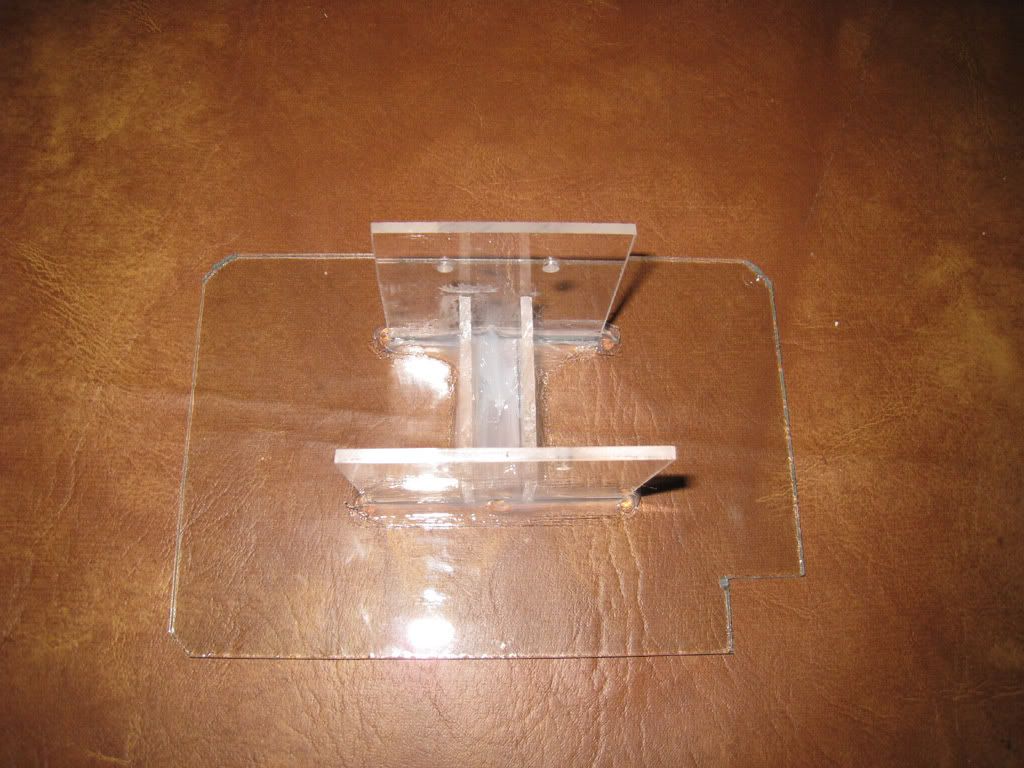
20101205 - After doing lots of measuring I proceeded to make a cardboard mock up of what my over flow box would look like and the dimensions of the box I would need. After doing this I proceeded to cut the inner panel of the Fluval Edge rear tower which normally houses the filtration. Here is a quick pic after doing a couple table saw cuts to the dimensions needed for my custom over flow. 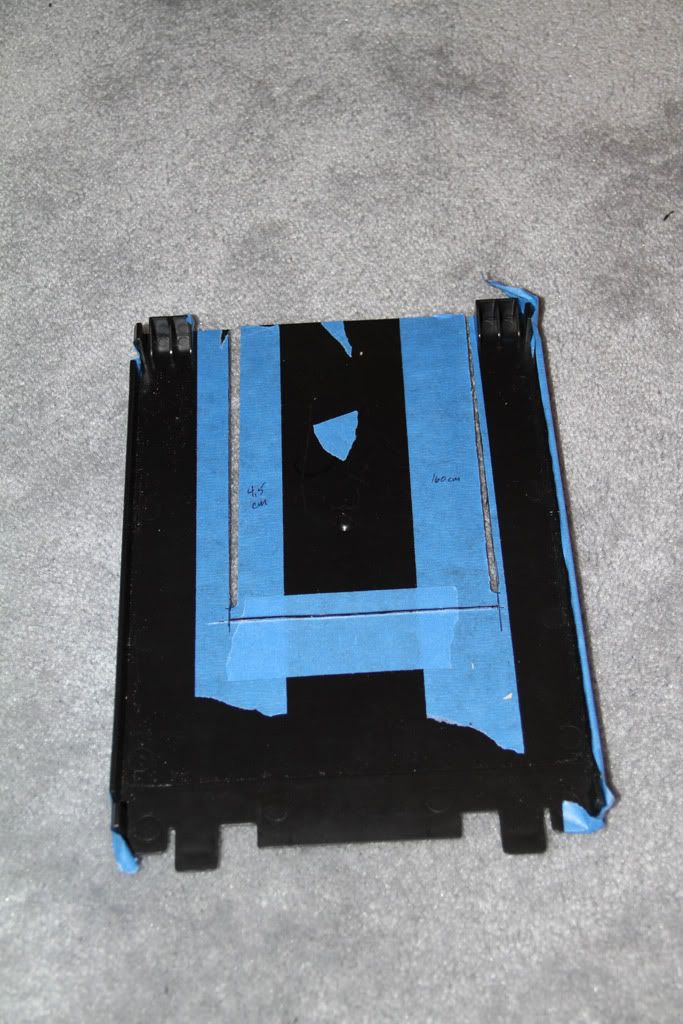 20101209 After getting that done I did a quick layout of where on the back of the Edge tank that the overflow box would sit and also constructed the overflow box. This required using some methylene chloride to acrylic weld the parts together. The resulting box was made and then used to dry fit onto the back of the tank. Now knowing the limits of where the box was going to be situated I proceeded to use a 1/4" drill bit to drill holes into the acrylic rim of the Fluval edge and dry fit the overflow box onto the back. 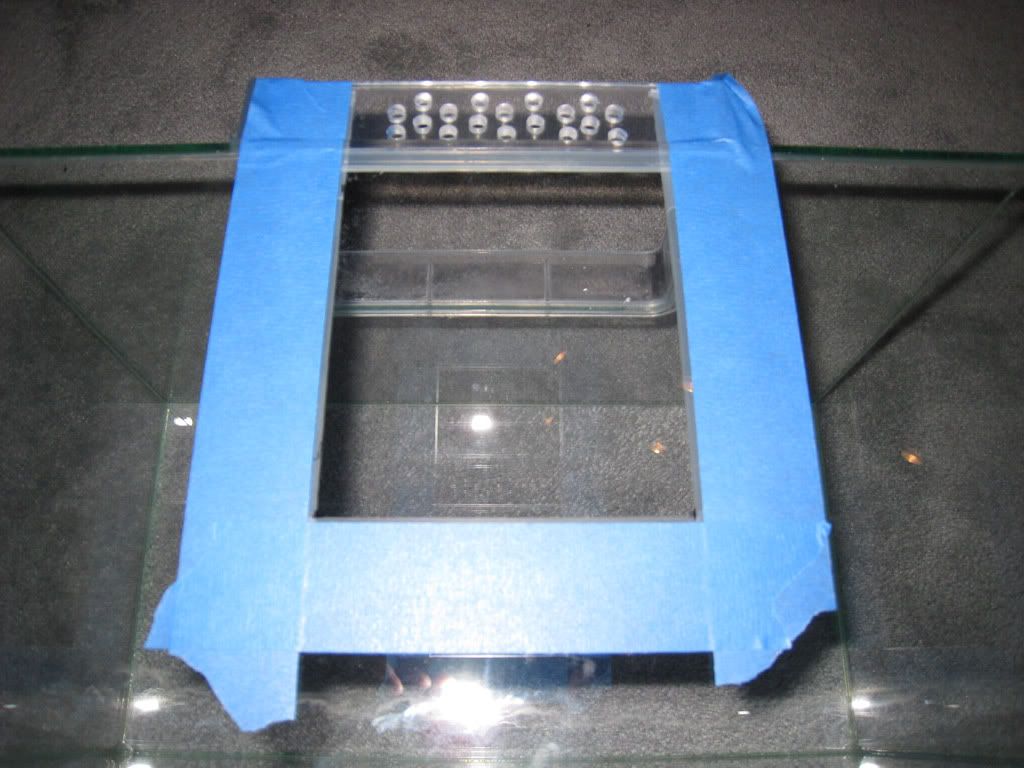 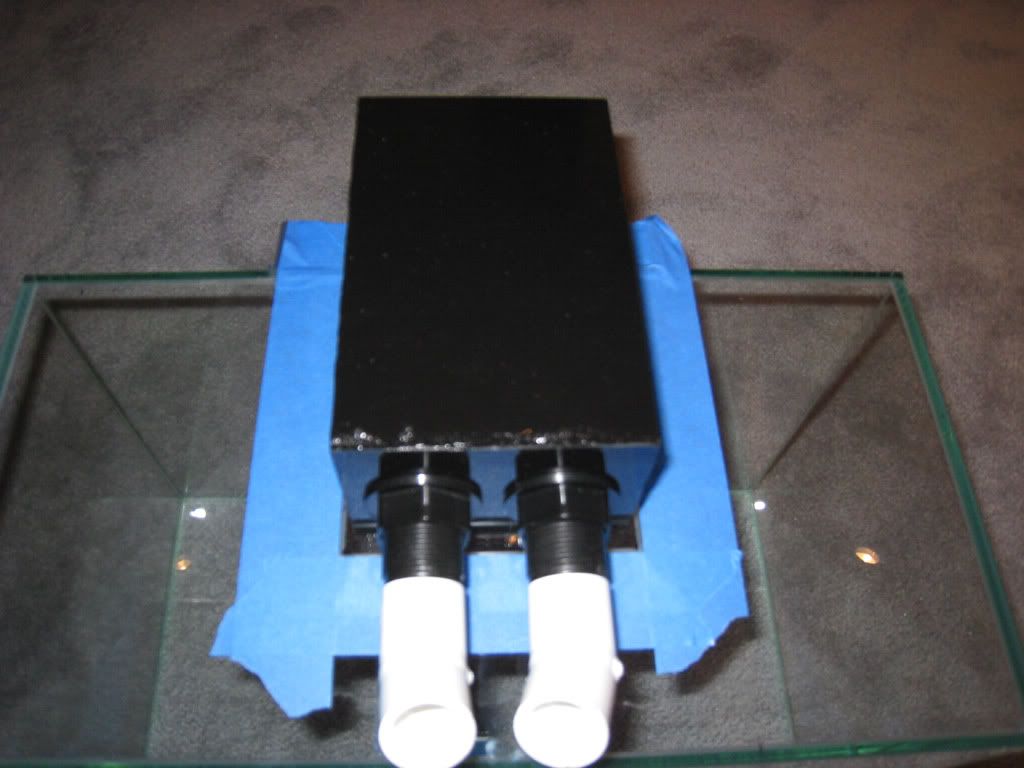 Side shot of overflow box - notice the slight jog of about 1/8" on the sides of the overflow box where it goes from glass to the plastic rim... fun cutting that on the table saw.... 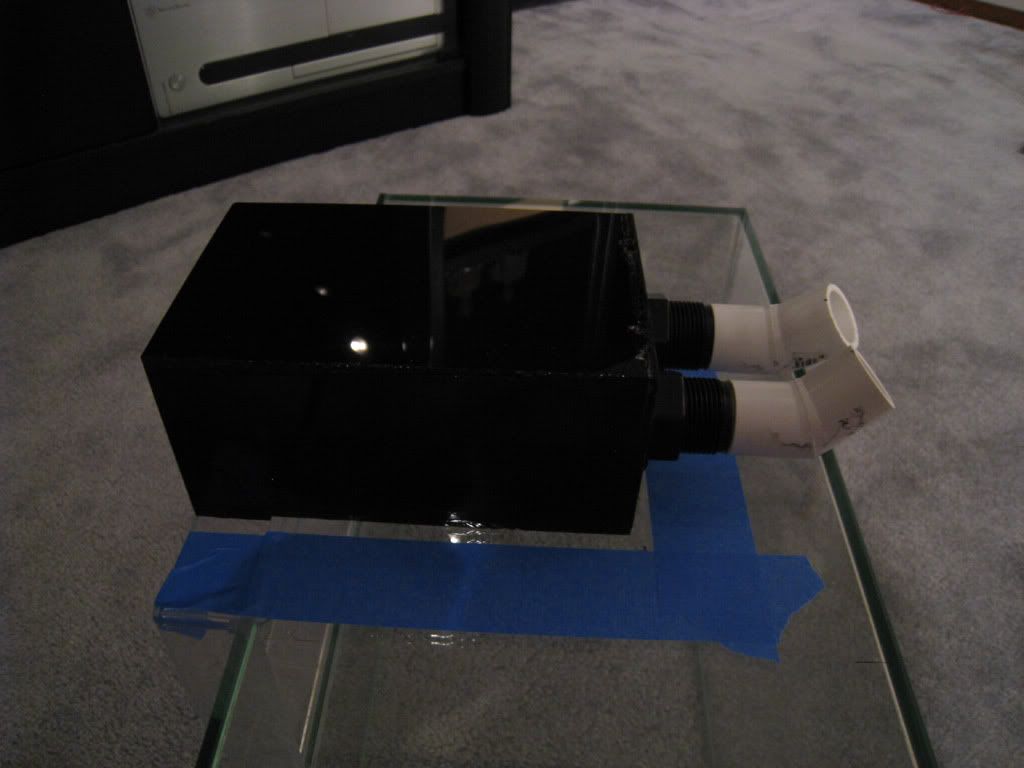 Here it is after applying the silicon. Instead of drawing on the tank with marker I used scotch tape on inside of the tank to mark where the silicon lines were going to be. 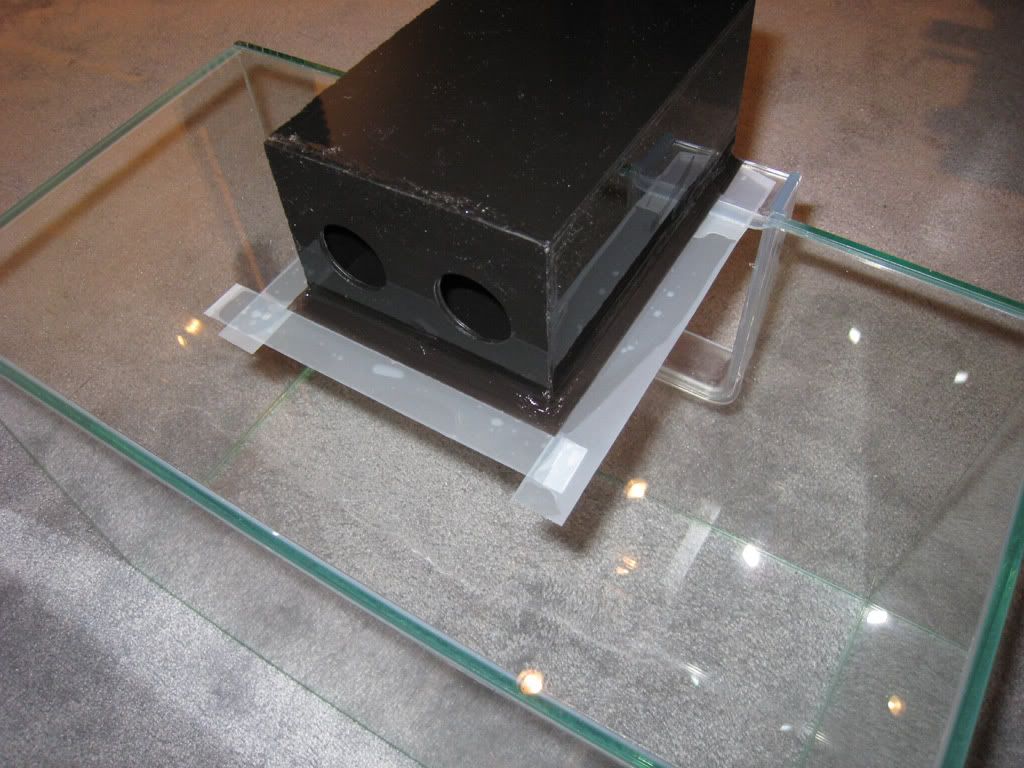 close up of inner edge between Fluval edge and the over flow. 1/4" drilled holes for the overflow and black silicon application between the overflow holes and inside lip of the overflow box.  20101213 - A quick pic of my sump build. This was made in a 5G tank. Total water volume increase over the display tank would be approximately 4 Gallons. In case of power outage the amount of siphoned water from the display tank would not over flow my sump. 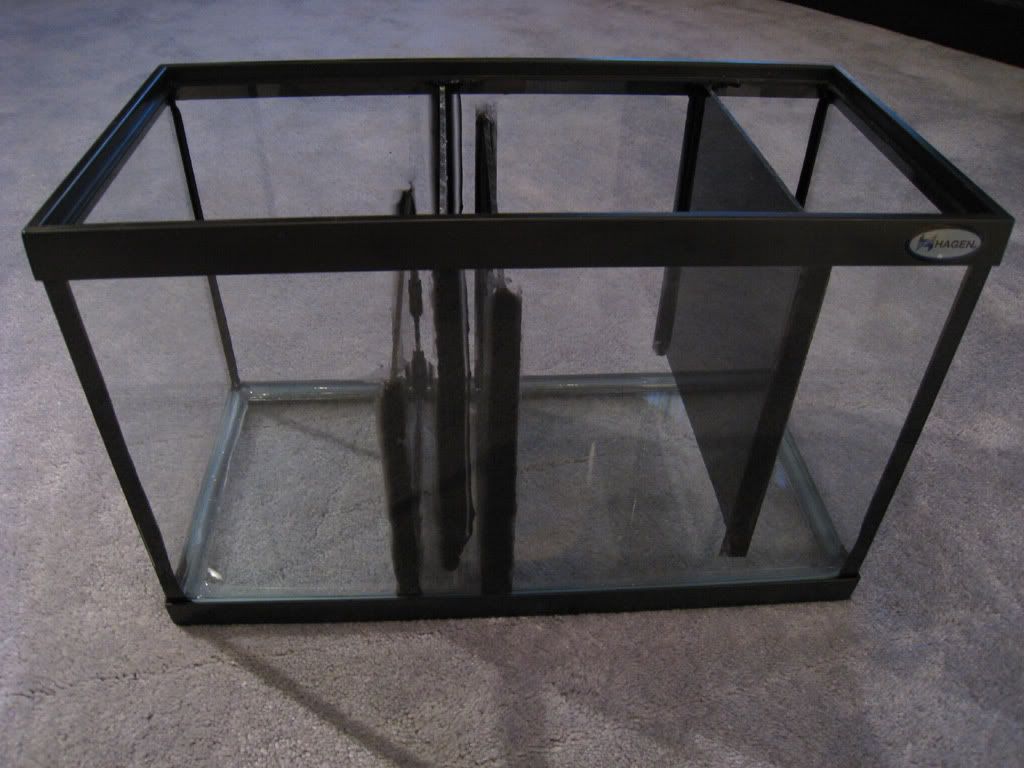 20101214 - To make sure my acrylic weld would hold I reattached the bulkheads and did a quick test of the sump. 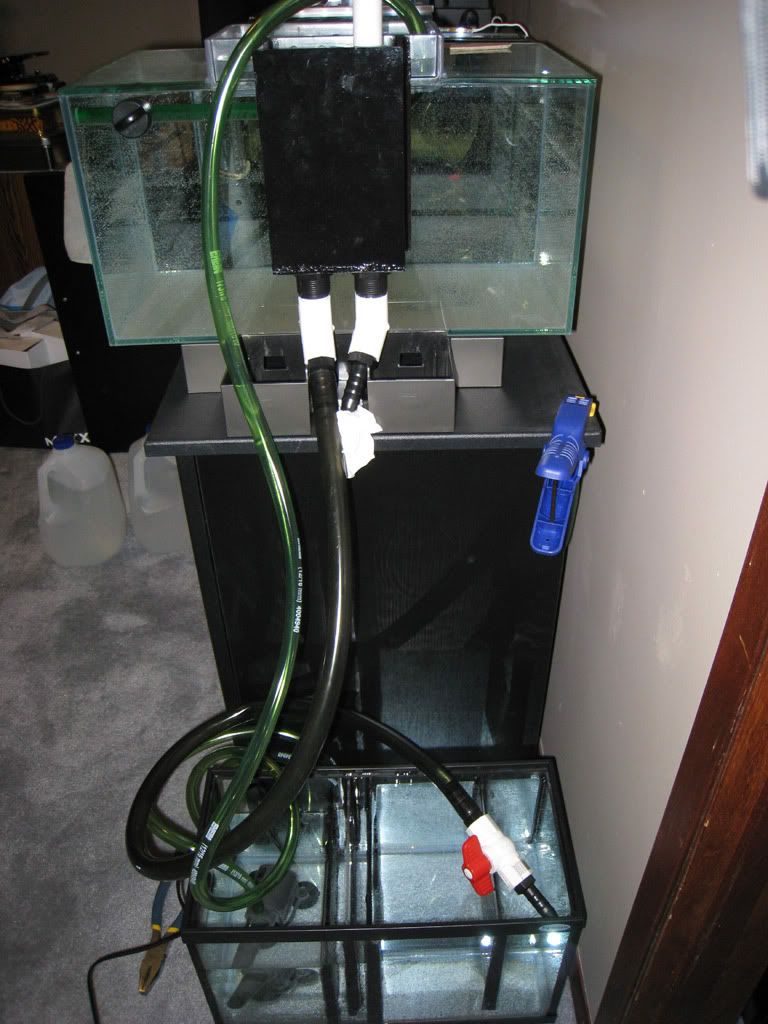 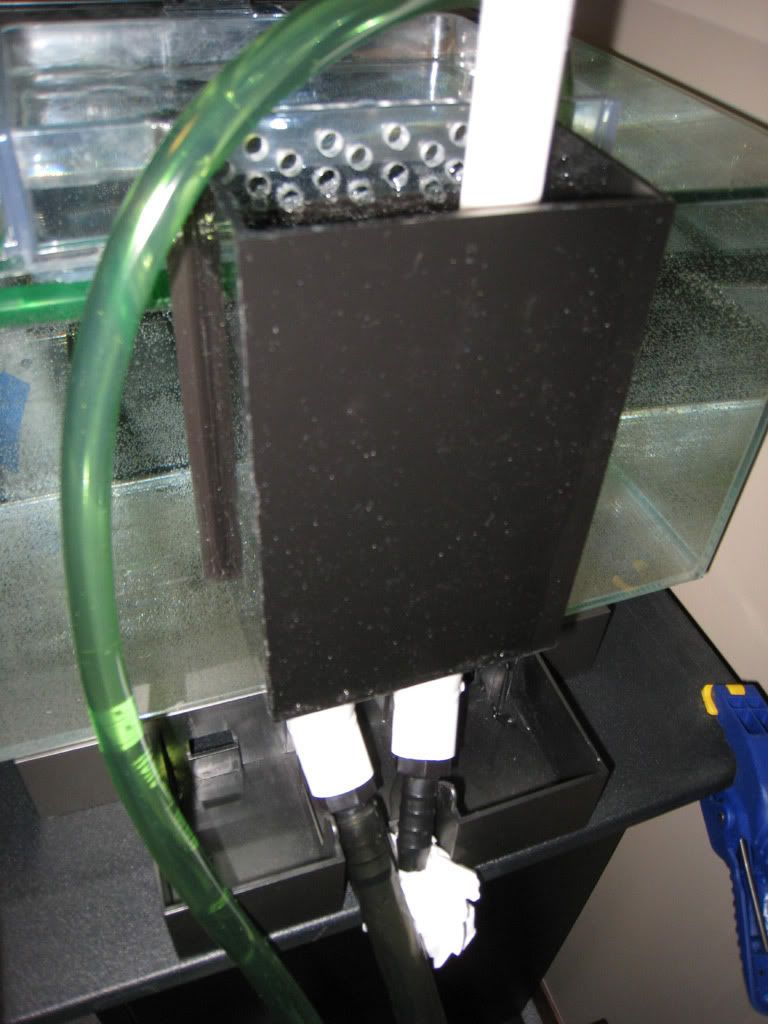
|
|
#3
01-24-2011, 08:49 PM
|
||||
|
||||
|
20101224 - One of the biggest complaints I have with the Fluval Edge in Calgary (being such a dry city for most of the year) is that water evaporation occurs at a very high rate. So I decided that I needed a solution to prevent such heavy evaporation from this SW tank. The solution I came up with protects my MR16 LED light bulbs from the salt water while also reducing the amount of evaporation that would occur from the tank. This is constructed from acrylic and a chunk of glass cut on a wet tile saw to fit inside the open mouth of the Fluval Edge tank.
    This is attached to the existing arm in the tank and utilizes screws which go into nylon center nuts epoxied into the arm so that I can detach and reattach the lid at will. 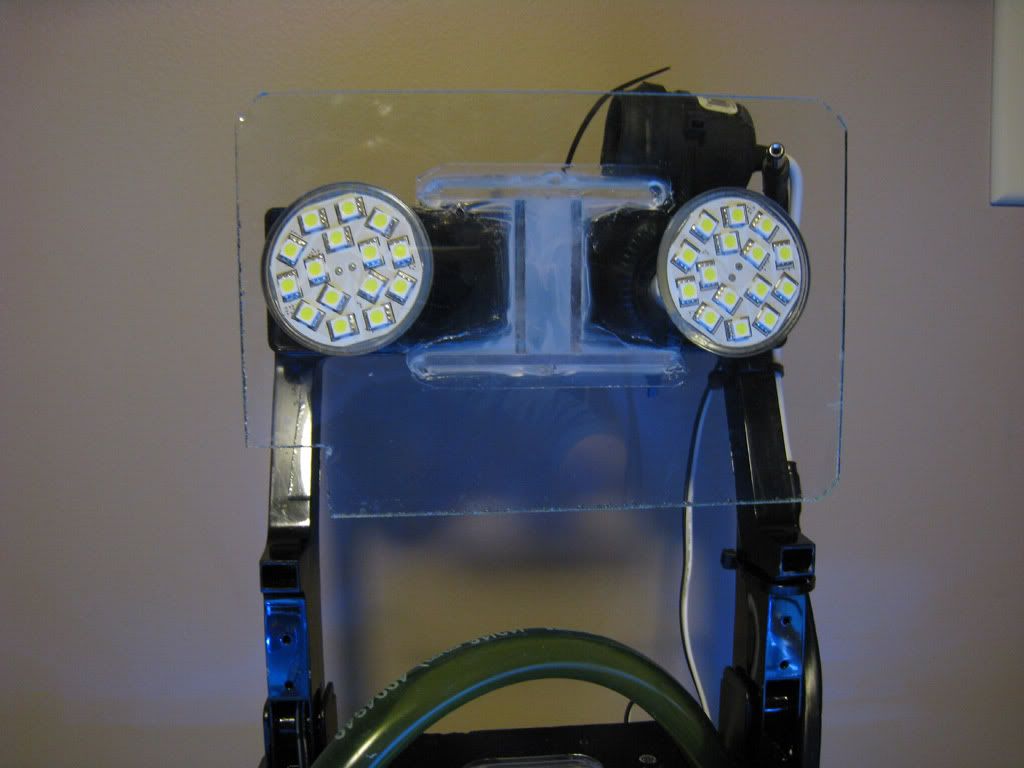
|
|
#4
01-24-2011, 08:50 PM
|
||||
|
||||
|
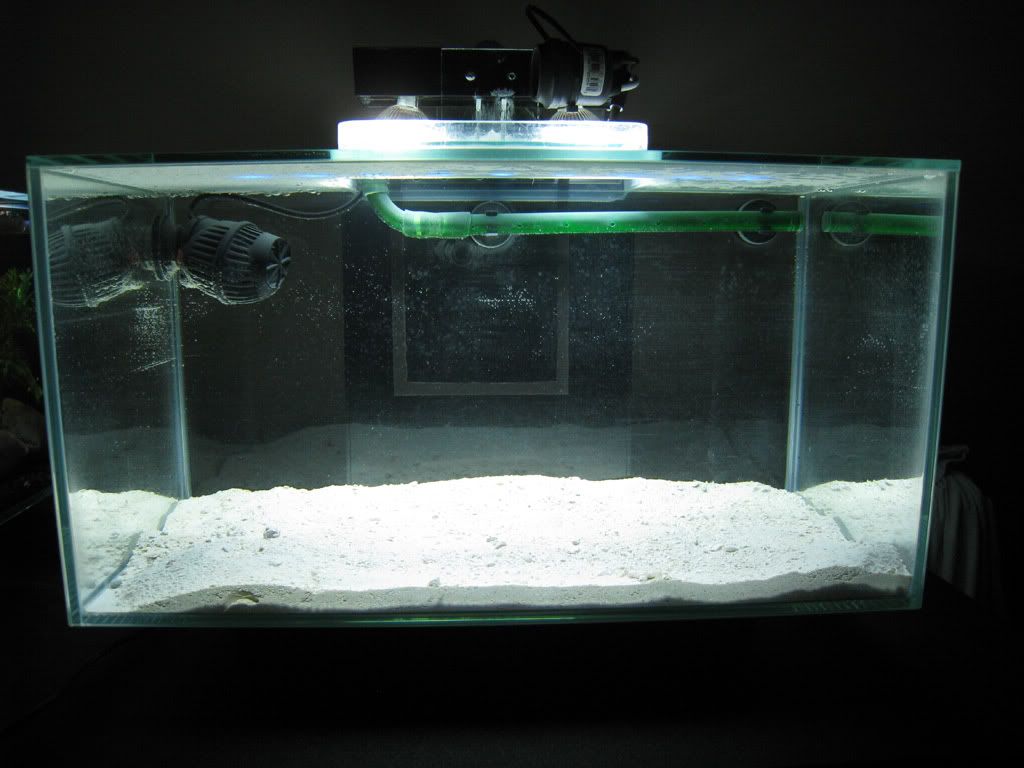
20101224 Here it is after adding salt and live sand. Both salt and live sand caused the water to look extremely cloudy but cleared up quite quickly. In this pic you can also see (sorta) that the glass on my custom cover hovers about 2mm above the water level as it goes into the overflow.
 20101226 - Went out on boxing day and picked up 8 lbs of live rock on sale. 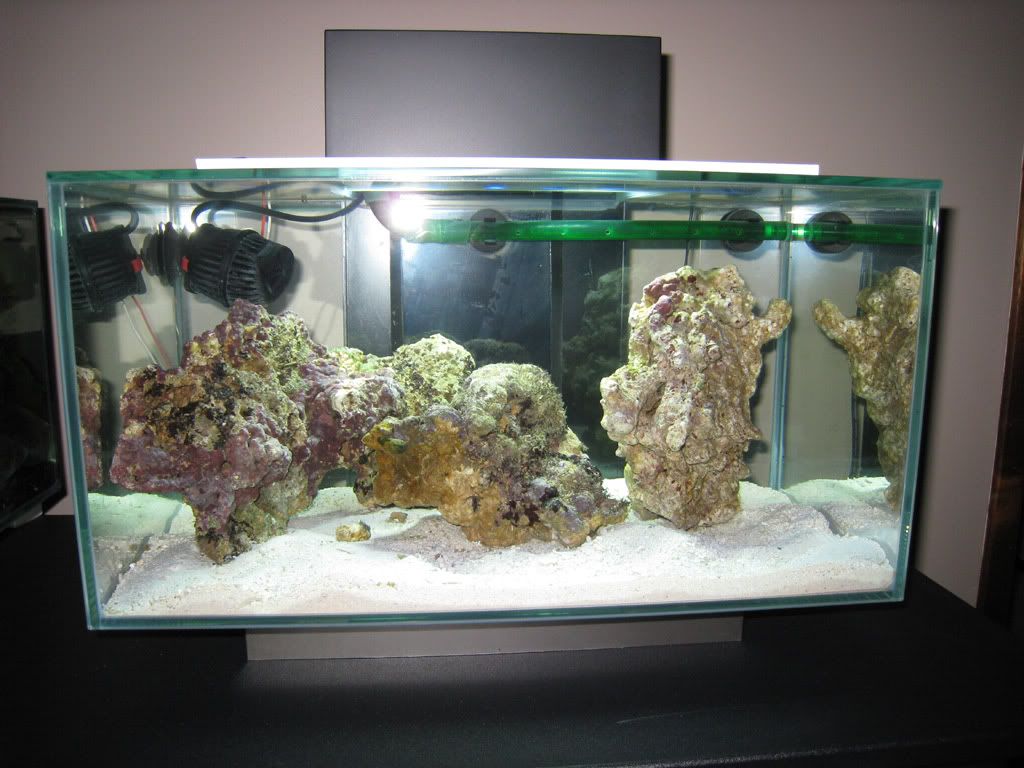 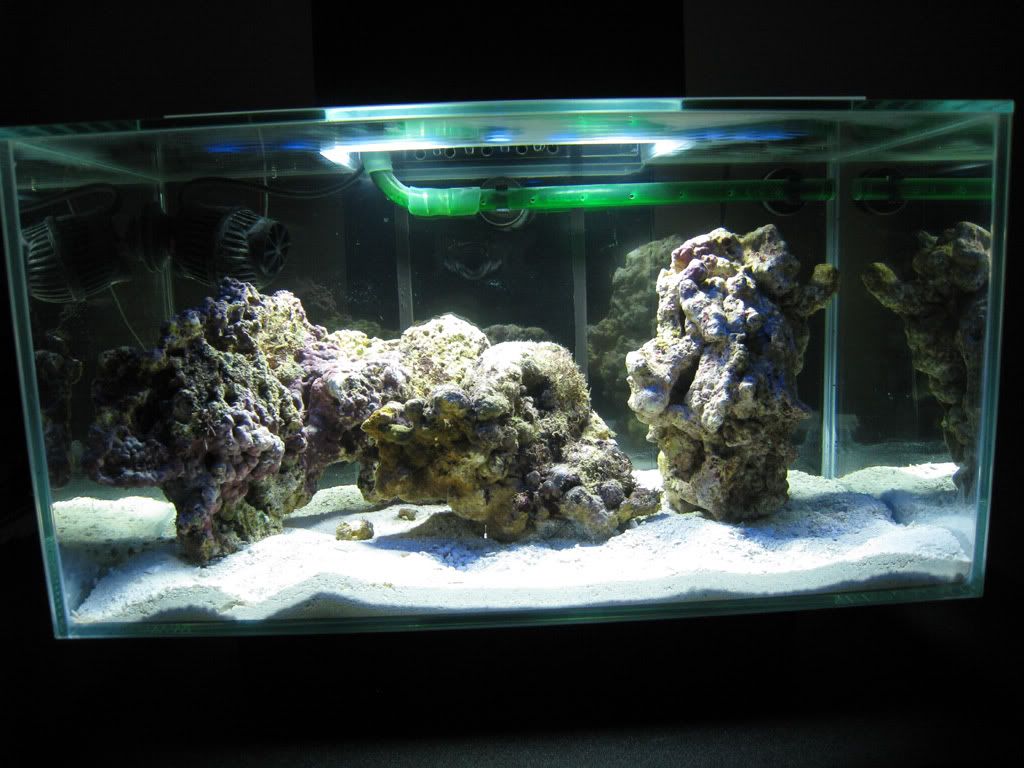 Wasnt really sure how to arrange these chunks so I just left them where I dropped them. I am open to suggestions. 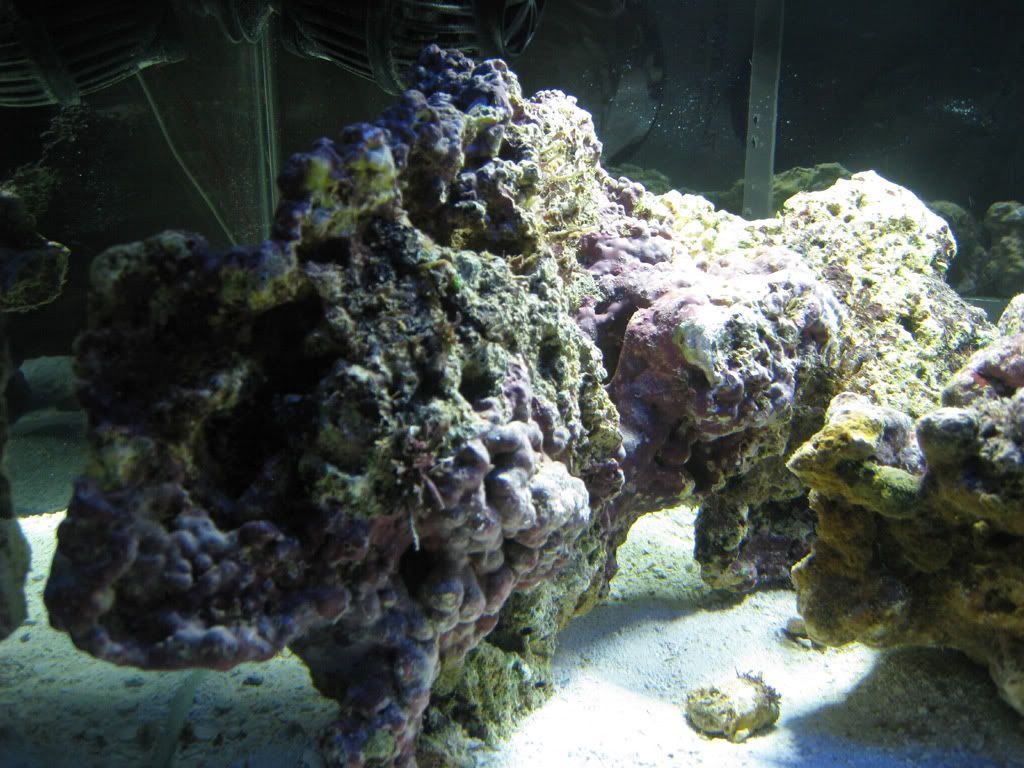 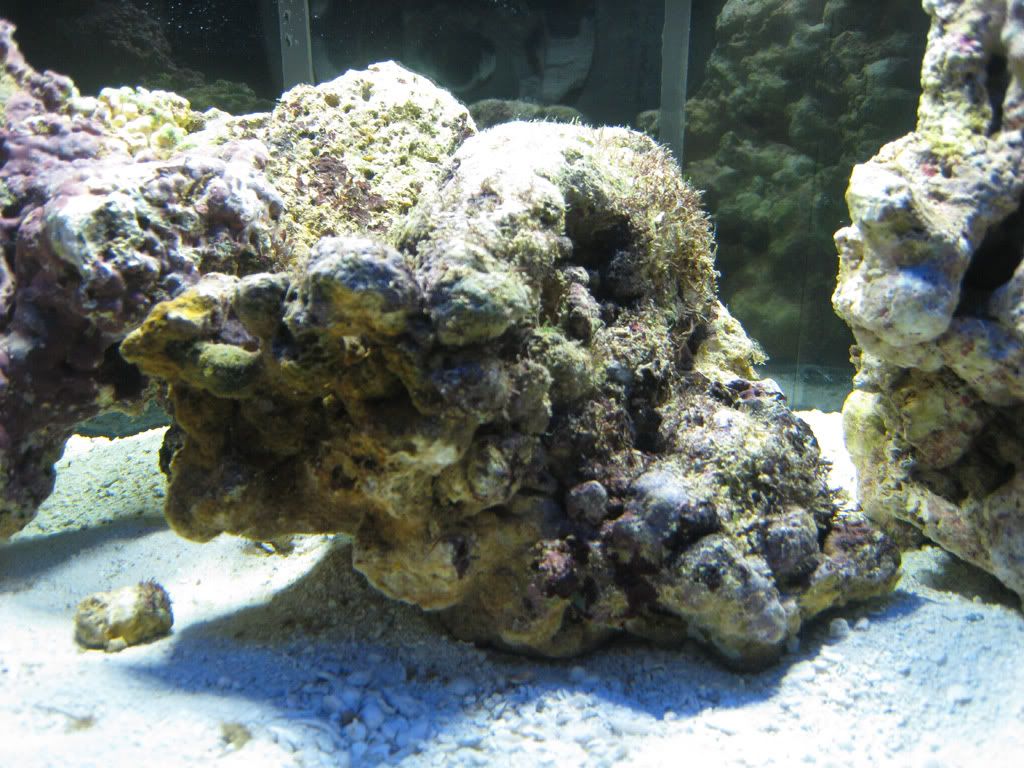 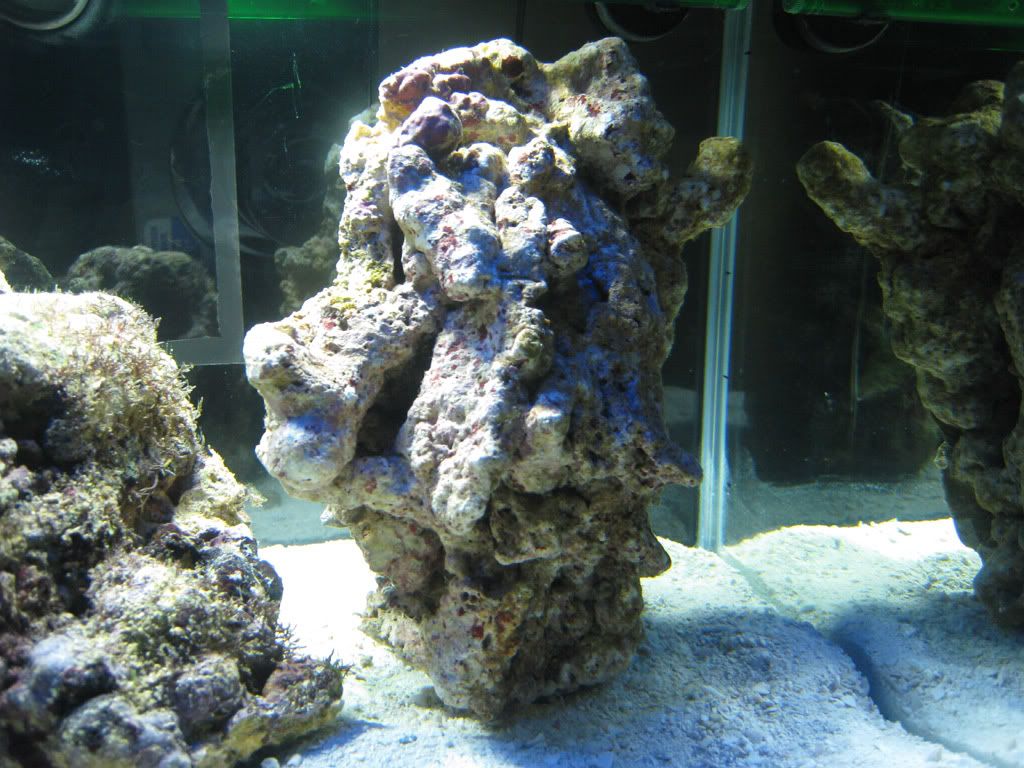 20101228 - Another quick look at the overflow box. I had made a small cover in order to reduce the amount of evaporation from the overflow. 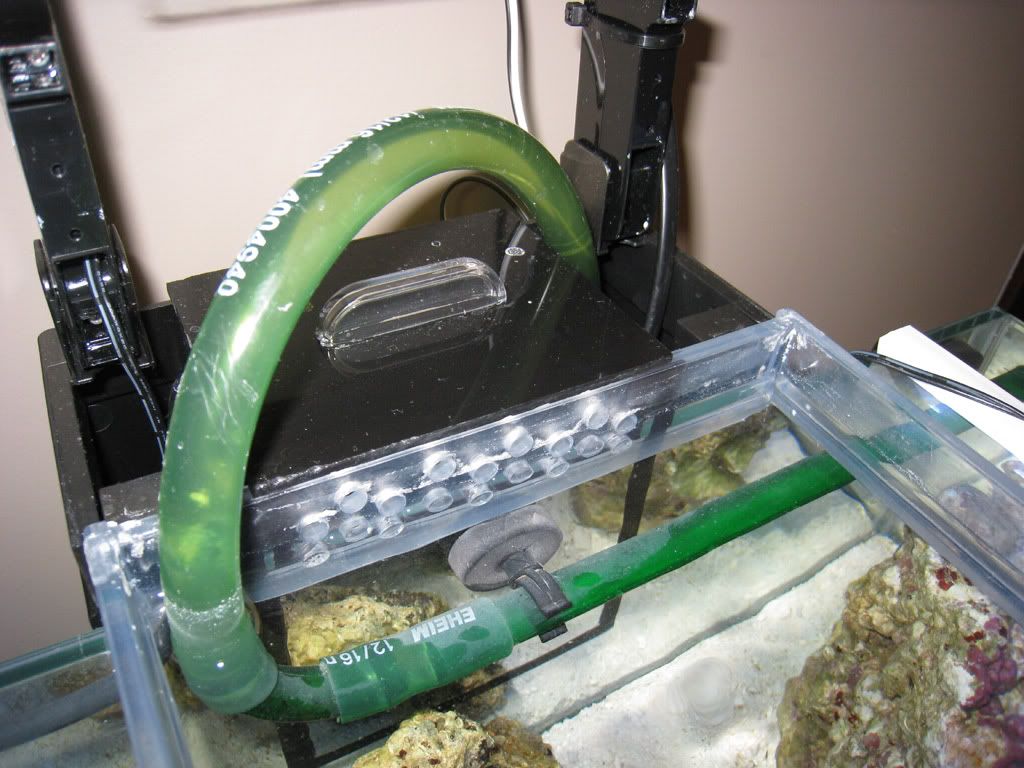 20101228 - set up complete with a "herbie" setup to reduce the noise coming from the overflow box. At this point I still needed to go out and find a 2" hole saw bit so that I could cut out a hole for the skimmer cup to poke out of the sump lid. I still need to get to organizing the wiring. Pump is a Maxijet 900 rated at 230 GPH. 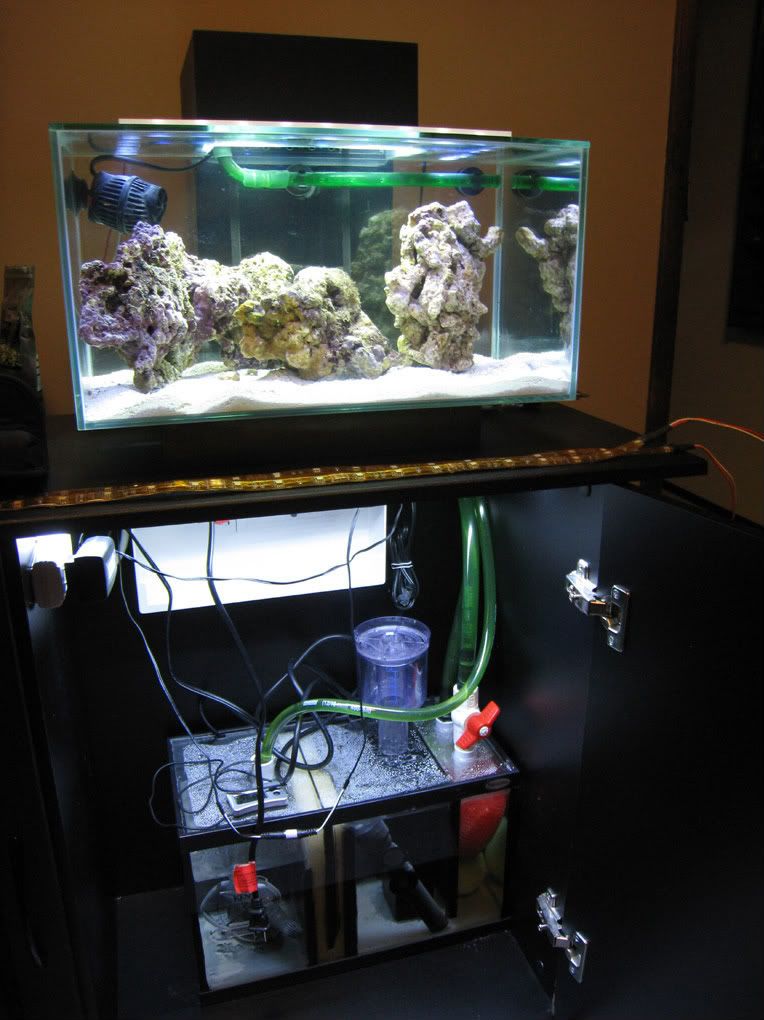
|
|
#5
01-24-2011, 08:50 PM
|
||||
|
||||
|
20110106 - added some critters
Spiny Astrea snail 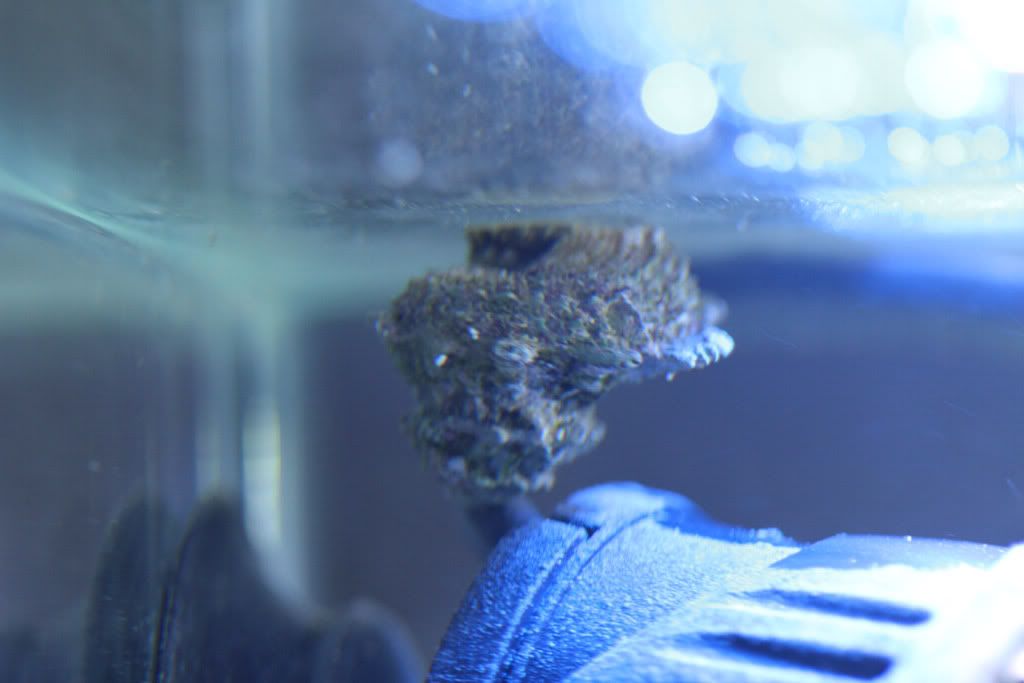  Blue legged hermit crab - about .5 cm long and bit out of focus due to shooting at an angle through the glass 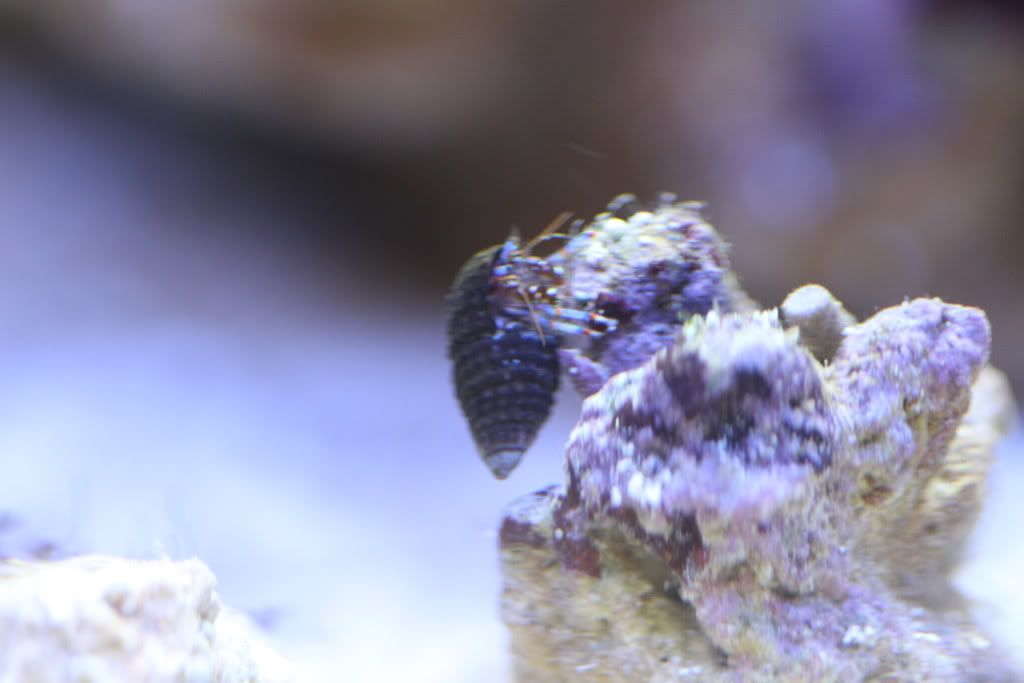 Trochus Snails 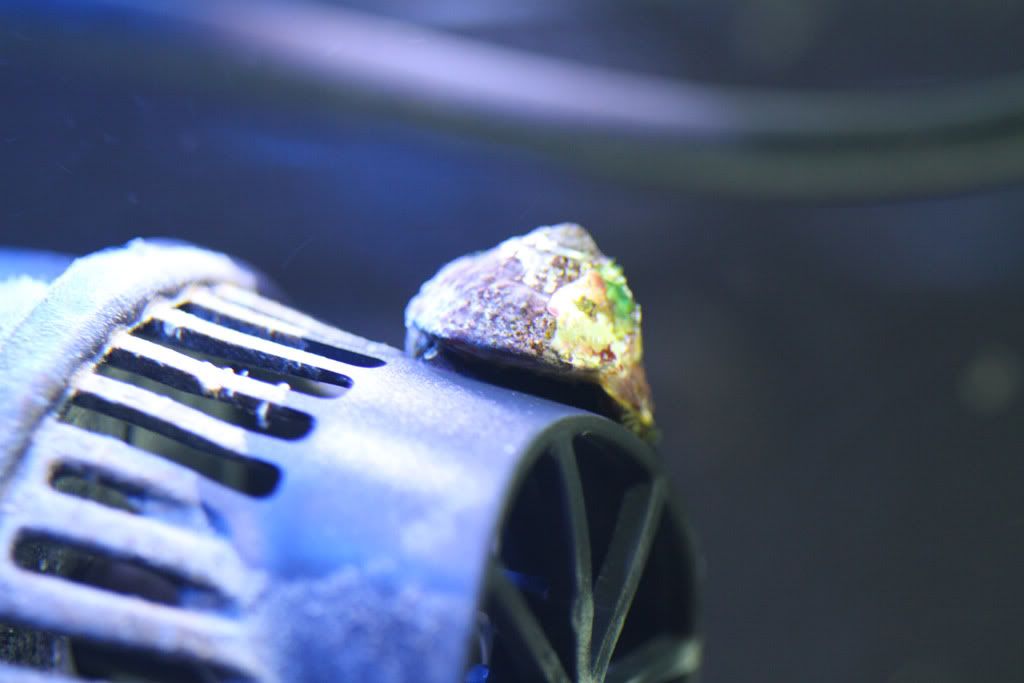 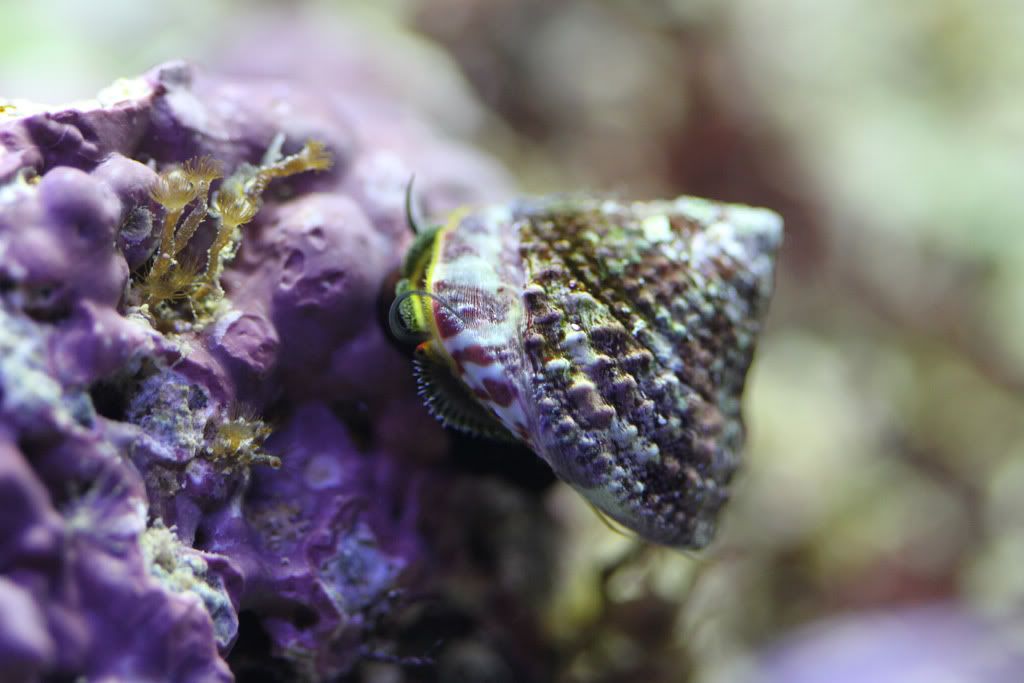 Nassarius Snails - Periscope up! - what I usually see of the Nassarius Snails  rare view of one of them zooming to a new location 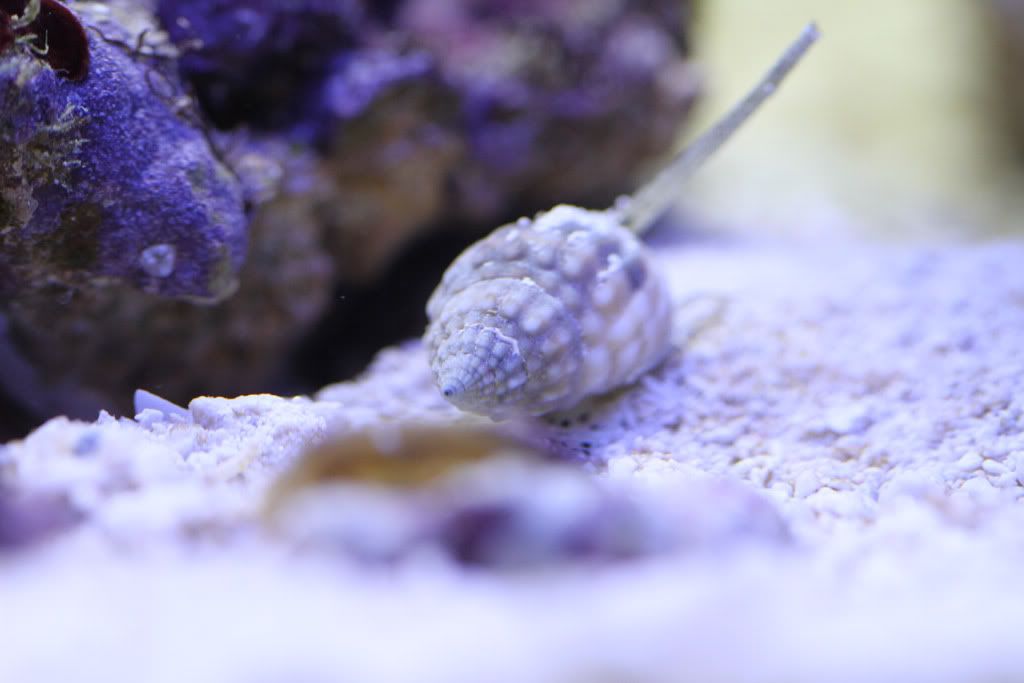 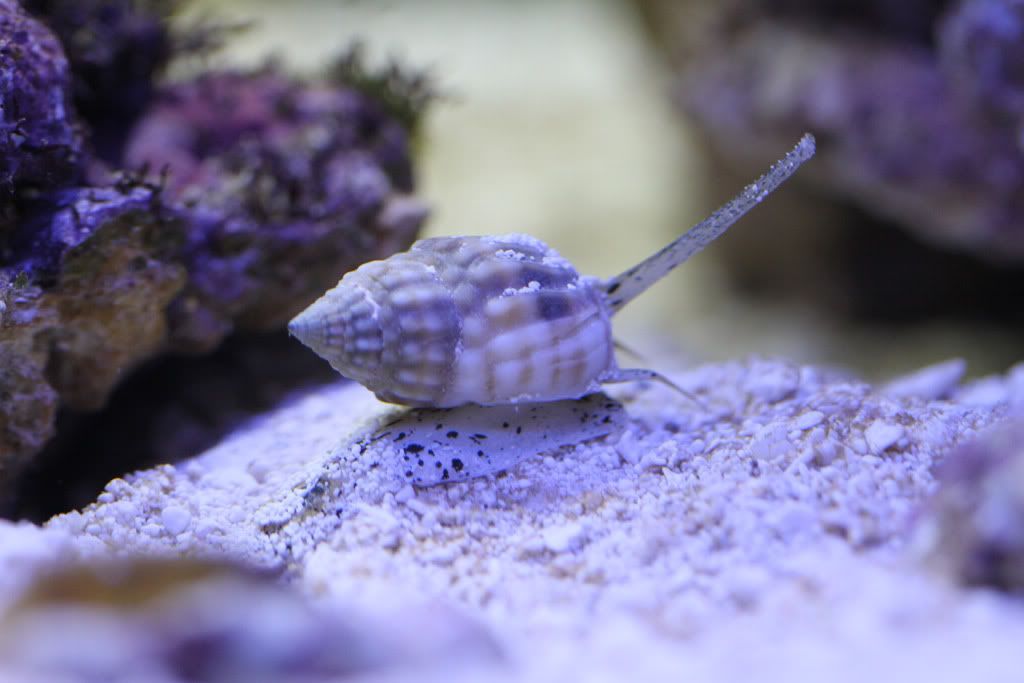 20110107 some sort of macro algae growing 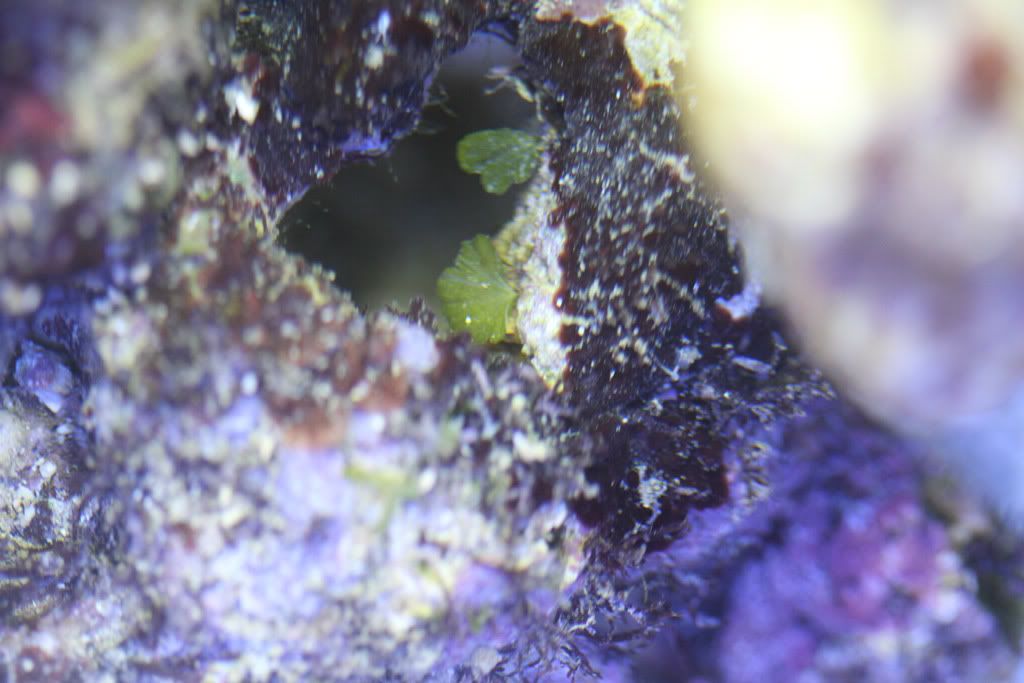 and a view of the chiton I found on the rock 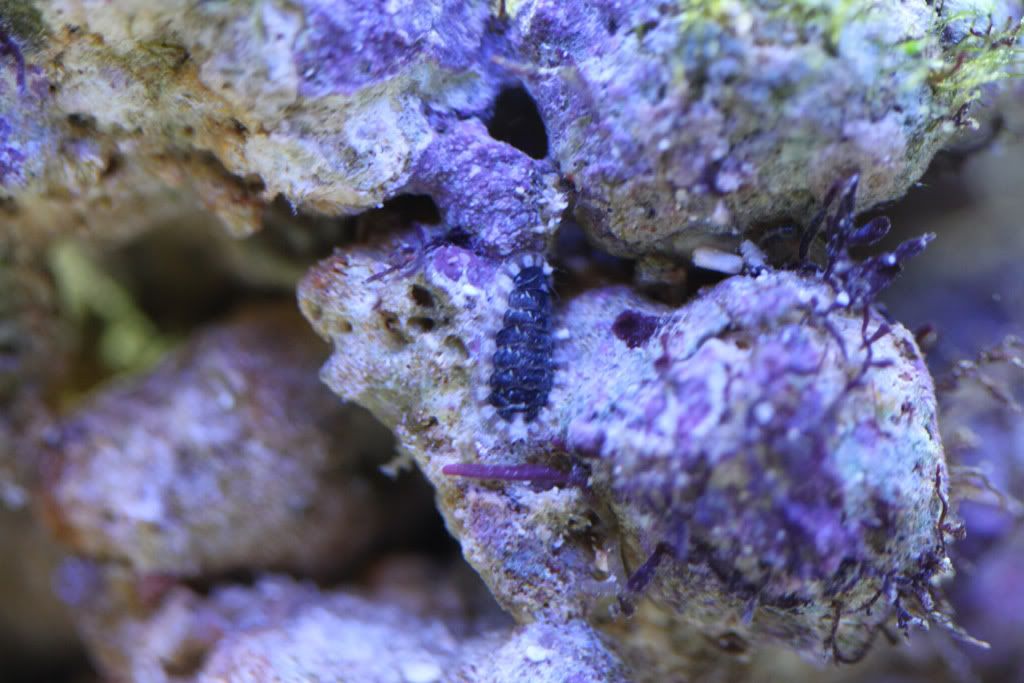 20110113 - added another 7 lbs of live rock to the sump so I am up to about 15 lbs of LR in water volume of about 9G. Dont know why I bought so much as my sump is totally filled and there is really no room. I ended up breaking up the one big hunk I bought into about 4 smaller chunks so it would fit in the different compartments. Is there such a thing as too much? This pic also shows the installation of the skimmer cup for the Tunze Nano 9002 skimmer through the acrylic lid. 
|
|
#6
01-24-2011, 08:51 PM
|
||||
|
||||
|
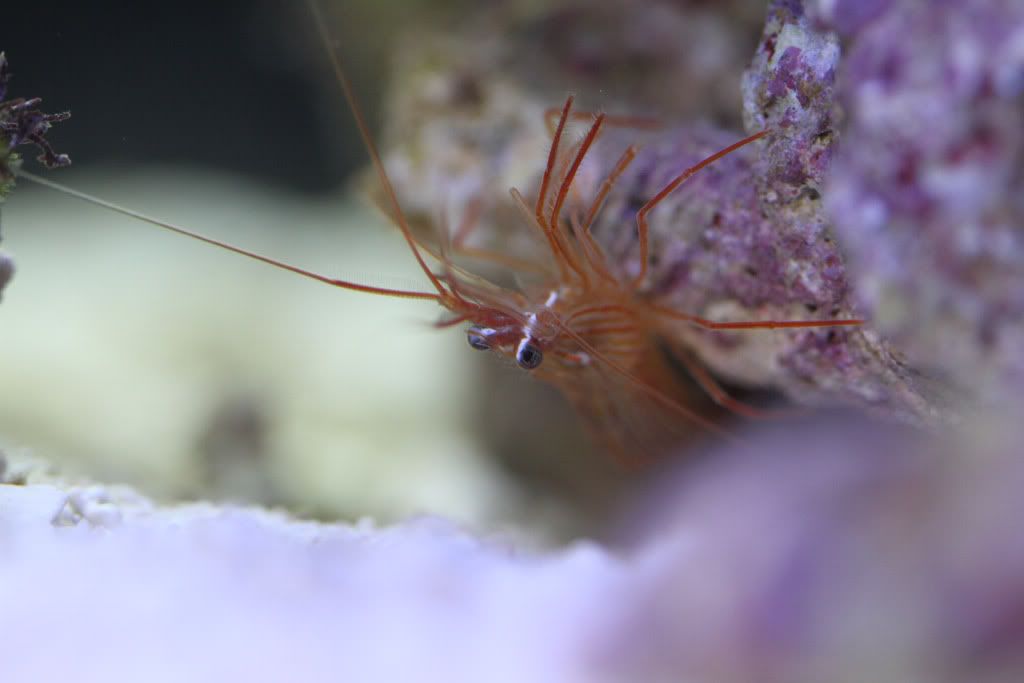
20110118 - added a peppermint shrimp to start work on the apistasia but have yet to see any noticeable dent in the population and might add another soon.
 20110123 - Found this hairy little crab grazing on the purple stuff on the top of my live rock after turning on the lights. Would estimate his body is about half a cm wide at most. 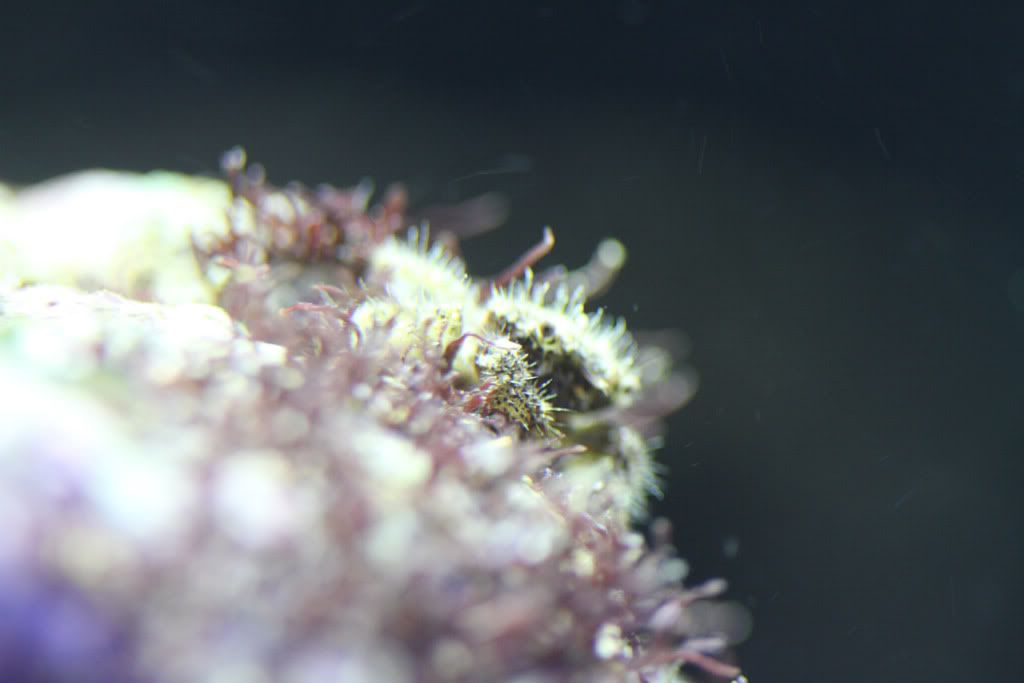 20110123 - Bubble Algae? 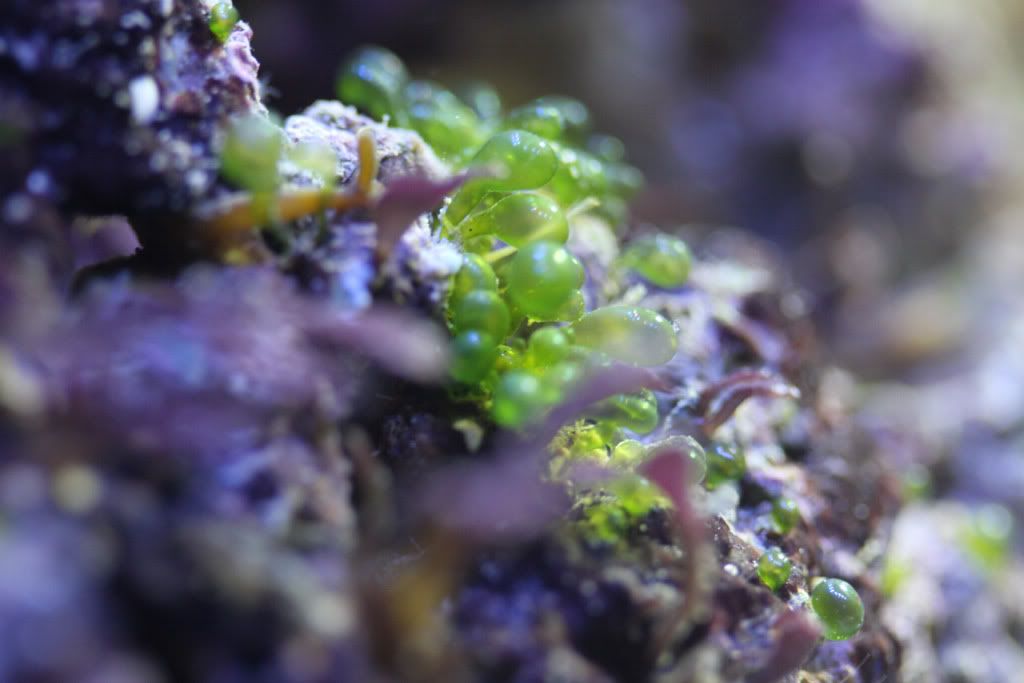 20110124 - Most recent FTS with the change to a black spray bar that is split and shoots some jets down towards the sand and some along the top glass. The small hole I made to break siphon in case of power outage (just below where the green tubing connects to the spray bar) gently agitates the water at the opening making the light shining through shimmer a bit and also doesnt allow the water level to get below the glass top. 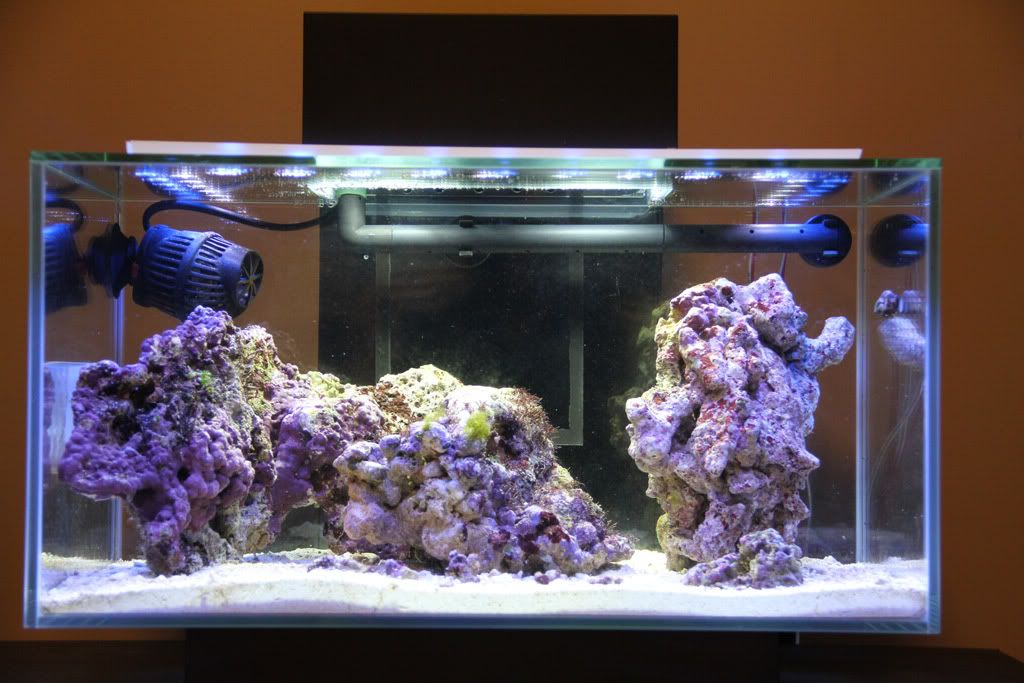
|


 Hybrid Mode
