Canreef Aquatics Bulletin Board  

Go Back   Canreef Aquatics Bulletin Board > General > Tank Journal

Reply
 
Thread Tools Display Modes
  #31  
Old 08-30-2012, 04:35 PM
Beano1169 Beano1169 is offline
Member
 
Join Date: Jul 2011
Location: Calgary
Posts: 193
Beano1169 is on a distinguished road
Default

That thing is awesome looking! I might have to hire you to build me something like that in the near future! hahah brilliant work!
Reply With Quote
  #32  
Old 08-30-2012, 05:06 PM
yellowworld's Avatar
yellowworld yellowworld is offline
Member
 
Join Date: Jan 2011
Location: Calgary
Posts: 228
yellowworld is on a distinguished road
Default

Quote:
Originally Posted by Ginu View Post
Sorry to hear about the mishap of the overflow box, although it looks like you're right back on track with the new one.

I also would like to suggest some sort of reinforcement for the three pipes coming down to the sump as those pipes will become something very similar to a crow bar once they are long enough and any tap or accidental light hit might either break the box again or blow out the back glass wall. I find that the easiest way to fix this by cutting a wooden block and attaching it to the back of the stand with the pipes resting and anchored to this block.

I really like that wave maker...
Thanks for that Ginu! I was thinking much the same thing about them being a problem but didnt really know how to tackle it! Thanks for the idea Ill have to look into it, im not to sure how I can do it just yet becuase the tank with be sitting on my desk but the wood block sounds great! thanks very much its greatly appreciated
Reply With Quote
  #33  
Old 08-30-2012, 06:16 PM
Ginu Ginu is offline
Member
 
Join Date: Jan 2012
Location: North Vancouver
Posts: 369
Ginu is on a distinguished road
Default

Np, thats why the tank journals are good to document
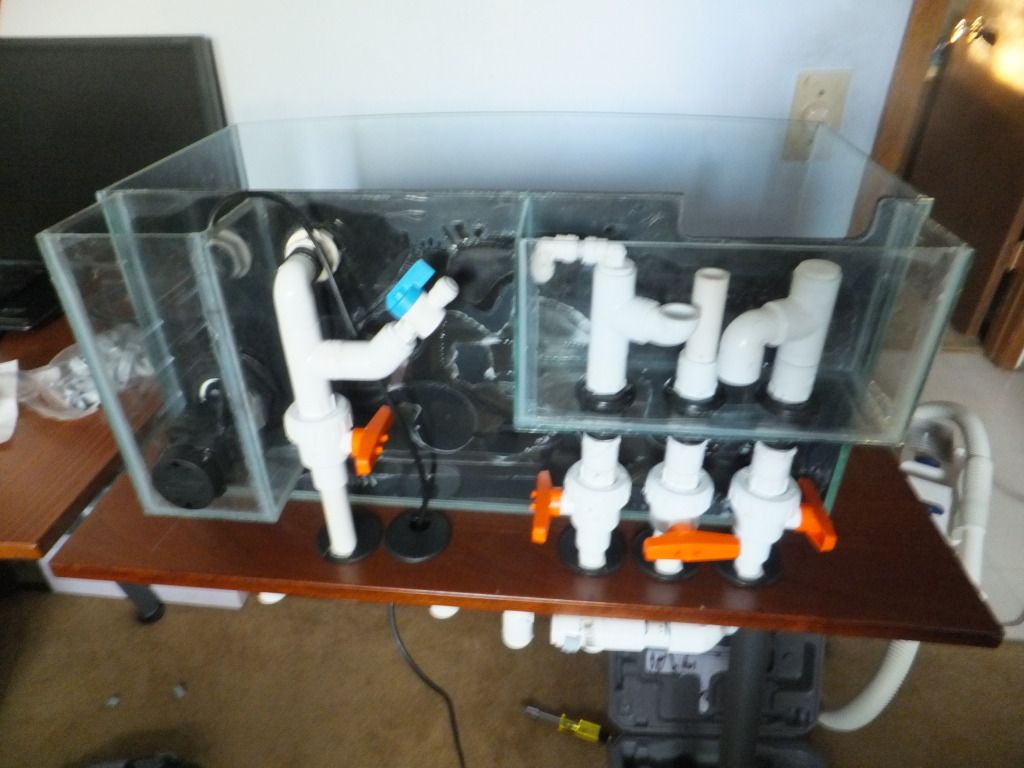
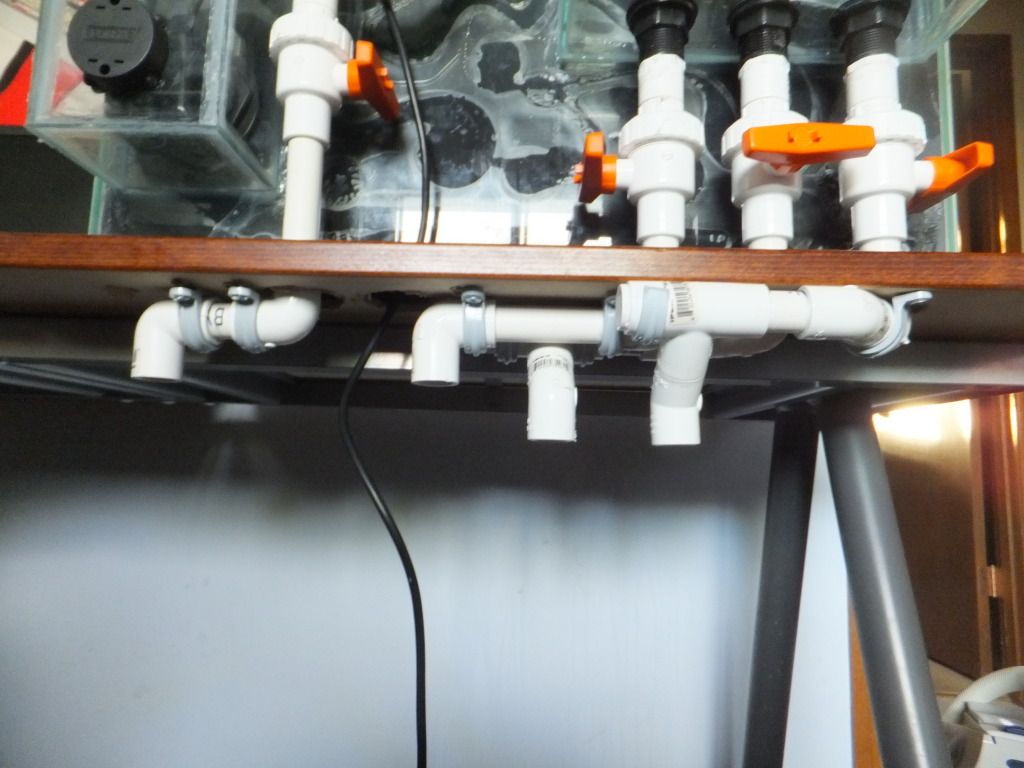
 (i should start my own thread as well)

I think you have a few options here:
1. if you would like the tank to sit flush with the desk then you need a wood block of the same width as the overflow box and you rest the pipes against it and also you can fabricate a bracket of some sort holding each tube in place taking the possible tension off the overflow box
2. you can bracket the tubes directly to the desk if the tank comes out the length of the desk
3. I've seen people bracket the tubes against the wall which in my opinion is not advisable as maintenance is always required and not being able to move the desk is not a good option.

Quote:
Originally Posted by yellowworld View Post
Thanks for that Ginu! I was thinking much the same thing about them being a problem but didnt really know how to tackle it! Thanks for the idea Ill have to look into it, im not to sure how I can do it just yet becuase the tank with be sitting on my desk but the wood block sounds great! thanks very much its greatly appreciated
__________________
Casual reefer
Reply With Quote
  #34  
Old 09-01-2012, 08:33 PM
yellowworld's Avatar
yellowworld yellowworld is offline
Member
 
Join Date: Jan 2011
Location: Calgary
Posts: 228
yellowworld is on a distinguished road
Default

HELLLLLLOOOOO LABOUR DAY LONG WEEKEND! time to get serious now, i got a bunch of stuff I want to get done and ill start if off with a trip to the hardware store.

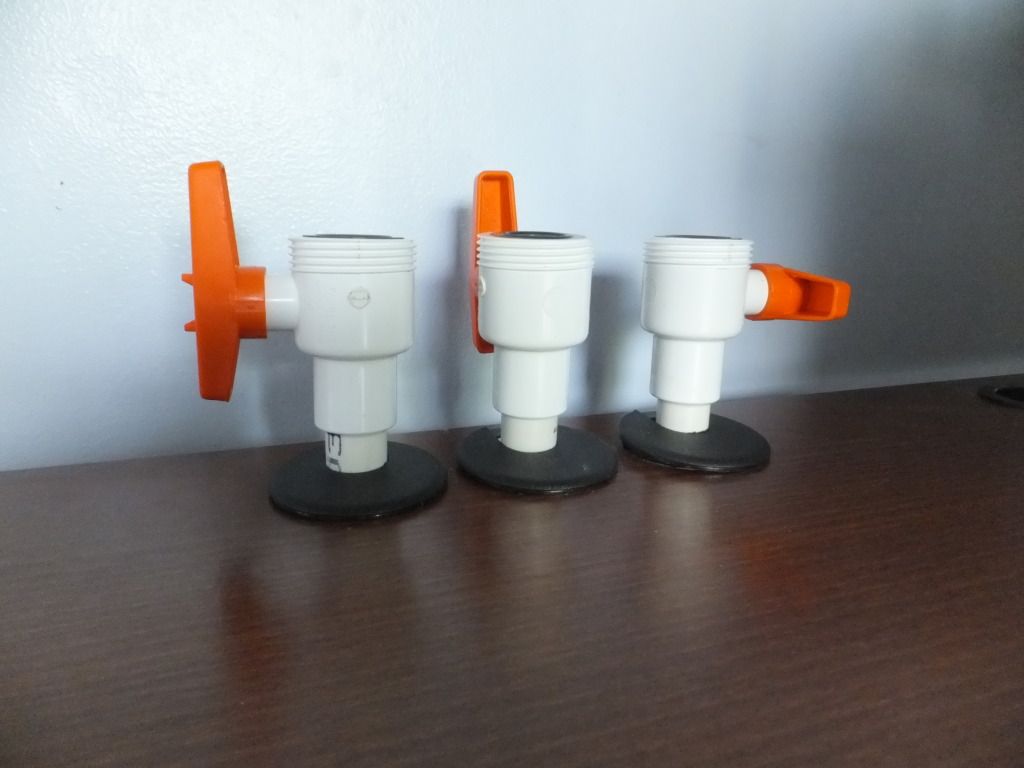
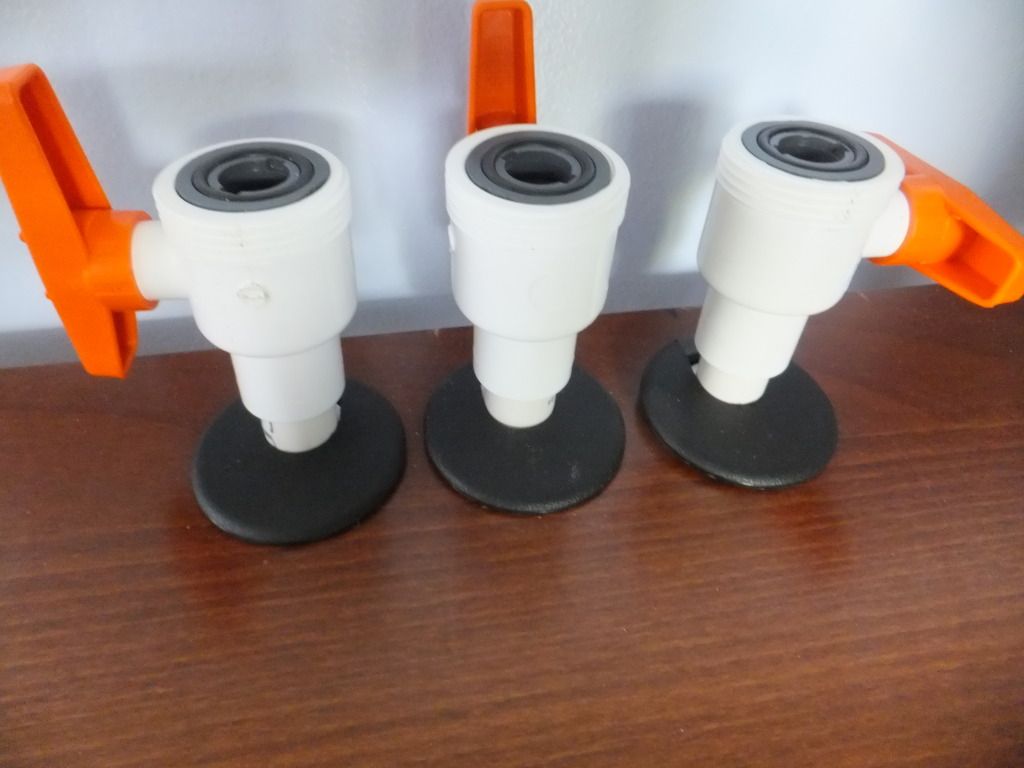
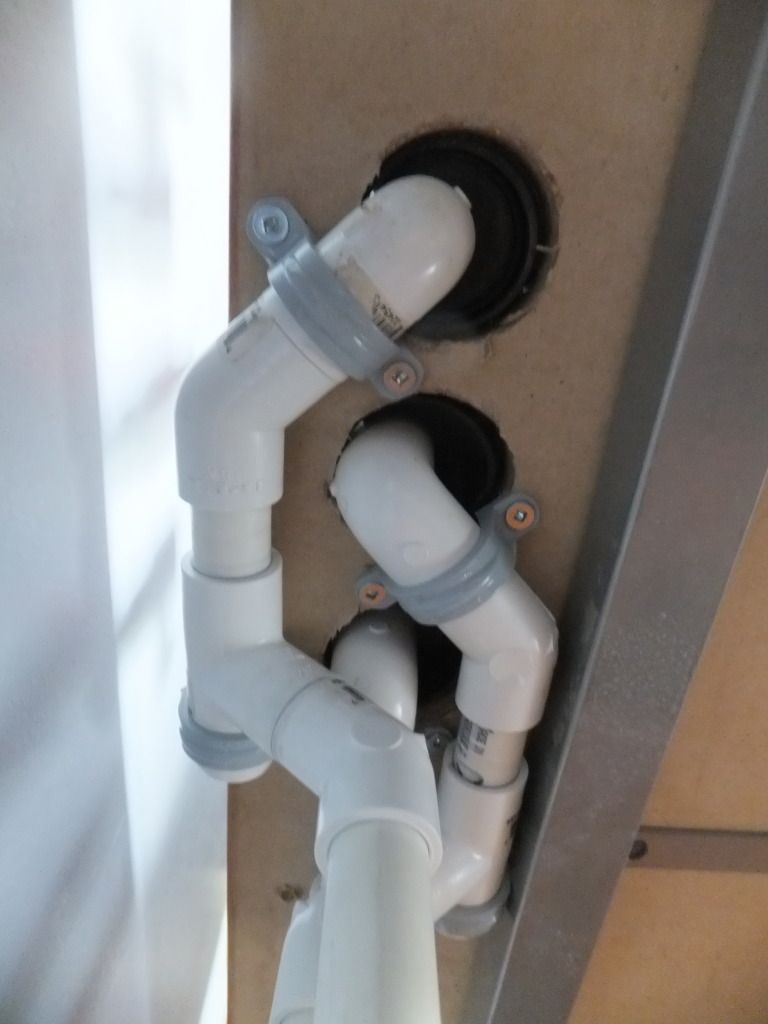
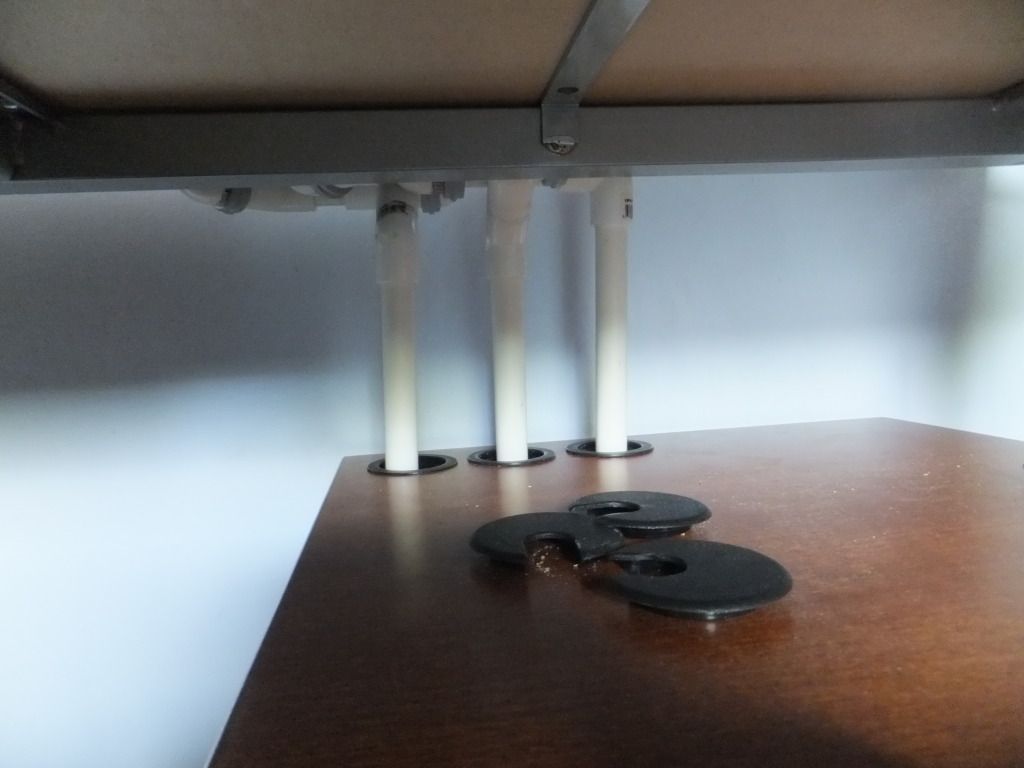
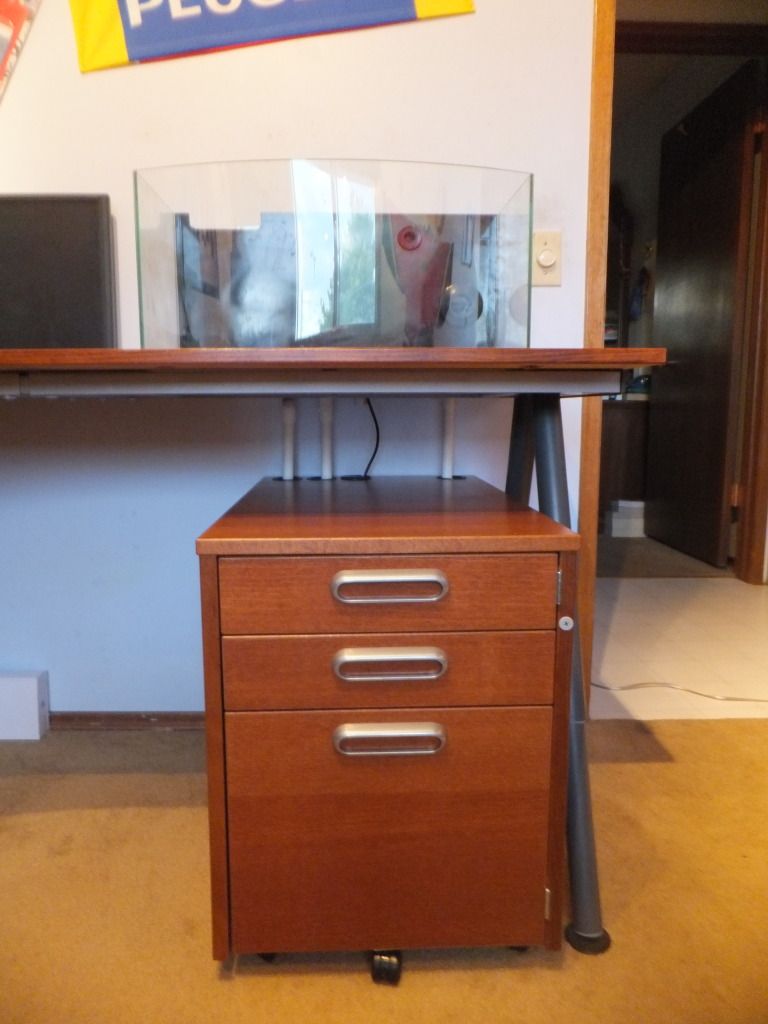
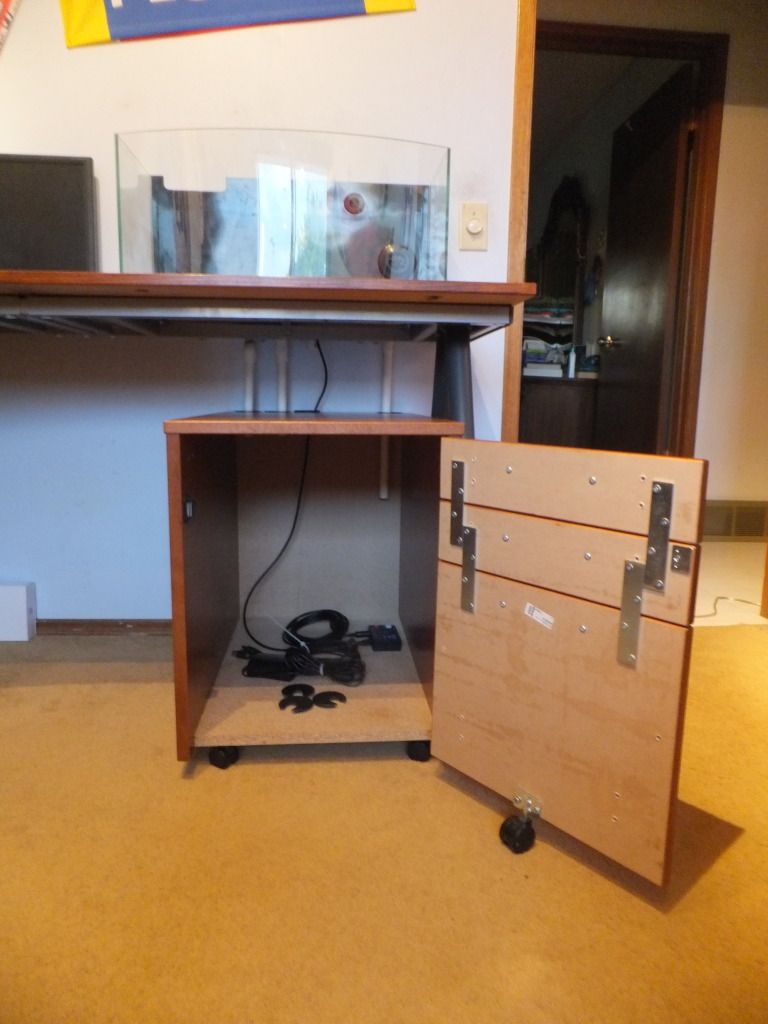
I picked up an ikea Gallant rolling filing cabinet that im going to gut and use as my sump stand, its going to match the rest of the desk and blend perfectly take a look


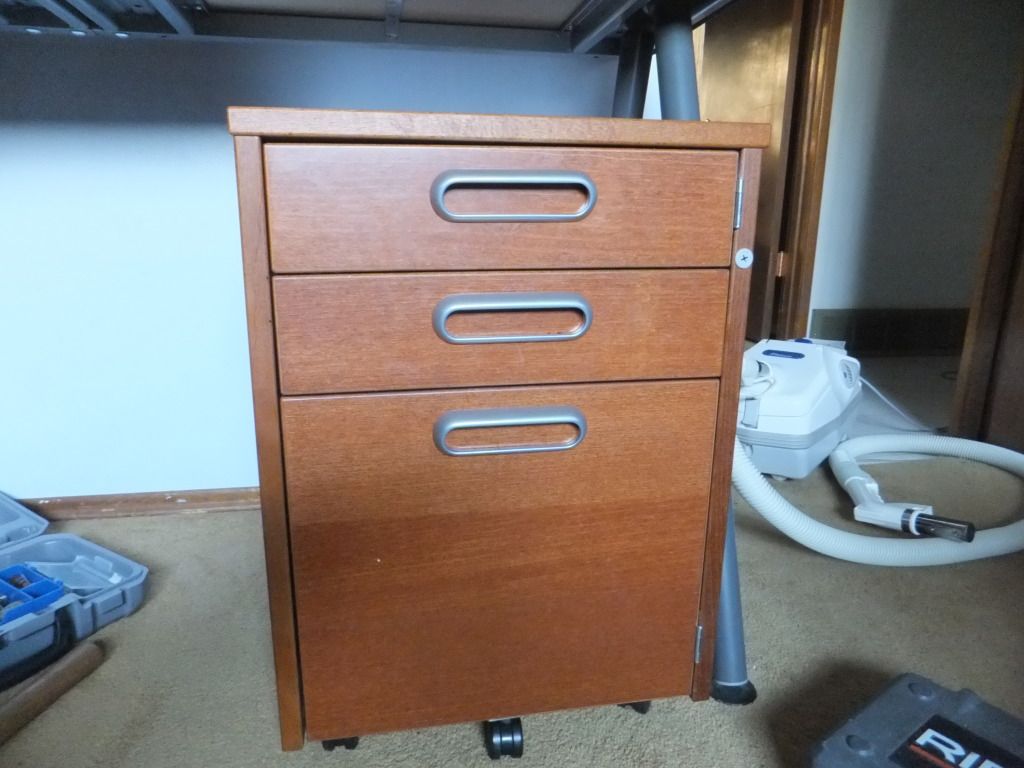
Then I gutted it and started to make all the drawer faces one solid door


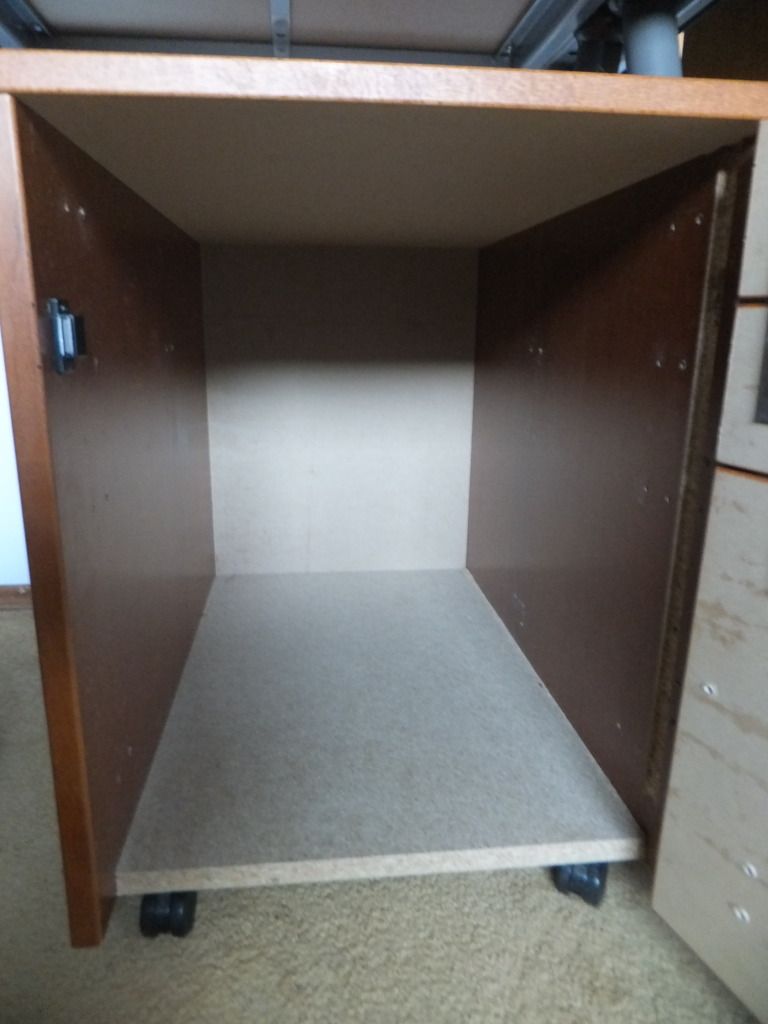
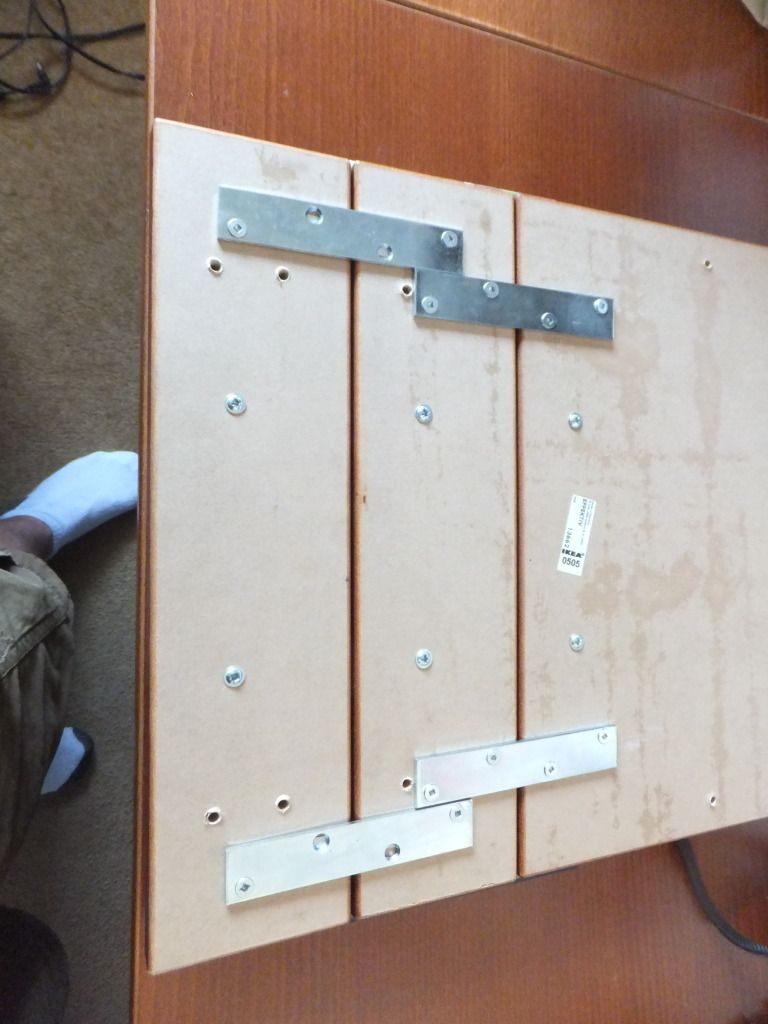
After that was done I used my dremel to recess the hinges so that the door would be centred again, then i put a magnet lock on it and voila!


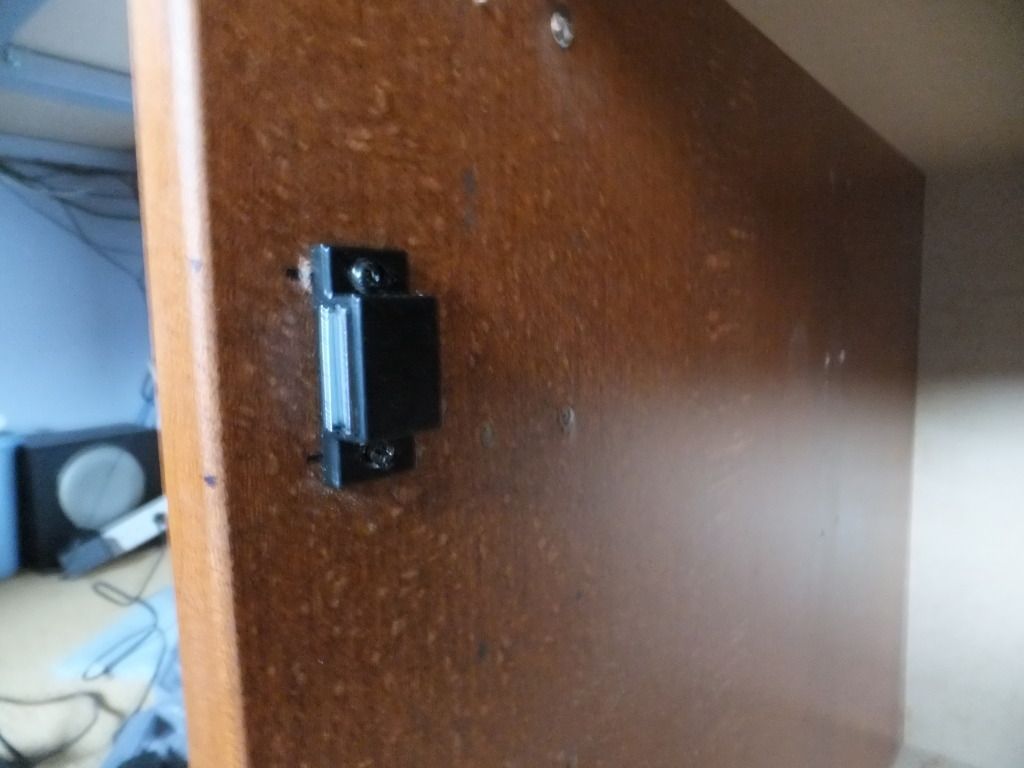
I still need to paint and seal the inside of the cabinet to make the wood water tight but its getting closer!


Then I moved my attention to the desk and how I was going to run my plumbing and this was my solution


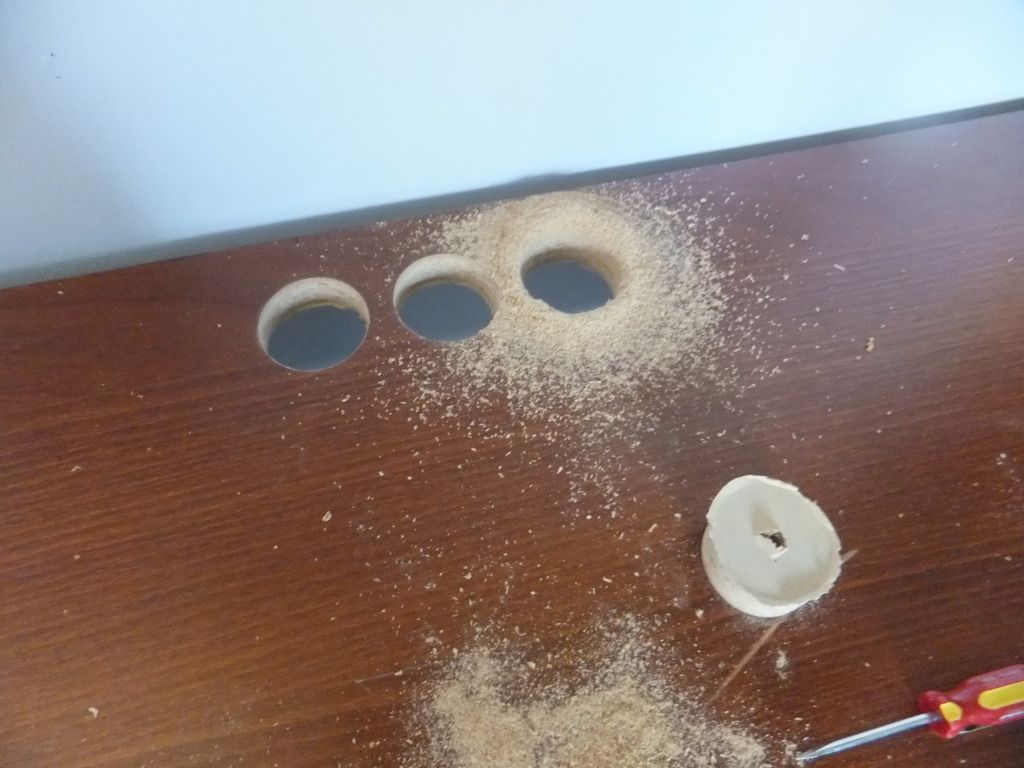
I think it worked out really well, kept everything nice and clean i think.


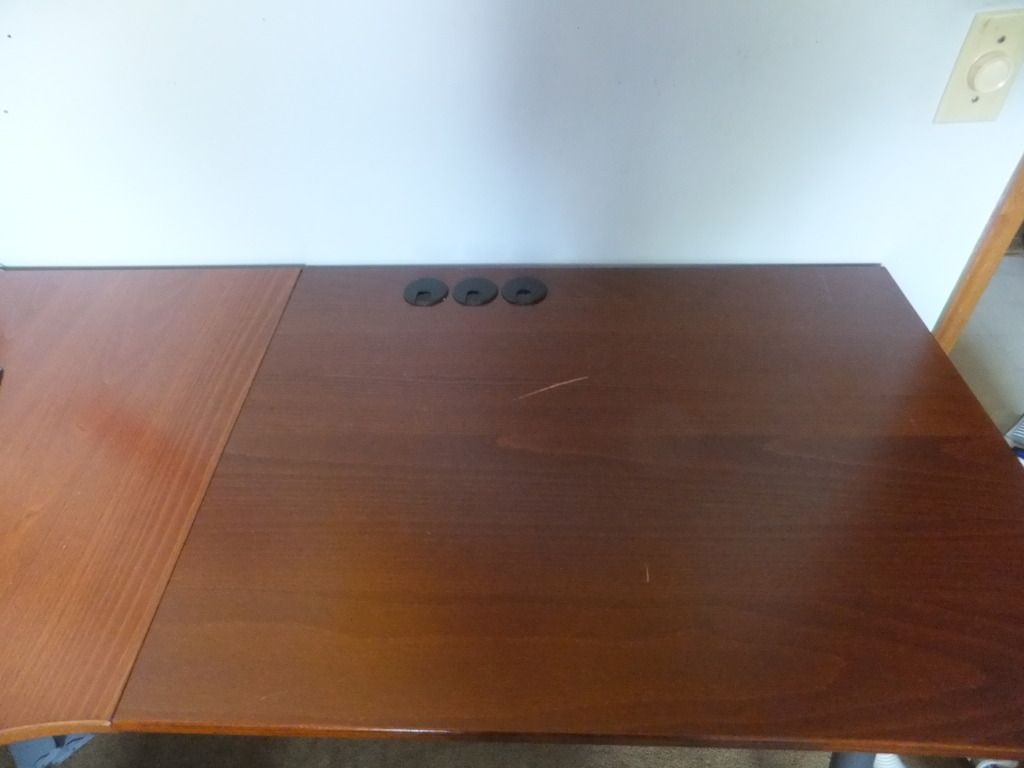
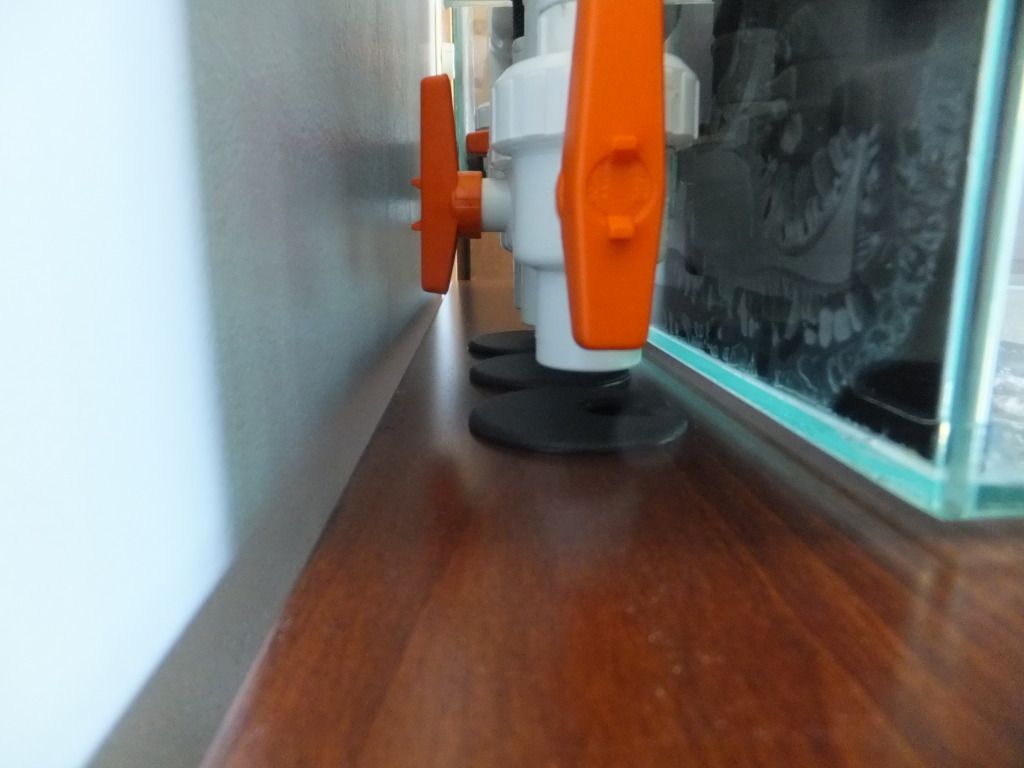
Then my ADD kicked in and i put some felt pads on the bottom of my tank cus it wasnt to fun to move around it liked to scratch the table haha


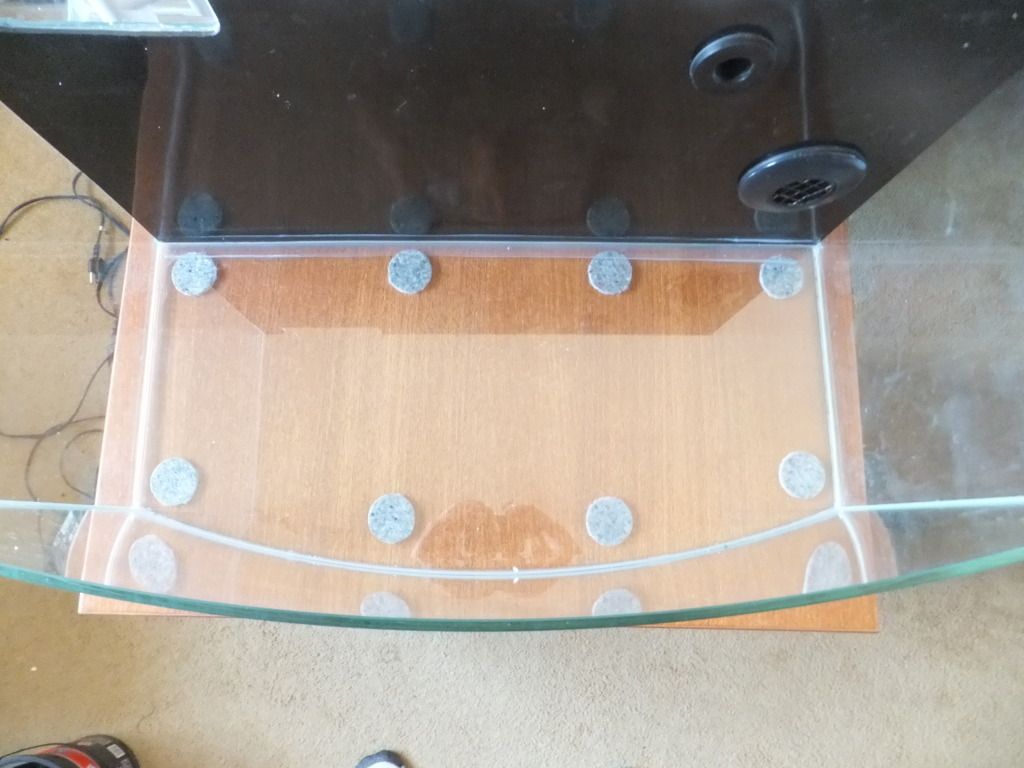
More to come tonight!
Reply With Quote
  #35  
Old 09-04-2012, 05:43 AM
yellowworld's Avatar
yellowworld yellowworld is offline
Member
 
Join Date: Jan 2011
Location: Calgary
Posts: 228
yellowworld is on a distinguished road
Default

So the labours of the labour day long weekend are over and here is what i have to show for it!


Still more work to be done, I have to go pick up a 15g long tomorrow and start to plumb and baffle the sump, once that is done i need to paint and seal the inside of the cabinet and run wire for a separate GFI plug that will power the cabinet and the whole tank. Then its on to the wet stuff and aquascaping!
Reply With Quote
  #36  
Old 09-04-2012, 06:08 AM
DCDN's Avatar
DCDN DCDN is offline
Member
 
Join Date: Sep 2009
Location: Calgary
Posts: 171
DCDN is on a distinguished road
Default

Looks great so far. With the effort you've put in so far I'm looking forward to what the tank will look like stocked
Reply With Quote
  #37  
Old 09-04-2012, 07:52 AM
Ginu Ginu is offline
Member
 
Join Date: Jan 2012
Location: North Vancouver
Posts: 369
Ginu is on a distinguished road
Default

Looks really good, looking forward to the next steps. The stand looks awesome and blends in completely.
__________________
Casual reefer
Reply With Quote
  #38  
Old 09-04-2012, 01:21 PM
daplatapus's Avatar
daplatapus daplatapus is offline
Member
 
Join Date: Apr 2012
Location: Port Alberni, B.C.
Posts: 1,315
daplatapus is on a distinguished road
Default

Awesome build man, keep up the good work!
Reply With Quote
  #39  
Old 09-04-2012, 01:45 PM
riceboy riceboy is offline
Member
 
Join Date: Jun 2006
Location: calgary AB
Posts: 664
riceboy is on a distinguished road
Send a message via MSN to riceboy
Default

I really like this build very detailed and straight up diy, what are you going to use for lights? oh yeah you might wnat to put some egg crate at the overflow, or most of your fish will end up in there lol
Reply With Quote
  #40  
Old 09-09-2012, 04:34 AM
nerdz nerdz is offline
Member
 
Join Date: Feb 2011
Location: burnaby
Posts: 156
nerdz is on a distinguished road
Default

Hi

l have a question about your acrylic background. Did you put the bulkhead gasket behind it against the glass or in front of acrylic? I guess siliconing the two layers should make a seal, lm just worried about leaks at the bulkhead with it going through 2 separate layers.

Also, can you recommend where to buy a 20"x20" sheet?

Thanks for any help
Reply With Quote
Reply

Tags
bowfront, custom, exposed rock, tunze, wavebox


Posting Rules
You may not post new threads
You may not post replies
You may not post attachments
You may not edit your posts

BB code is On
Smilies are On
[IMG] code is On
HTML code is Off
Forum Jump


All times are GMT. The time now is 07:33 PM.


Powered by vBulletin® Version 3.7.3
Copyright ©2000 - 2024, Jelsoft Enterprises Ltd.