
|
|
|
|
|
#2
 06-27-2020, 07:09 AM
|
|||||
|
|||||
|
Thanks for the kind words guys. Sadly no tank yet, it's with the movers and scheduled for delivery on July 6th which has me both terrified and thrilled.
Here it is being built: 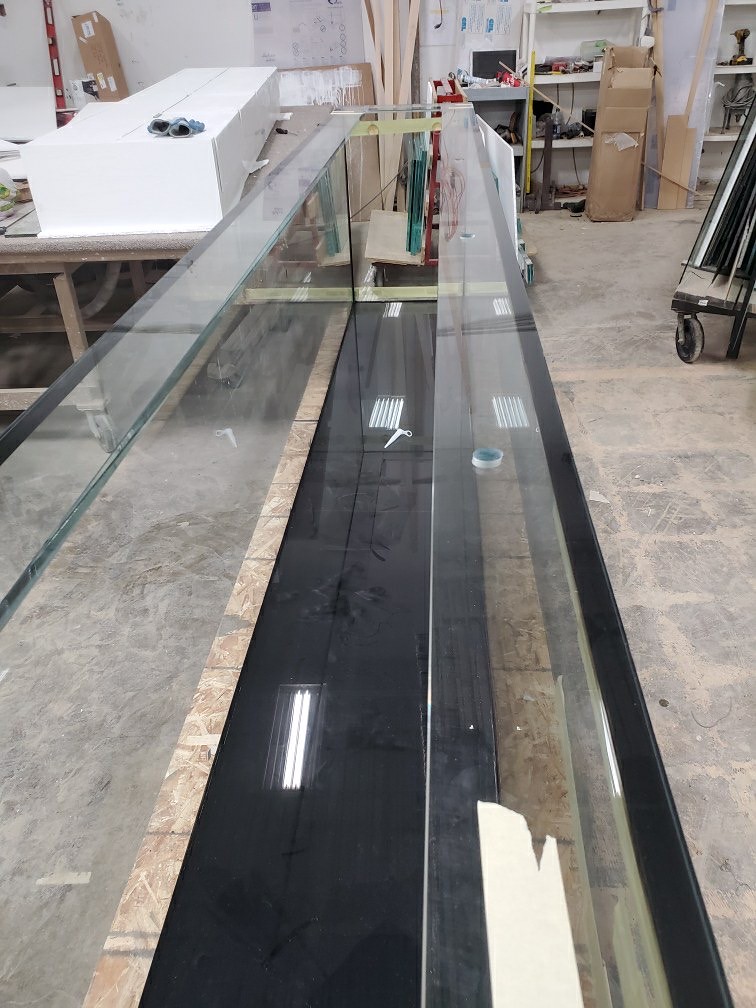  3/4 Sapphire all around. Overflow on one side with three 1.5 bulkheads, and two 1" return holes on the other. We put holes along the top back brace to allow for 4-6 gyre to be positioned along the back wall. I plan on putting 2 MP60s and 2 MP40s on the sides. Since the tank sits almost against the wall I needed to make room for the Gyre magnets and a way to hide all the cables. I put together some recess boxes:  Here are all four done:  Each has a hole in the bottom so I can run cables down below the tank.  Here it is all mudded and painted: 
__________________
__________________ 125 gallon 6', 33 gallon sump \ refugium 
|
|
#3
06-29-2020, 06:00 AM
|
|||||
|
|||||
|
Now this...this I must follow
__________________
Current System 75 Gal with 30 Gal Sump Reef Past Tanks 60 Gallon True Cube 30 Gallon Breeder 165 Eurobraced Starfire Custom 10 Gallon Softy Tank(My First Tank)
|
|
#4
06-30-2020, 12:06 AM
|
|||||
|
|||||
|
Well, small set back...
I put a level on the beams after the construction and everything looked pretty good. Not perfect, but totally passable for standard construction. It was kind of nagging me in the back my mind for a couple months though and it occurred to me I had a laser level. So I shot a line 5 inches above the beams and measured down. Well I'm glad I did. It turns out over the span of 16 feet a tiny bit out of level translates into almost 1/2 of an inch, with more than 1/4" racking corner to corner. So that sucked. Not wanting to try and bandaid it with foam I decided to bite the bullet and redo the top. Before I leveled it, I wanted to put as much weight on it as I could to ensure I didn't get much settling. 9 bins of water and 1500 pounds later; I'm pretty sure my neighbors thought I was nuts as I filled these with my garden hose. 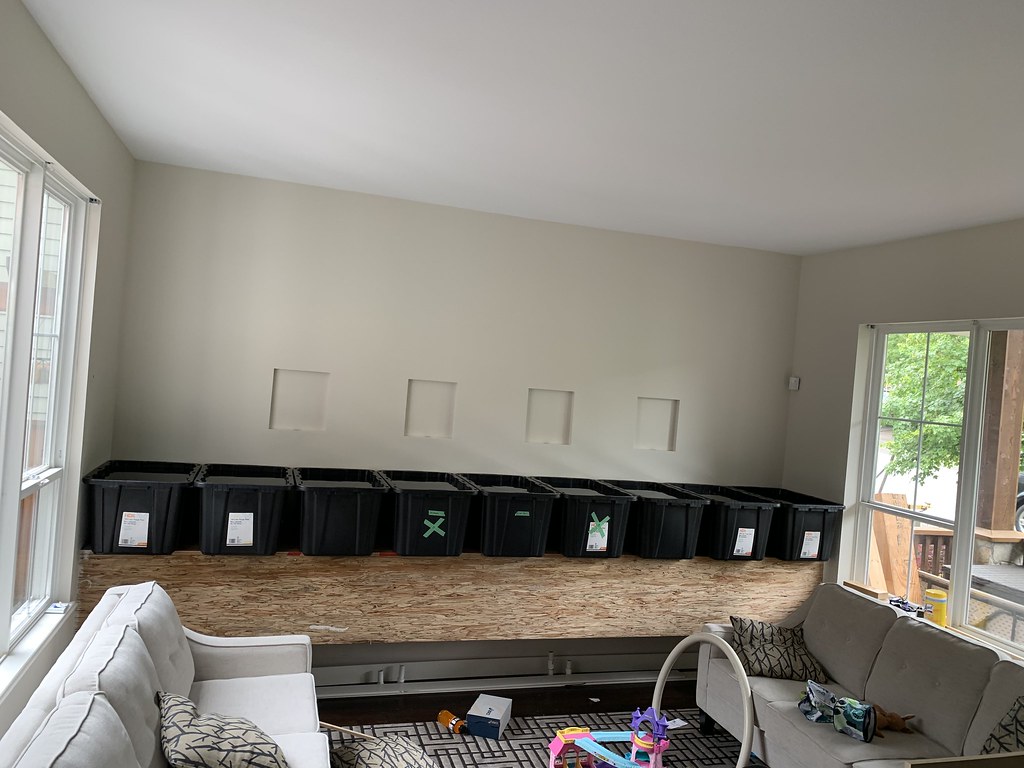 A week later, off with the plywood, and of course it had to be glued   Tip: if you ever have to remove PL glue, a heatgun turns it soft enough to easily scrape it right off but use a chemical respirator, I did half of it without one and paid dearly that night. Now to shim it, I have a planner so I made a jig to plane 1x6s down into long wedges. I ended up making eight 4 foot wedges which where about 1/8" shorter on one side. It was tedious as hell but worked well. Here they're installed: 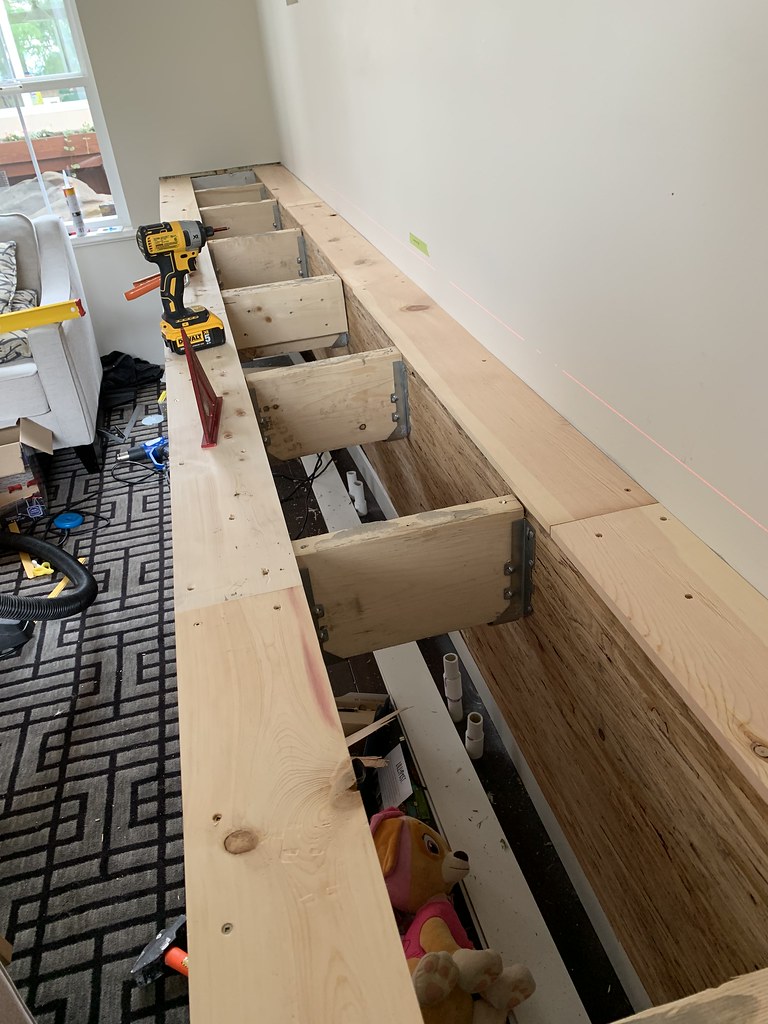 Grabbed a nice finished birch 3/4 plywood from Windsor and proceed to glue it down only to realize I only had about half the amount of glue I need. That was proceeded by a frantic trip to the hardware store and a ton of clamps to get the curing glue flat. In the end it turned out perfect, less than 1/64 from end to end.  Putting me right back to waiting for the tank
__________________
__________________ 125 gallon 6', 33 gallon sump \ refugium
|
|
#5
06-30-2020, 06:40 AM
|
||||
|
||||
|
Wow already a roller coaster and the tank hasn't arrived!! Good for you man perusing your passion and an understanding wife LOL. I see you used PoCo building supplies! We must be near neighbours I"m in Citadel heights, best of luck going forward.
__________________
220Gal Dining room build complete! no bucket or barrel water changes!!!
|
|
#7
07-01-2020, 03:19 AM
|
|||||
|
|||||
|
Quote:
Time to start thinking about the fish room, I have been putting it off for a while. Here is the basic layout I have so far:  So the idea is the Frag tank and Refugium will overflow into the main sump. If I have enough flow I will tee off the return line otherwise it will be a separate pump. Sadly I'm dealing with 16' of head pressure back to the display. I will run the RODI unit into the top of the Salt container and the RO Tank, each having there own solenoids and float valves. I may even plumb a drain at the top of each tank too in case they fail. The RO Tank will be used for top off to the sump and quarantine tanks. I liked the idea of having lots of quarantine tanks, but I haven't decided yet how I'm going to plumb them. Part of me wants to add drain holes to the sewer on each and a filling pipe from the sump so I can easily empty the quarantine and refill it with tank water. I have all the tanks except the four 20G quarantines. Here is the beast for salt water:  Any ideas are welcome as I haven't fully committed to this yet.
__________________
__________________ 125 gallon 6', 33 gallon sump \ refugium
|
|
#8
07-01-2020, 03:23 AM
|
|||||
|
|||||
|
Oh and this just arrived:

__________________
__________________ 125 gallon 6', 33 gallon sump \ refugium
|


 Hybrid Mode
