
|
|
|
#61
 12-03-2006, 06:55 PM
|
|||||
|
|||||
|
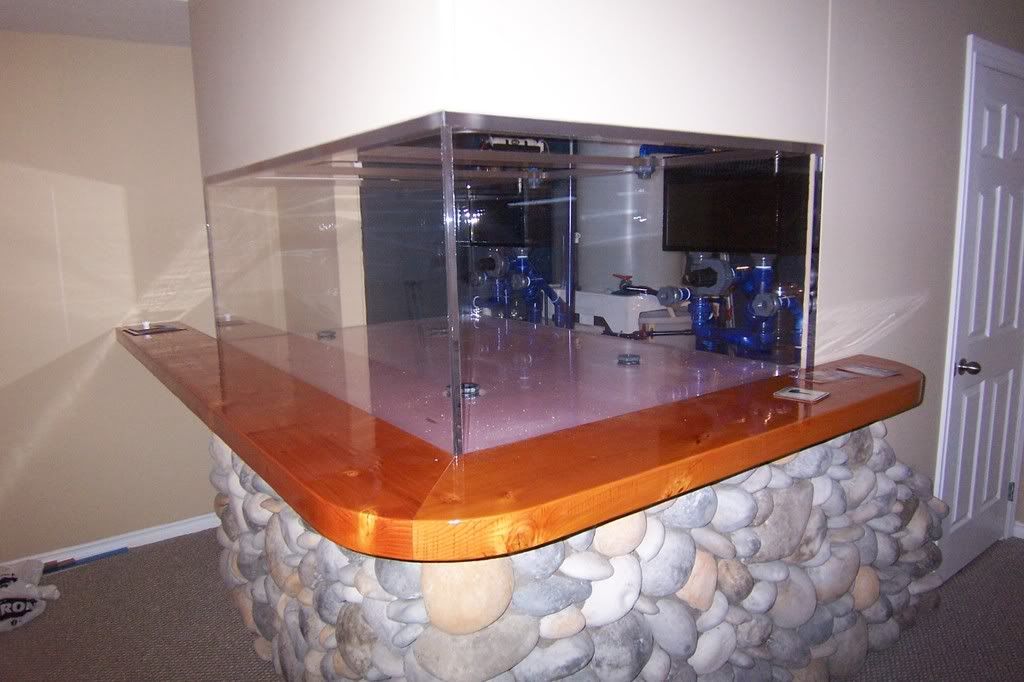
The outside of the tank is really coming together now. The artificial stone has been applied to the lower portion, below the bar. This gives the bar that "floating" appearance that I was hoping for.
I used rounded "stream" stones as I hoped they give the impression of being rounded by water. They actually had a simulated coral stone, which was kind of tempting, but it only came in rectangular bricks...which I didn't like. For anyone thinking of doing this, it will cost more than you think. Money can be saved by doing the work yourself, or choosing non-round material. The trouble with round stones is that you don't want to cut and chisel much because you loose the rounded look. That means a lot of picking, choosing, planning to ensure to get a nice balanced look. Also, if you want the stones fitting tightly, you'll use more stones than estimated. Overall, I'm extremely pleased with the result. It's really coming together now. 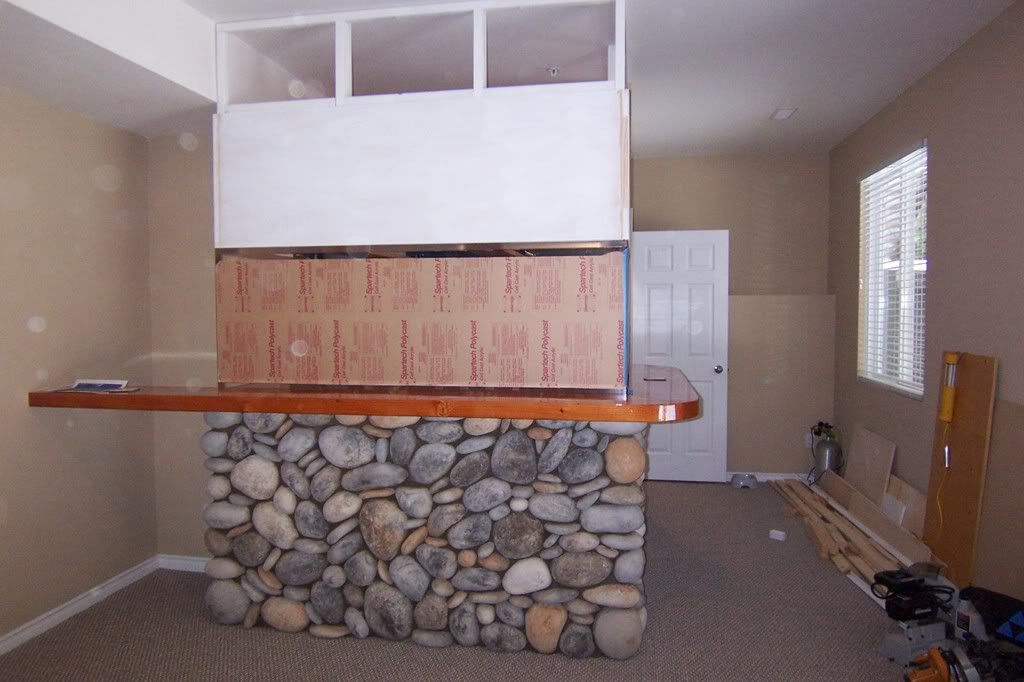 (sorry about the backscatter on the photo, it was a dirty job and I had just completed vaccuuming...) 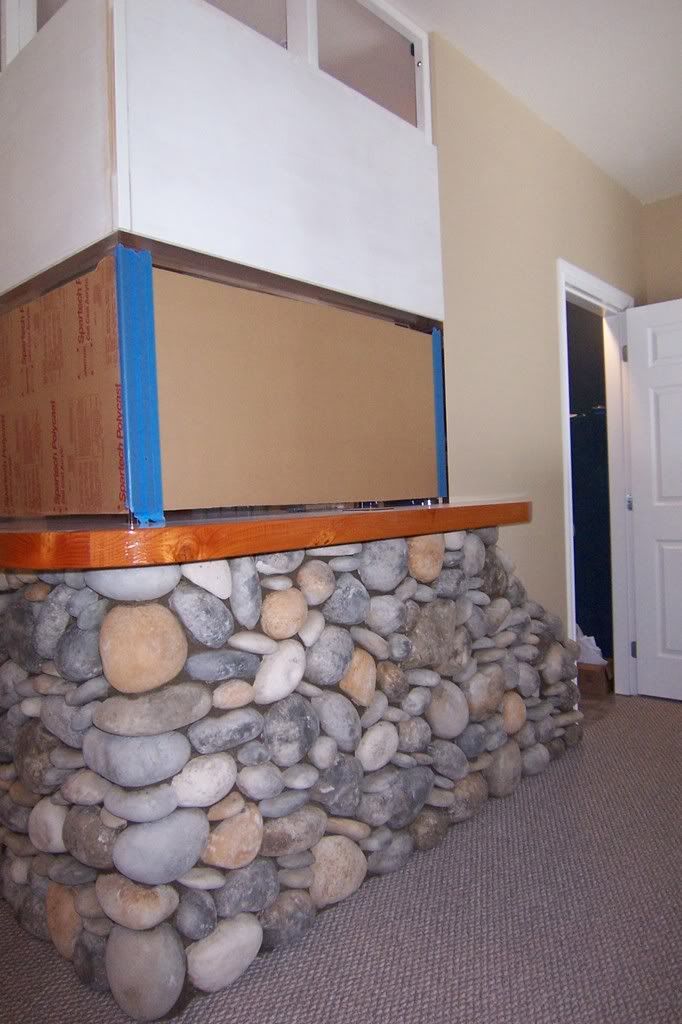 
|
|
#62
12-03-2006, 07:26 PM
|
|||||
|
|||||
|
thats crazy. very very nice work. i love the rock work. i see what you mean the bar seems to be floating. can hardly wait for the open house when it is done
|
|
#63
12-14-2006, 05:03 AM
|
|||||
|
|||||
|
Wow...it took me so long to do this that I almost fell off page 1!
The above tank doors/walls are completed. I'm not completely happy with the result, though. I'm willing to bet that I tear that top section out in a few years and try something else. I was trying to create an "in wall" look, while still having something that I could open. I think I succeeded, but they just look so plain compared to the stone work below. Oh well. 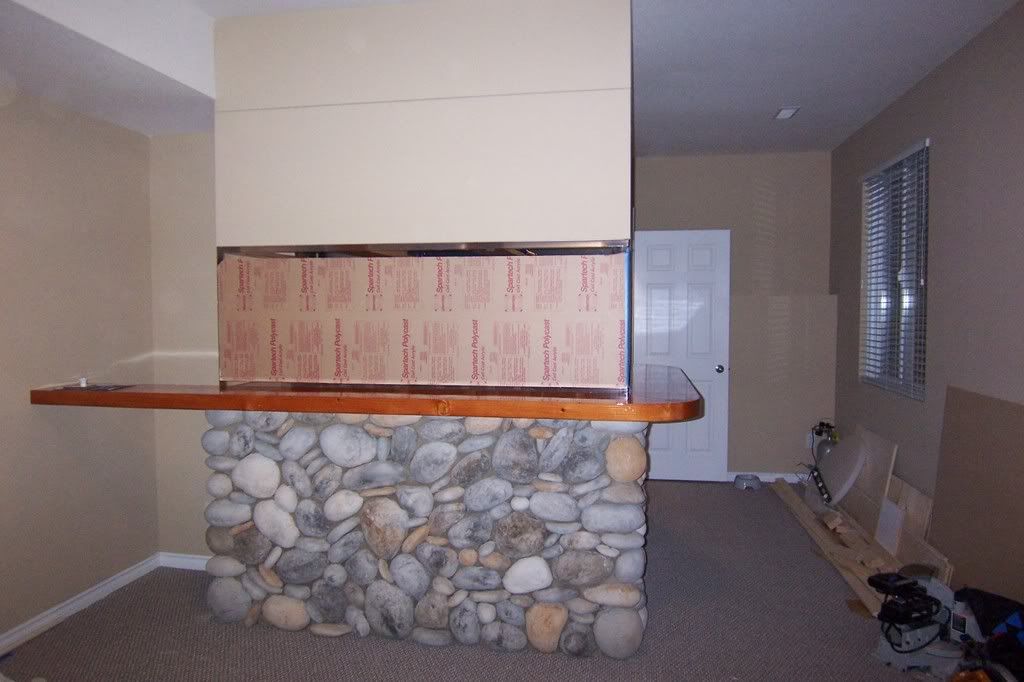
|
|
#64
12-14-2006, 05:06 AM
|
|||||
|
|||||
|
Meanwhile, behind the scenes...I finally plumbed up the SW mixer tank. The only tricky part of doing this was to create rigid plumbing that could be disconnected in just the right parts to enable the mixer to be moved around on it's wheels.
One valve directs back into the mixer (for mixing)...the other directs SW into the 2nd sump. 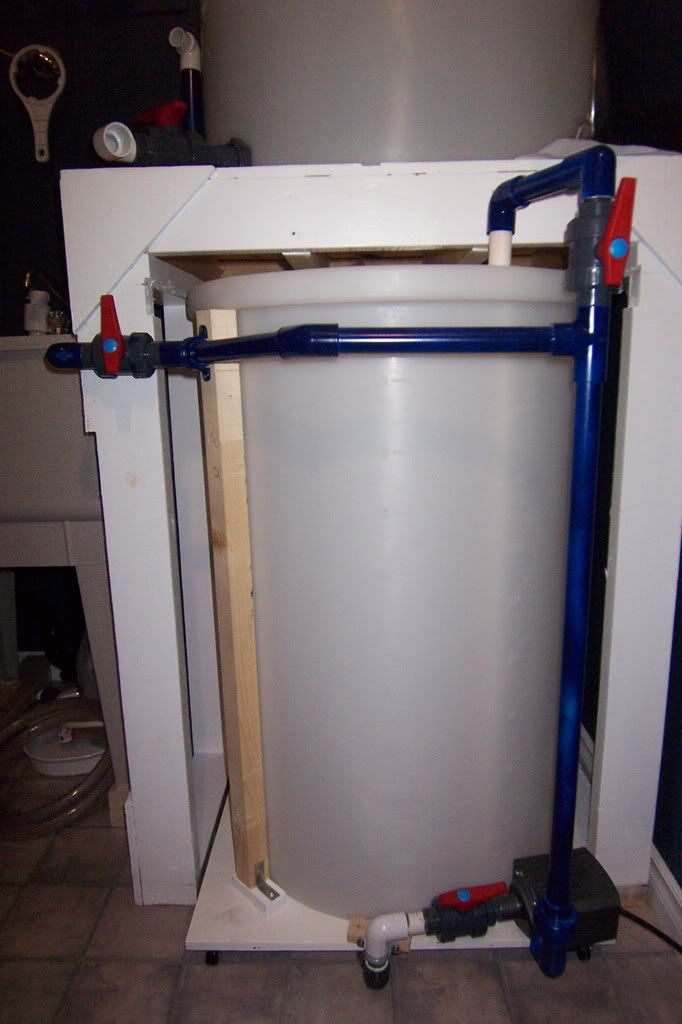
|
|
#65
12-14-2006, 06:05 AM
|
|||||
|
|||||
|
Look great Brad. Not sure what you could do to jazz up the upper section but I don't think you really need to. Hey you now I could have sold you a used Chemical mixer you didn't have to make your own. that is sweet you should sell the design.
Oh BTW I have a cheap router for sale I hear you may be looking for one LOL J
|
|
#67
12-17-2006, 04:02 PM
|
|||||
|
|||||
|
Now that the external construction is basically finished, I figured that it was safe to unwrap! That's a big improvement. Planned rockwork will hide most of the plumbing that you can see through the back wall of the tank.
 Last edited by untamed; 12-17-2006 at 04:12 PM.
|
|
#68
12-17-2006, 04:09 PM
|
|||||
|
|||||
|
I've done a little work on the sump. The skimmer is in place. I built a small acrylic shelf and set the Ca Reactor down on it. The sump shelf sits just above water line.
That's a PM622D reactor and G6 Skimmer. You can't see the 2nd stage of the reactor in the photo because it is hiding behind the skimmer. Basically...I'm killing time waiting for my lights to arrive. 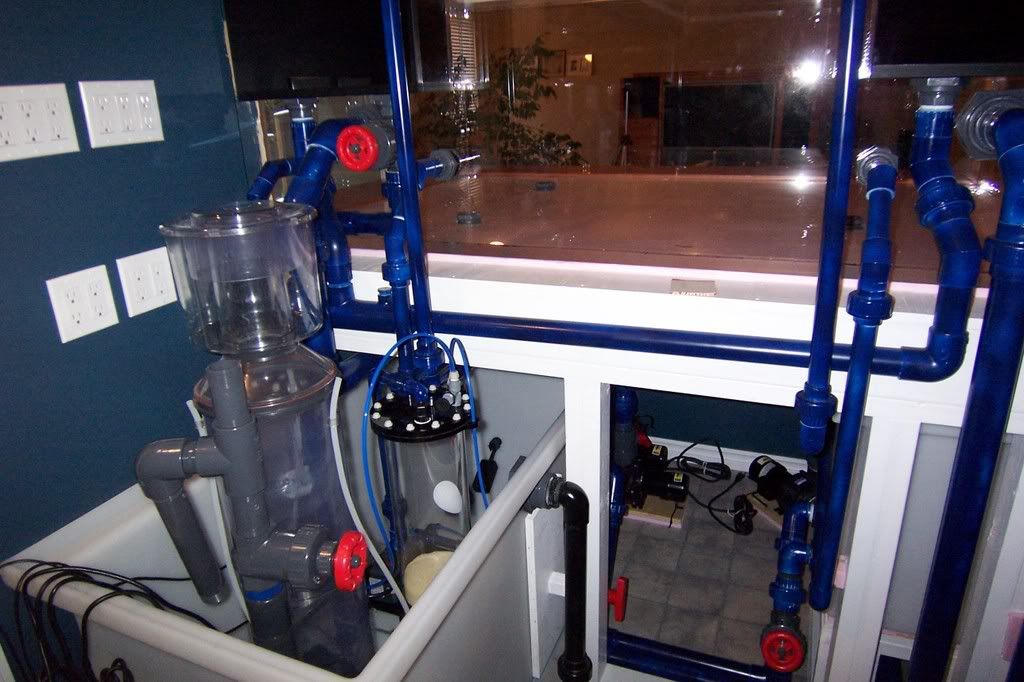
|
|
#70
12-17-2006, 05:33 PM
|
|||||
|
|||||
|
Everytime I look again at your pictures think it's going to fantastic with the front to back depth you have.
Know there's others out there but reminded of Fudge's or http://www.oregonreef.com/sub_aquascaping.htm .
|


 Linear Mode

