
|
|
|
#61
 10-27-2011, 05:18 AM
|
|||||
|
|||||
|
The finishing carpenter was there prepping the enclosure today. Site meeting with the builder, the finisher and Kevin on Friday to get exact final measures to place the glass order.
Dining room view: 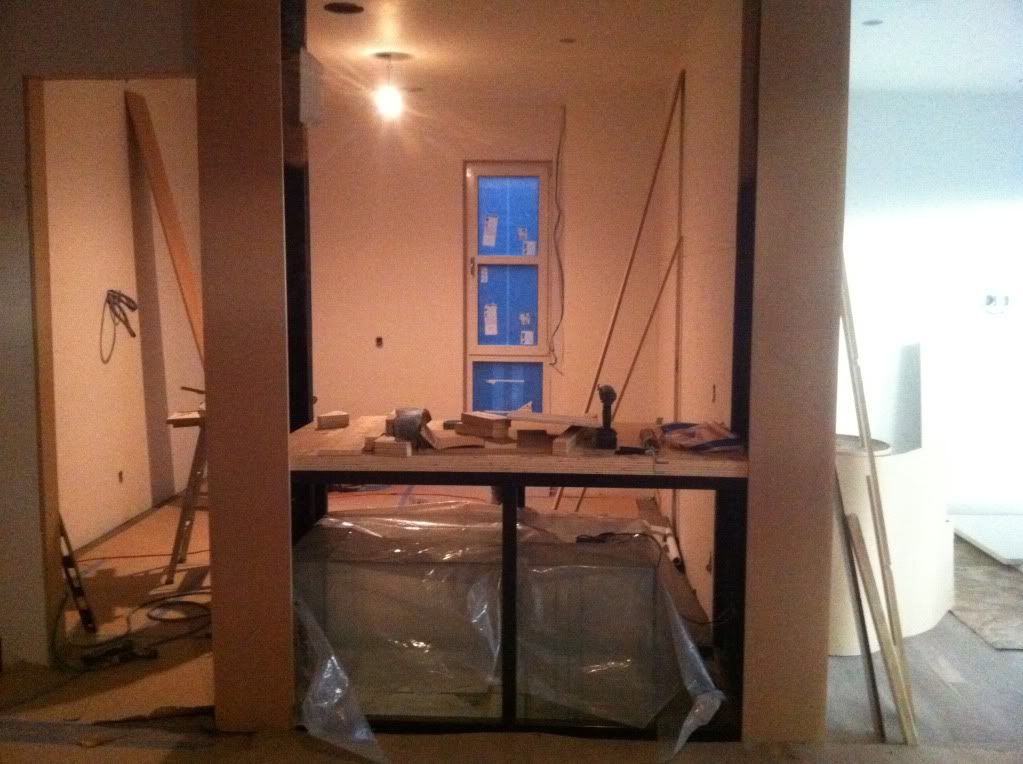 We had to replace the original top sheet of plywood on top of the stand with a much thicker 3 inch piece of wood in order to have something to drill the door frames in to. Also, the MDF columns on either side needed to be wide enough to cover the steel legs of the stand in order for there to be enough clearance to attach the door hinges. In order to keep this view symmetrical, it means that about 3 inches of the right side and 5 inches of the left side of the tank will actually be covered up. Office side view: 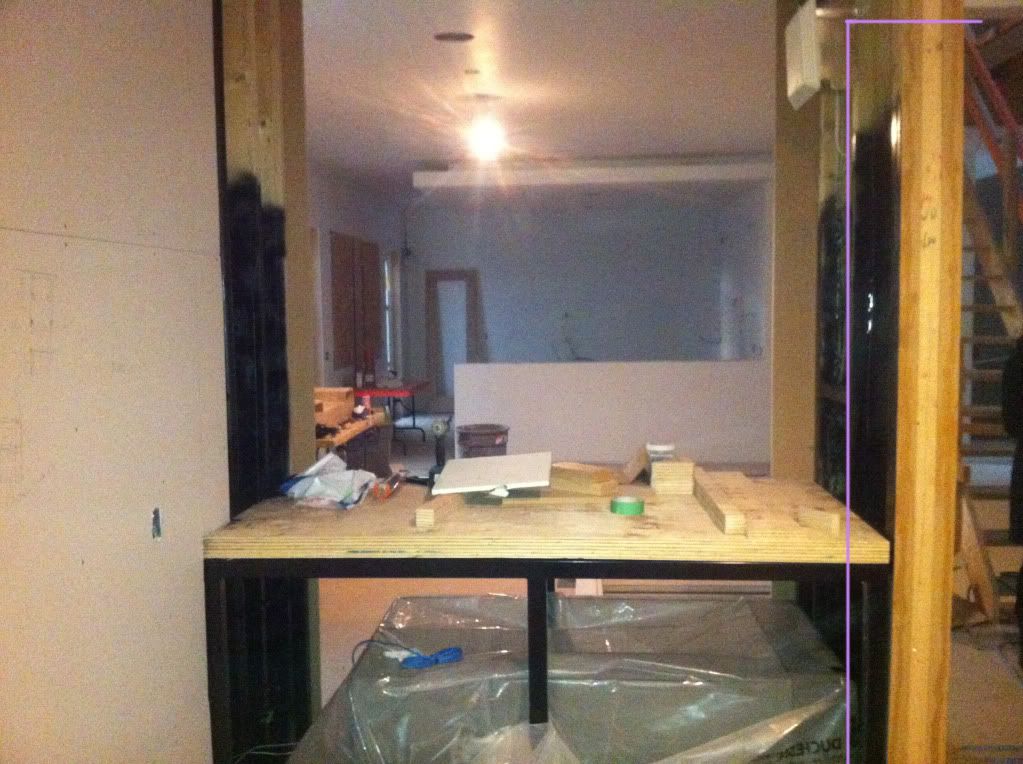 When I stopped by tonight, the finisher had also installed an MDF panel on the office side where the purple line is. It matched the front of the tank, but would have meant the tank couldn't have been installed without reducing it's length by 5 or 6 inches. I had him remove it (obviously), and we're redesigning the office side of the aquarium so that you'll be able to see 100% of the width of the tank. Depending on how the finished enclosure looks, I might also do cut-outs on the front side so less glass is hidden. 
|
|
#62
10-27-2011, 03:11 PM
|
||||
|
||||
|
Love seeing this coming together! What were the biggest hurdles in explaining what you wanted to accomplish to the builder? I am in the process of building a house around a tank and would love to know before I run into the same issues.
__________________
Mark...  290g Peninsula Display, 425g total volume. Setup Jan 2013.
|
|
#63
10-27-2011, 03:50 PM
|
|||||
|
|||||
|
Wow that is a thick piece of plywood! Certainly nothing I've ever seen at home depot etc.. you don't even need support in the middle with that thing lol.
Keep crackin' the whip I like what I'm seeing!
|
|
#64
10-27-2011, 07:04 PM
|
|||||
|
|||||
|
Quote:
I've approached it from the perspective of letting them know what my 'givens' are: things that absolutely must be adhered to from a functional perspective, like size of access points, clearances, etc. The outward design I don't care so much about and left that up to the guy who designed the house, so I just said as long as the givens are respected and built around, the finished product from a cabinetry point of view can be whatever it needs to be. I've been doing it from the start, like after I explained it, the plumber and electrician knew why I needed the ability to bring water from the basement up to the tank cabinet, but I was the only one who ever really understood how critical that part of the design was to the tank functioning at all. So I just had them install the allowances I would need later on to make it all work the way I want. For code reasons they weren't able to run the electrical cords that will connect the pump and auto-top off system to the controller under the tank, so I had them install two empty conduits that run through the floor that are wide enough for me to thread cords and tubing through myself when it's time to set it all up. Quote:
Also, Doug mentioned to me last night that MDF is a dangerous choice for building material in a tank enclosure. We had talked about that on site months ago and I was pretty sure we had that issue addressed, but to be on the safe side I checked with the carpenter today. They're actually not using MDF, it's an MDF like product called Medex which is more water resistant than MDF (and formaldehyde free, which is a definite plus around a tank!). All the Medex cracks/seams/joints are going to be caulked and sealed and then we're going to apply 2 layers of a 2 part exterior grade flexible epoxy coating. It's used in commercial and industrial applications and is also used as a liner material in swimming pools. The company doing the painting deals with marine aquariums all the time so I think it will be OK. It's more expensive than using something a little more water resistant like birch or paintable plywood, but the painted texture of MDF/Medex is a better match to everything else that's going on in the house.
|
|
#65
10-28-2011, 07:33 PM
|
|||||
|
|||||
|
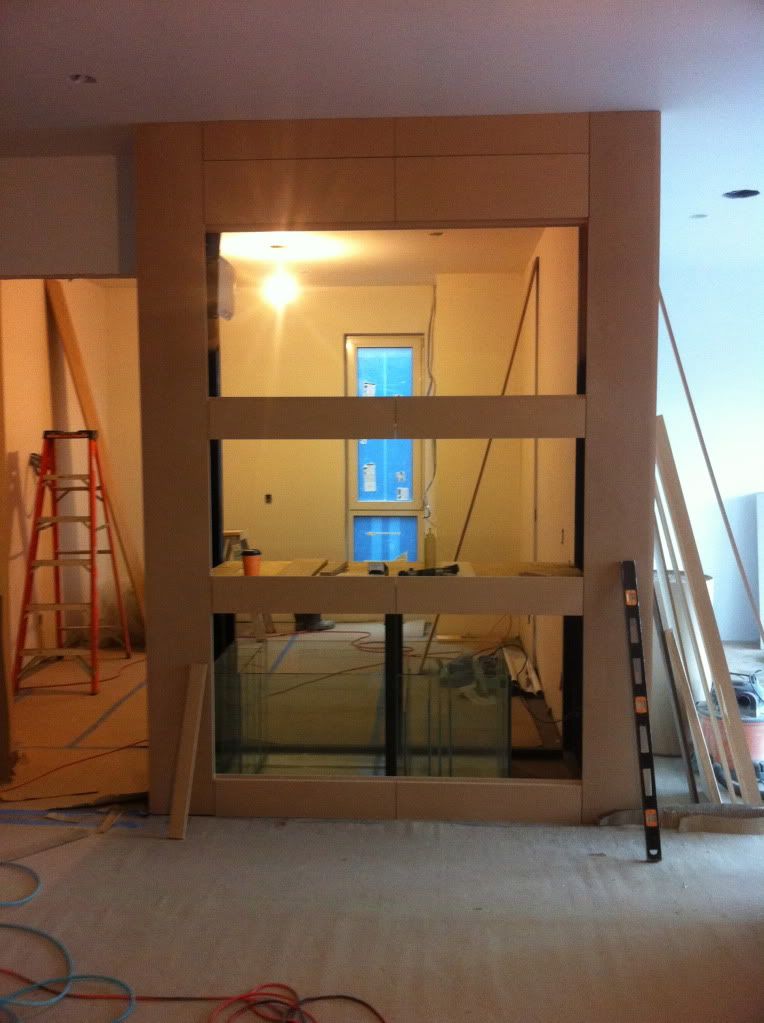
Tank enclosure is coming along nicely! Had a meeting with everyone today for final measurements so we can place the glass order. Gained an inch in height, the tanks going to be 27 inches from top to bottom now. I'm probably going to put a 2 inch layer of sand in, so it will be 25 inches from the top of the water.
|
|
#66
10-29-2011, 01:55 AM
|
|||||
|
|||||
|
Rock-on man love it!
You sure you don't want to have them do a solid sheet of plywood and then carve those lines with a crappy utility knife?
|
|
#67
10-29-2011, 05:40 AM
|
|||||
|
|||||
|
Quote:
|
|
#68
11-02-2011, 06:42 PM
|
|||||
|
|||||
|
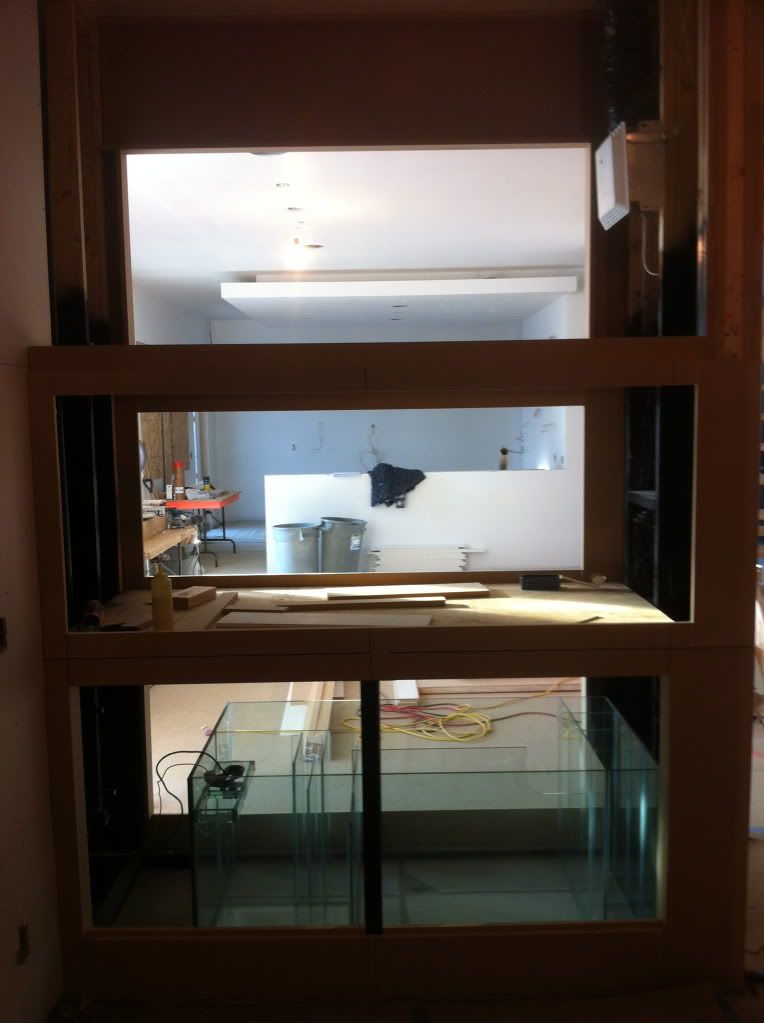
Crappy dim picture of the backside. There's more viewable area on this side, as we didn't need to put two wide columns on either side for aesthetic purposes. The frame on this side is one solid piece that's been screwed in, so we'll be able to remove it when the tank is ready for install.
|
|
#69
11-02-2011, 10:38 PM
|
|||||
|
|||||
|
Did a quick sketch of the tank. It's not even remotely to scale, but here's how the drains/overflows, returns are going to work.
 Two overflow boxes on either side of the tank, each with two holes. The left side is directly above the return pump in the cabinet, so the holes will be a drain and the return. The right side will just be a drain and an emergency drain. 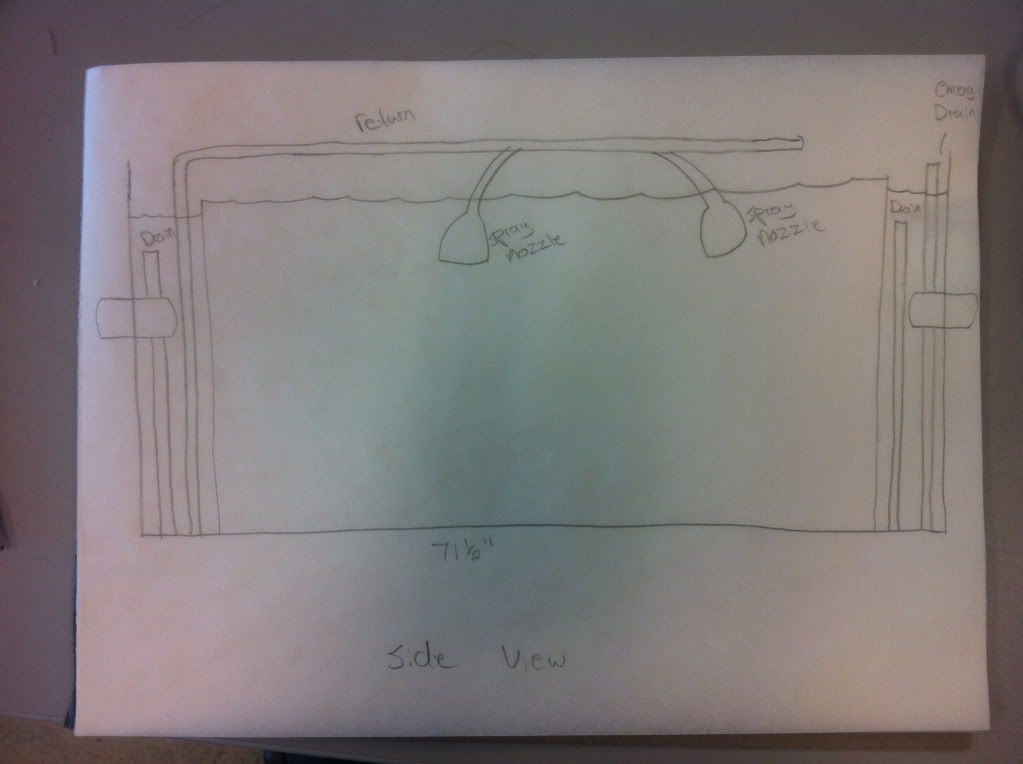 The return will come up above the overflow box and run over the centre of the tank. Since my canopy is completely enclosed and I'm likely going with modular LED lighting, the centre return line shouldn't (I hope) interfere with the lighting. This design also reduces the number of holes I need in my tank and thus the size of the overflow boxes, and it gives me the ability to distribute flow towards the centre of the tank, or to specific dead spots that the vortech's might create. I will also need 2 return drains and an emergency drain to become completely blocked before I have a flood. Not sure if I should go with 4 MP40's or 2 MP40's and 2 MP60's though, anyone have any thoughts?
|
|
#70
11-05-2011, 01:03 AM
|
|||||
|
|||||
|
I can't believe I missed this build until now, absolutely stunning so far, I'm stoked to see it filled with water!
Have you finalized on internal overflows yet? My biggest relief on my new tank was finally getting rid of my little bastard of an internal overflow. They are bulky, take up space and are a nightmare when it comes to maintenance (leaky bulk heads, fish overflowing in, ect...). Another major problem you run into with side internals is that they block valuable aquascape and swimming room. In the amendment below the red areas are places you wont see when you look at the tank, yellow is area of high flow and blue is your flow pattern.  By having your internals placed as such your loosing a whack load of valuable real-estate, another problem with placing them there is the final placement of your MP40W's. When you confine the MP40W's to a small water foot print (with the overflow box and the rear/front tank wall on either side) it restricts the amount of water that can be drawn into the pump decreasing there efficiency. If your set on internals you could do this:  Or if you really want to shake it up and go external you could coast to coast it like this:  I will post on the radions after I eat supper, quick overview though: GET THEM!
|


 Linear Mode

