Canreef Aquatics Bulletin Board  

Go Back   Canreef Aquatics Bulletin Board > General > Tank Journal

Reply
 
Thread Tools Display Modes
  #41  
Old 03-28-2013, 07:38 PM
mrhasan's Avatar
mrhasan mrhasan is offline
Member
 
Join Date: Jun 2012
Location: Calgary
Posts: 2,893
mrhasan is on a distinguished road
Default

Quote:
Originally Posted by ensquire View Post
A3
Quote:
Originally Posted by Madreefer View Post
Second from the bottom. There should be a poll on this. BAHAHA J/K dont torture us.
Quote:
Originally Posted by Ram3500 View Post
I vote for a3 I think that looks sweet
Thanks for the suggestions. I guess I will have to stick to something similar to that
__________________

You wouldn't want to see my tank. I don't use fancy equipment and I am a noob
Reply With Quote
  #42  
Old 03-28-2013, 09:54 PM
Ram3500's Avatar
Ram3500 Ram3500 is offline
Han Solo
 
Join Date: Oct 2011
Location: Langley
Posts: 294
Ram3500 is an unknown quantity at this point
Default


I vote for a4
__________________
Keep calm and reef on
Tank Journal
Reply With Quote
  #43  
Old 03-30-2013, 01:55 AM
mrhasan's Avatar
mrhasan mrhasan is offline
Member
 
Join Date: Jun 2012
Location: Calgary
Posts: 2,893
mrhasan is on a distinguished road
Default

TANK IS IN!


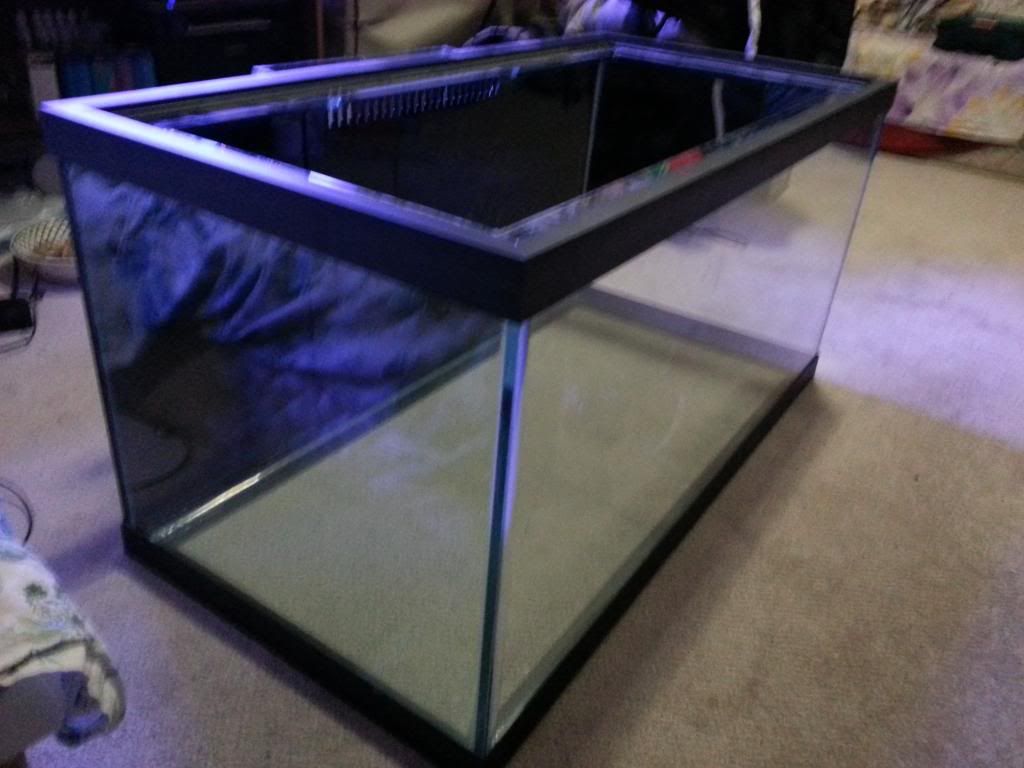
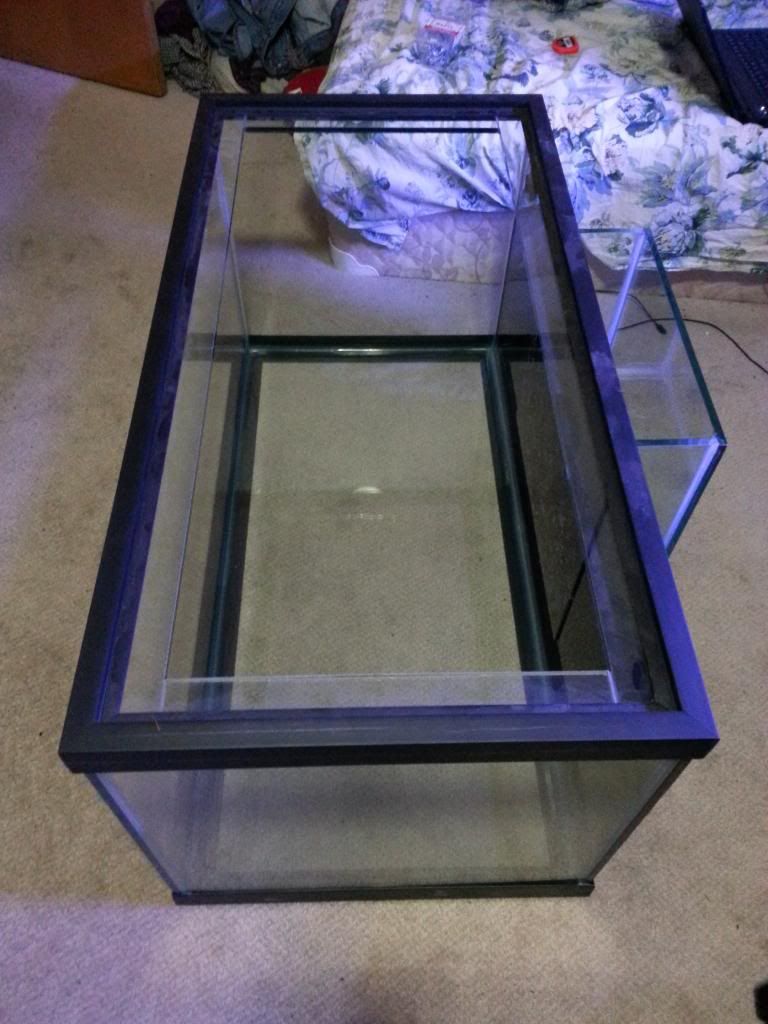
And made my own stand (needs some more pieces screwed but the drill machine ran out of battery and never knew it would take ages to charge!)


Anyway, since this is my first DIY stand, there are some faults and I was just wondering whether it will be of any problem:

1. The tank with rim is actually 40.5" and 20.5" but I made the stand as 40" and 20"; will that be any issue?

2. Some of the woods at the corner are not totally smooth and on same plane like this (in the bottom pic). Will that be any issue?


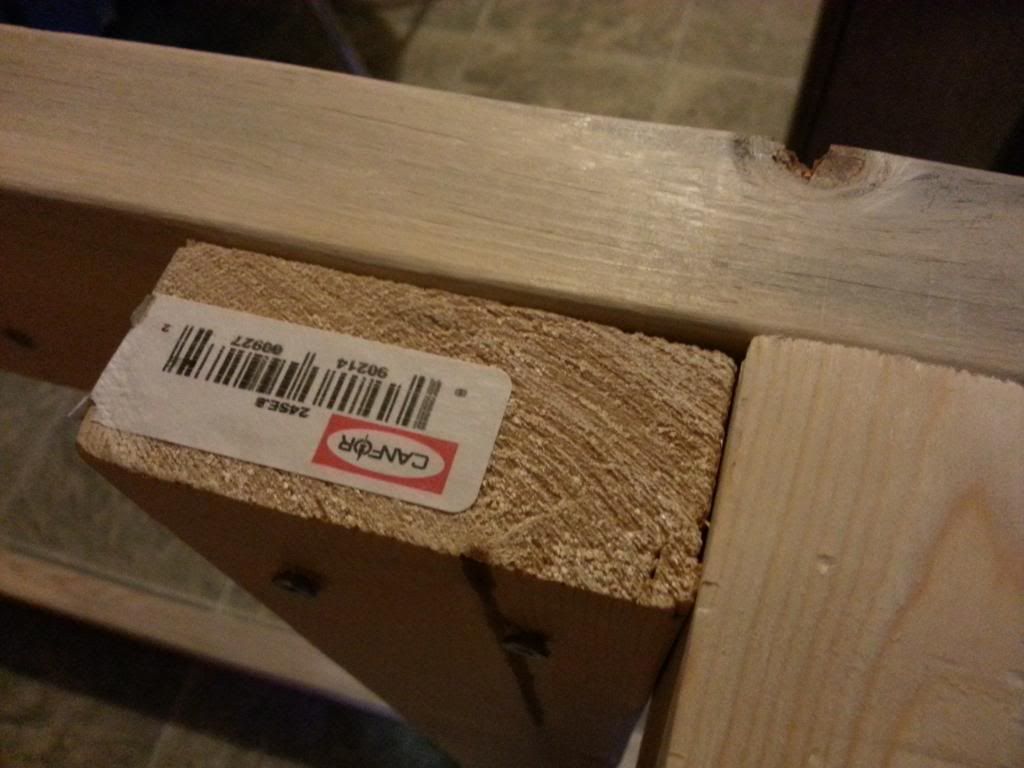
3. And what about this?


Hoping to get some insights from DIY gurus

Tomorrow is plumbing day.

Last (but not the least), I would like to thank Dave and Denny for their tremendous support and hours and hours of explaining stuffs. Really appreciate all the efforts And thanks to Matt (mattjoly I believe) for his insights too And ofcourse to those who have posted in this thread and will keep on posting, giving suggestions and flaming
__________________

You wouldn't want to see my tank. I don't use fancy equipment and I am a noob
Reply With Quote
  #44  
Old 03-30-2013, 09:33 PM
Ram3500's Avatar
Ram3500 Ram3500 is offline
Han Solo
 
Join Date: Oct 2011
Location: Langley
Posts: 294
Ram3500 is an unknown quantity at this point
Default

Is it still funny when your the only one laughing? Kirk vrs Gorn is a classic it reminded me of your aqua scape. Anyway are you planing on using a epoxy or somthing to hold your rocks together ? If I was starting from scratch I would . I was working on the rock today it all looked good and than I had a major rock slide making a few unwanted sps frags .
__________________
Keep calm and reef on
Tank Journal
Reply With Quote
  #45  
Old 03-31-2013, 03:34 AM
mrhasan's Avatar
mrhasan mrhasan is offline
Member
 
Join Date: Jun 2012
Location: Calgary
Posts: 2,893
mrhasan is on a distinguished road
Default

Quote:
Originally Posted by Ram3500 View Post
Is it still funny when your the only one laughing? Kirk vrs Gorn is a classic it reminded me of your aqua scape. Anyway are you planing on using a epoxy or somthing to hold your rocks together ? If I was starting from scratch I would . I was working on the rock today it all looked good and than I had a major rock slide making a few unwanted sps frags .
I am not planning to use any epoxy since if I want to reaquascape (which I will :P), it will be a PITA. Will just use the theory of center of mass to balance everything
__________________

You wouldn't want to see my tank. I don't use fancy equipment and I am a noob
Reply With Quote
  #46  
Old 04-01-2013, 05:12 AM
mrhasan's Avatar
mrhasan mrhasan is offline
Member
 
Join Date: Jun 2012
Location: Calgary
Posts: 2,893
mrhasan is on a distinguished road
Default

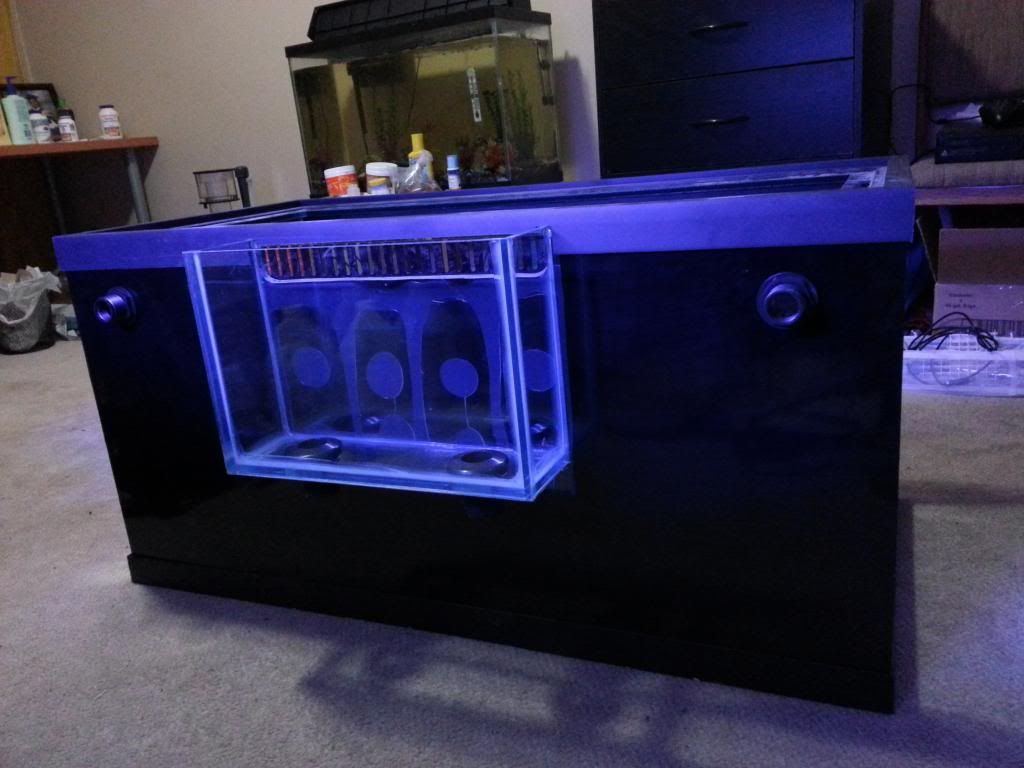
Time for some updates

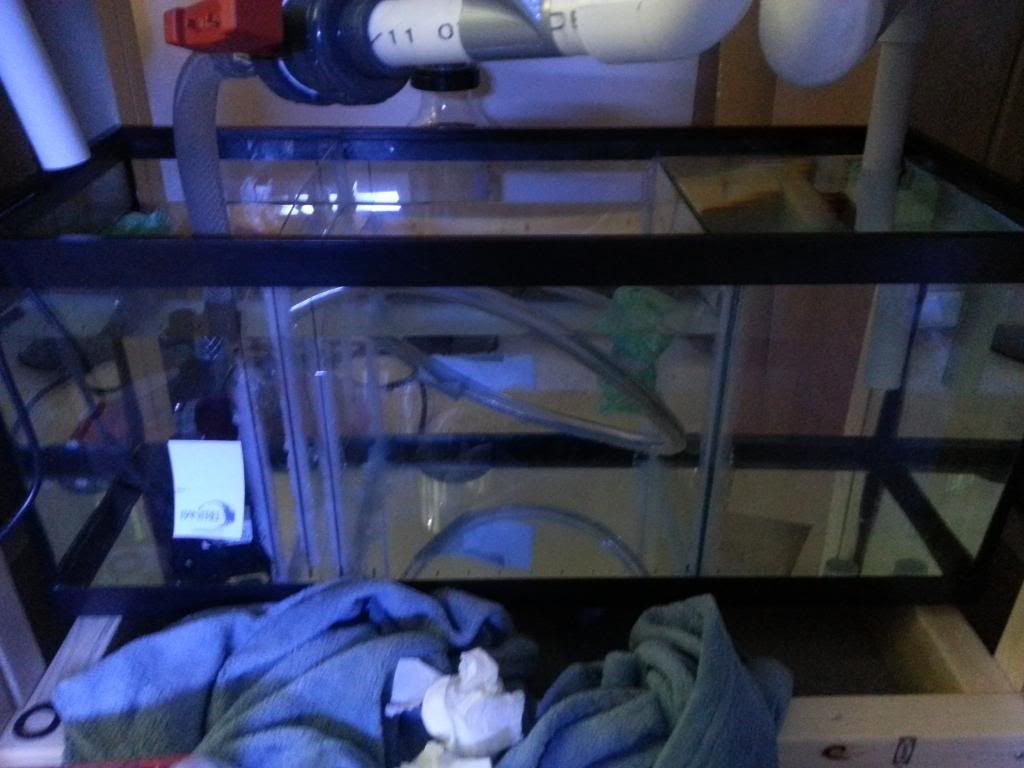
So yesterday (30th March, 2013), I made the stand a little more sturdy and posh and the outcome was this:


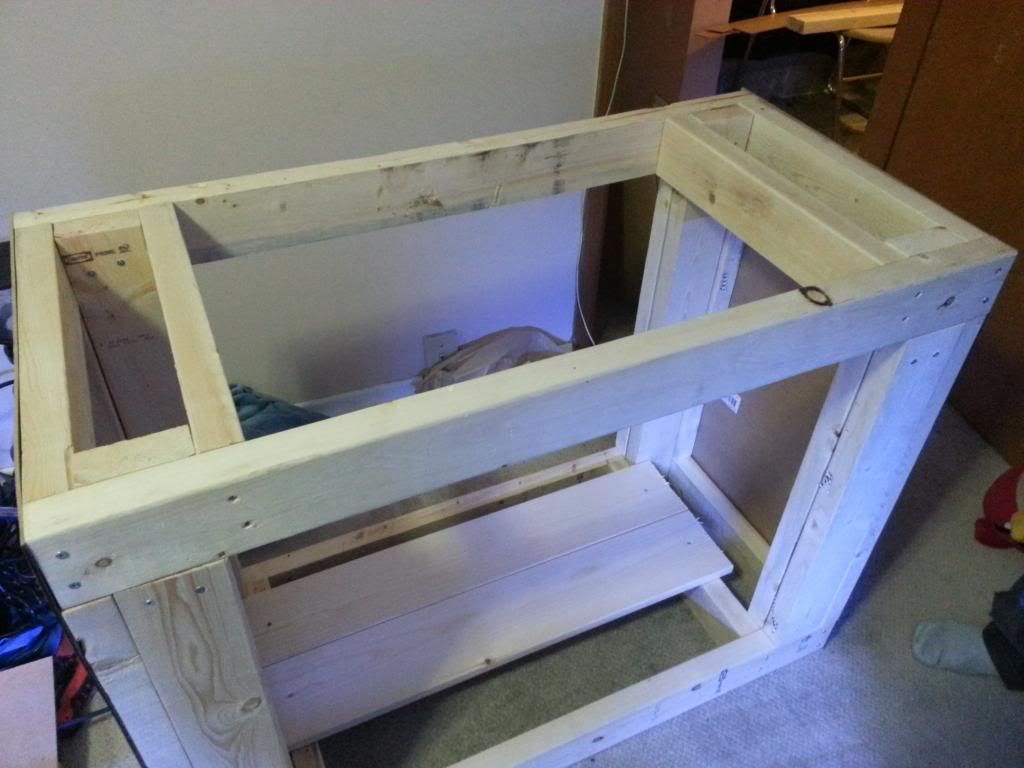
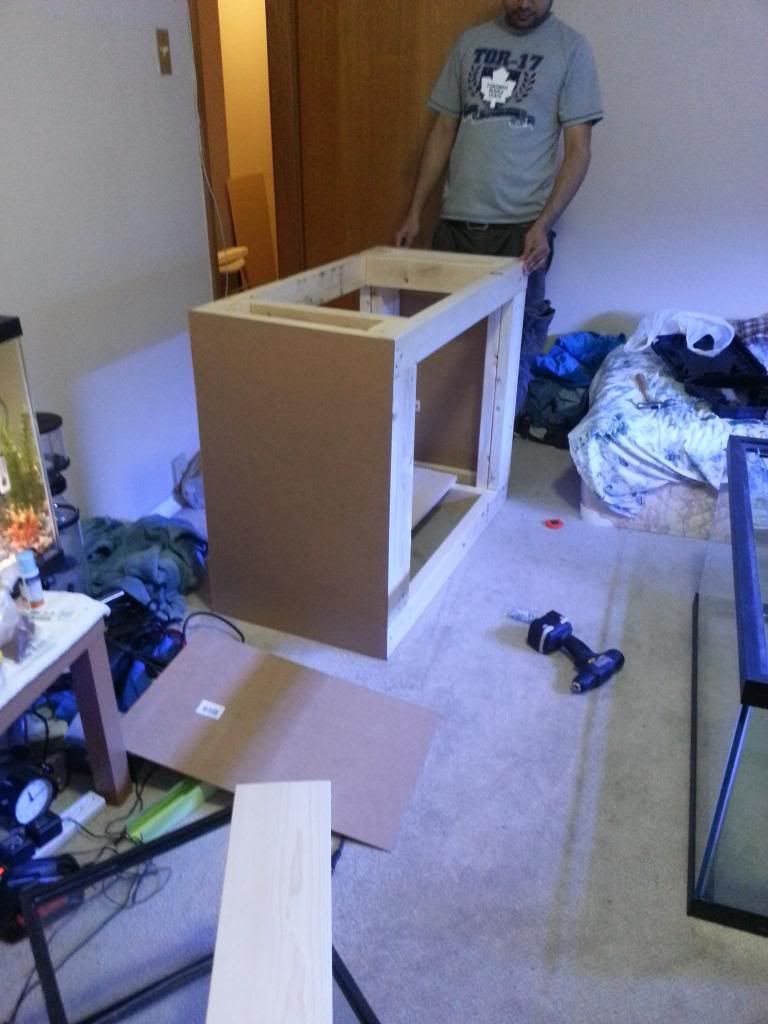
Will be putting doors infront once everything is together

Also got most of the plumbing parts from concept:


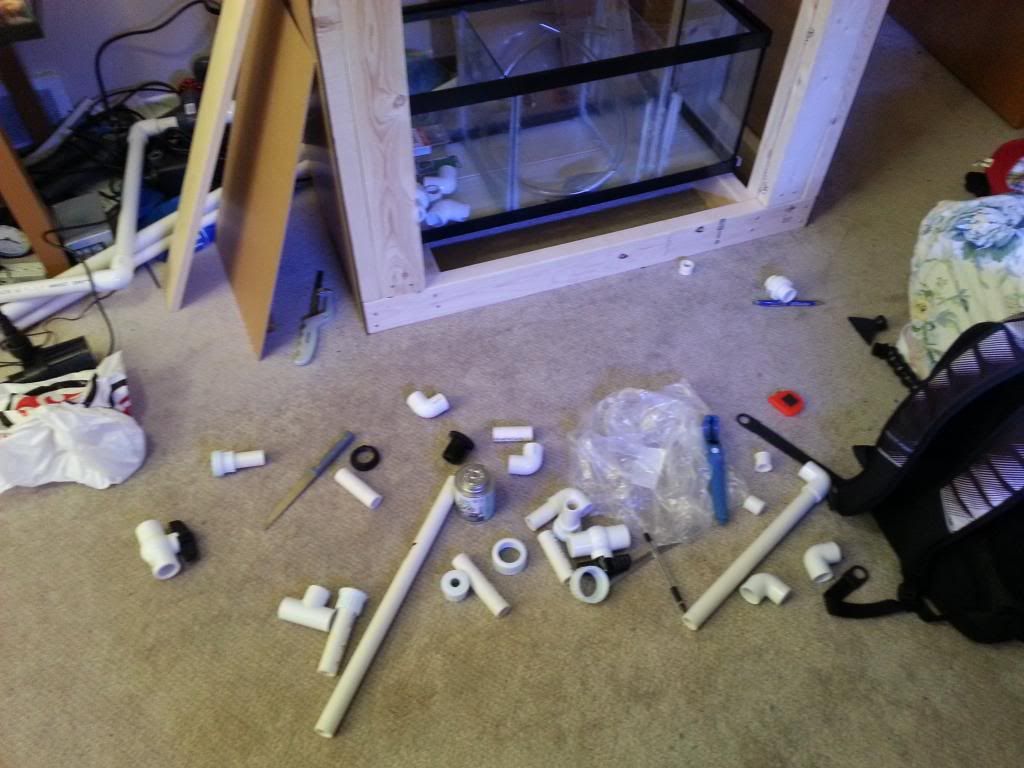
Was hold back yesterday since concept didn't have few of the parts needed so no more progress yesterday.

Today was a very very hectic day for me. From time to time, I do realize how essential owning a car is and today was no different. Took me 4+ hours to go here and there to grab the plumbing parts while, with a car, I could have done it within an hour. On the bright side, I got some exercise

Anyway, I have finally completed the plumbing today Since this was my first plumbing of any sort; I was more of tiring than challenging. Dry fitting and measuring was the hardest part since I lacked the muscle to take those off so had to hammer them to loosen up (without breaking). But overall, it was fun So here's the plumbing:


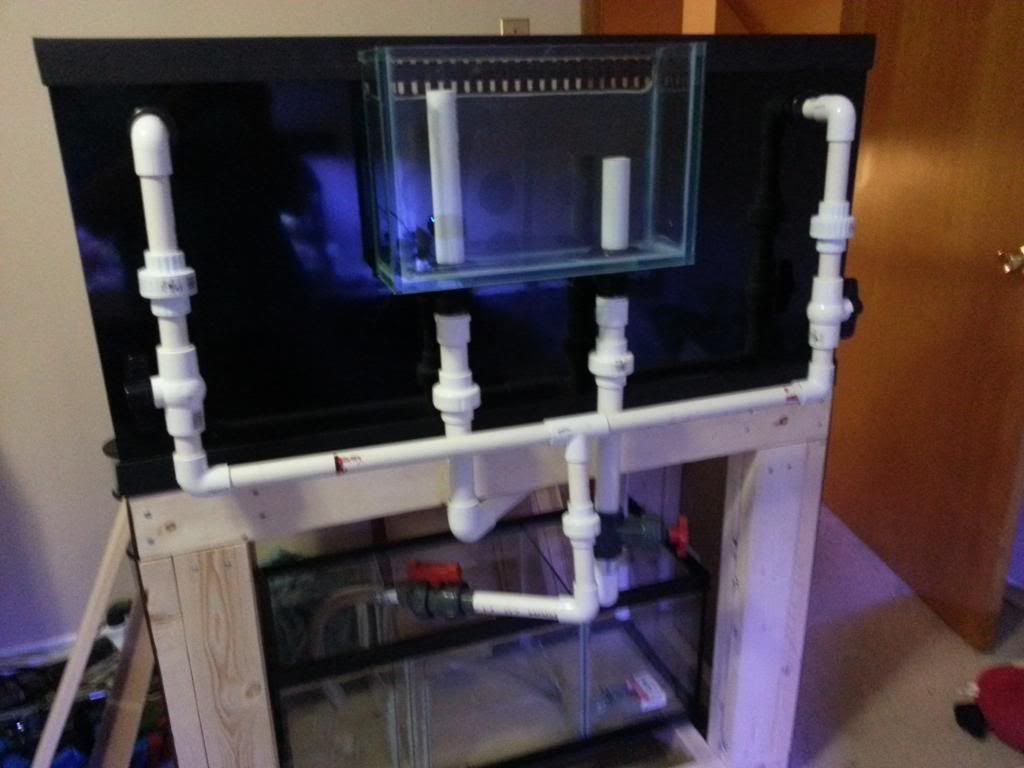
Not anything fancy but I really liked my own work

And it livesssssssssssssssssssssssss!


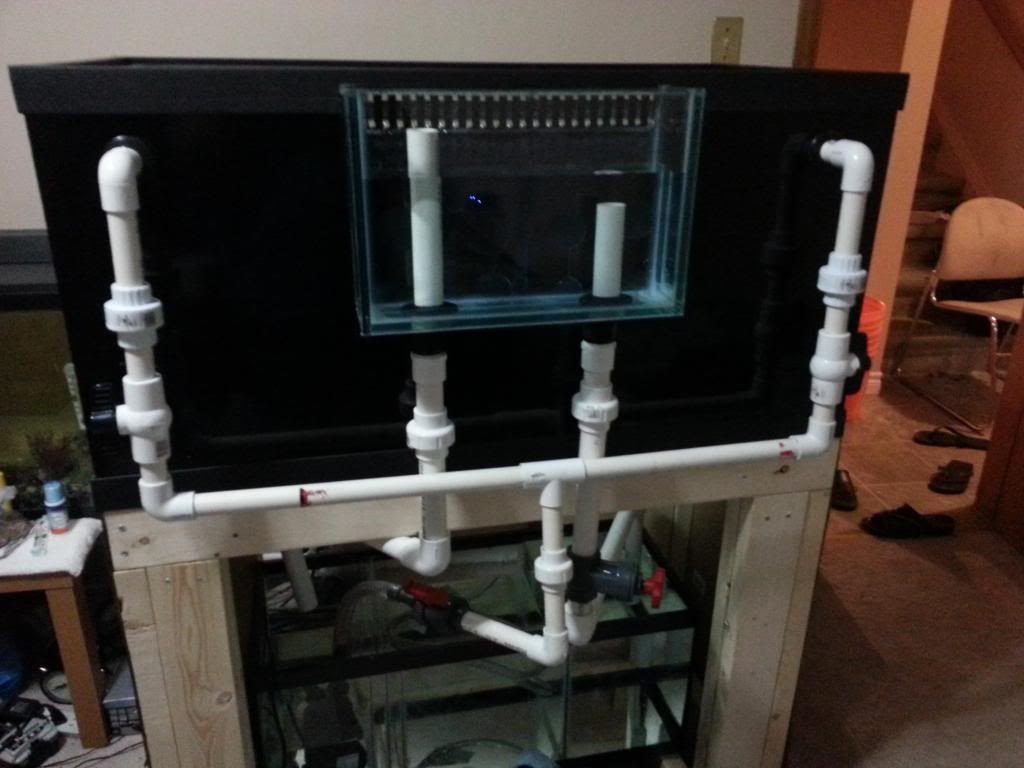
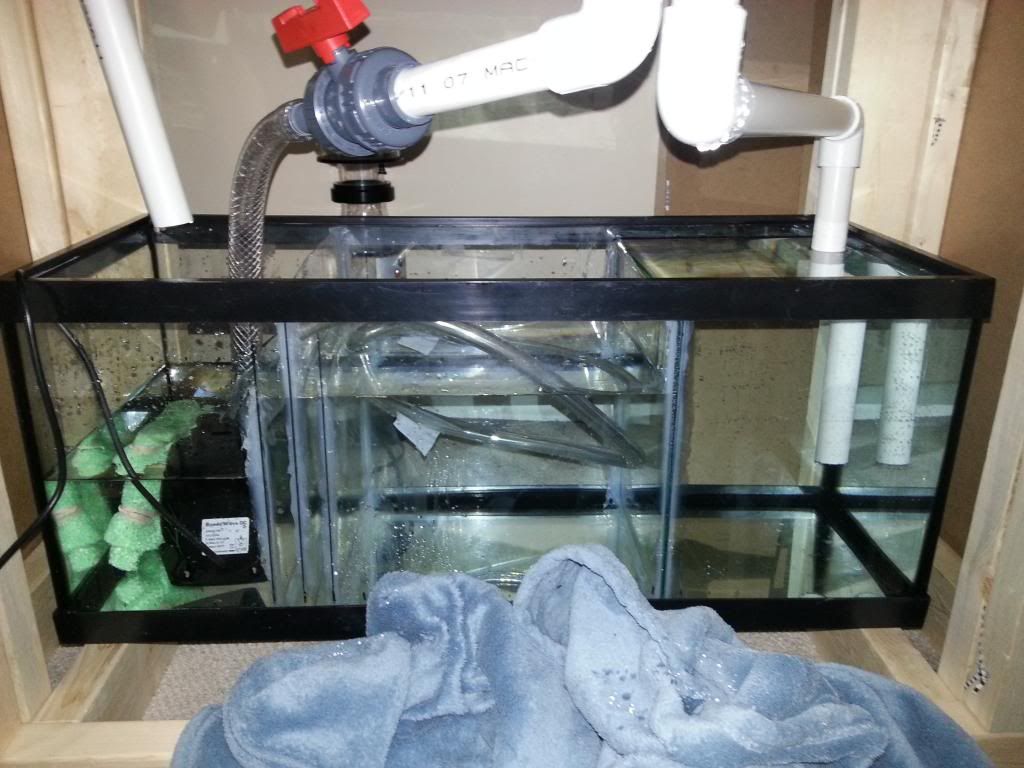
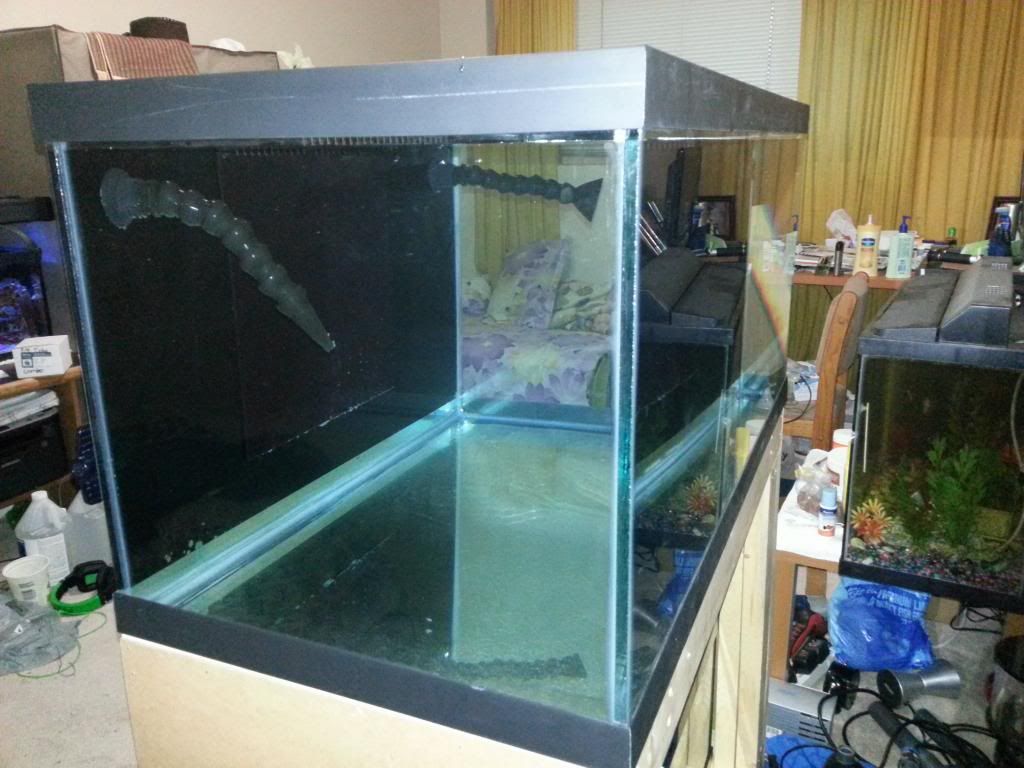
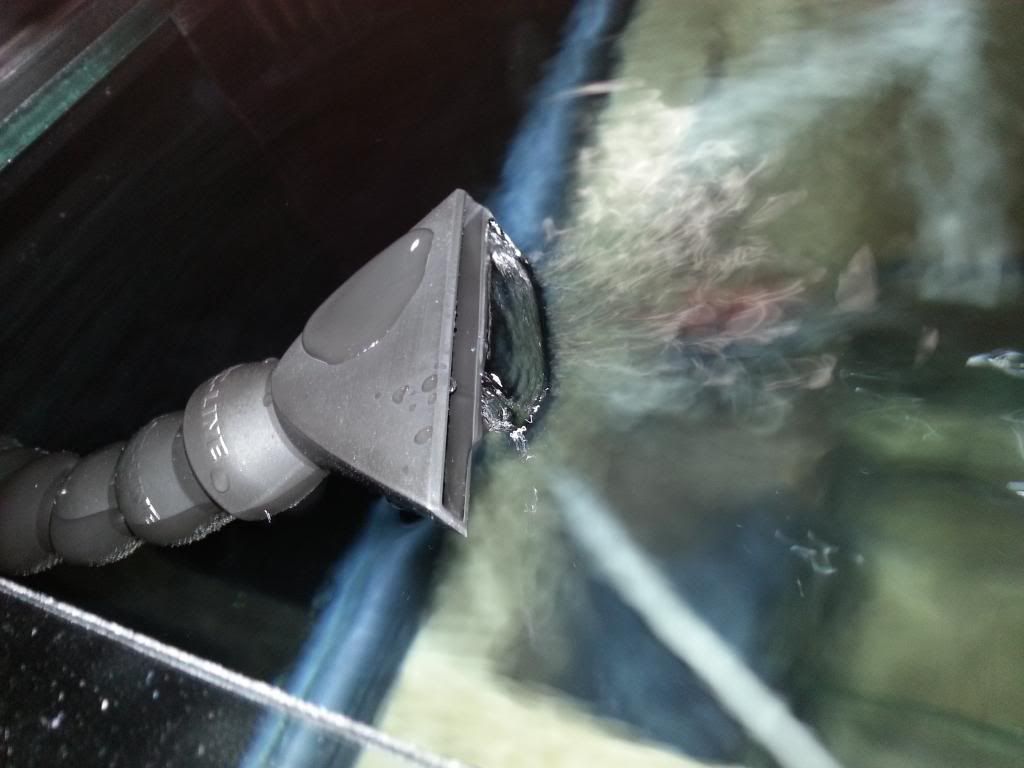
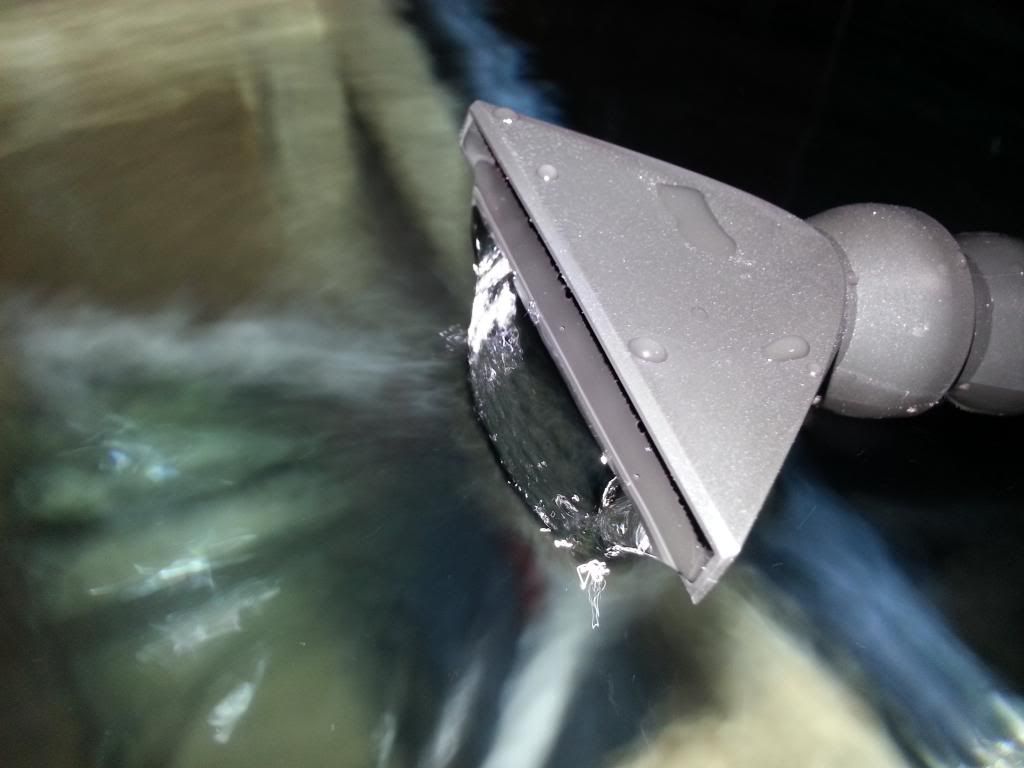
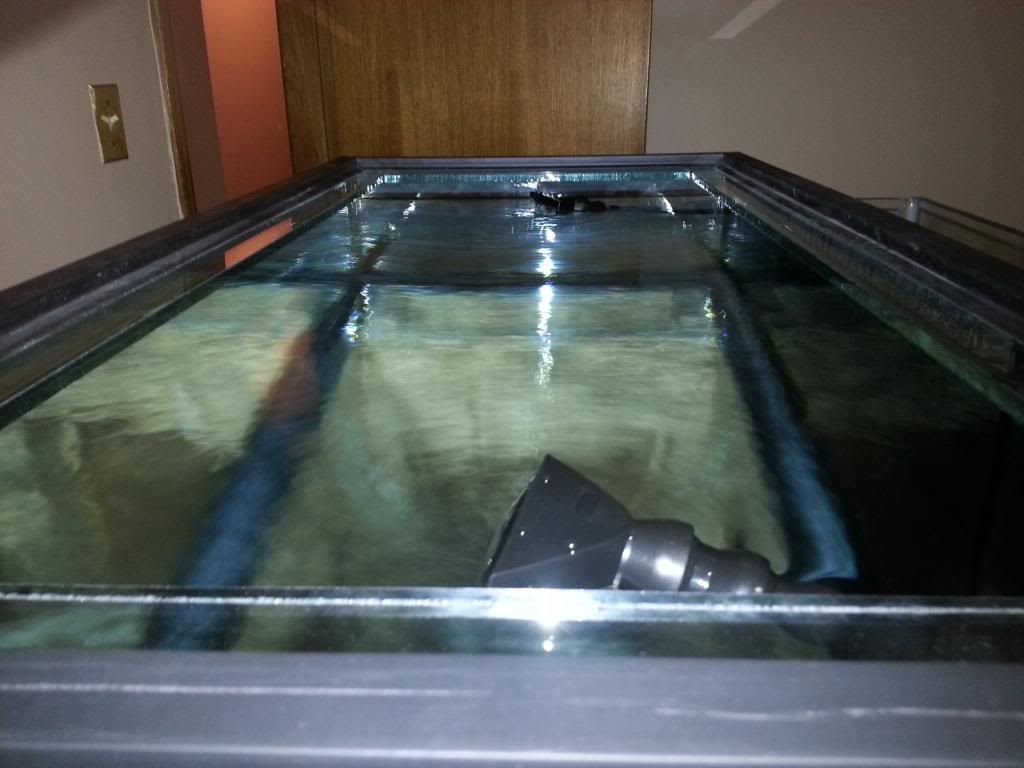
Filled this baby up with fresh water to test for licking and everything was perfect Forgot to cement one union which was licking but it was a quick fix. But it was really really happy that everything turned out alright since I was testing everything on a carpet!!!!

Kept the nozzles of the return higher than water level so that no back suction occurs. Had a check valve but forgot to place it The flow is very smooth even at the highest speed and so there's no water splashing noise.

Tuning the overflow seems to be a bit challenging but I guess I will get used to it

Lastly, I simply can't thank Denny enough to teach me how to plumb and giving me the exact amount of things required. Its because of his help that I accomplished (yes a accomplishment for me ) the plumbing in one go!
__________________

You wouldn't want to see my tank. I don't use fancy equipment and I am a noob
Reply With Quote
  #47  
Old 04-01-2013, 01:54 PM
daplatapus's Avatar
daplatapus daplatapus is offline
Member
 
Join Date: Apr 2012
Location: Port Alberni, B.C.
Posts: 1,315
daplatapus is on a distinguished road
Default

Lookin' good! Always a good feeling doing stuff like this yourself and having it work the first time. Congrats.
Not sure by the pics, but just a teeny suggestion: You may want to provide some support for some of that plumbing. Install support blocks under the return plumbing so that the weight of the piping full of water isn't torquing on the bulk heads. For the drains a hangar strap across the piping where they elbow under the stand would be easy too.
Other than that, well done.
Reply With Quote
  #48  
Old 04-01-2013, 02:10 PM
mrhasan's Avatar
mrhasan mrhasan is offline
Member
 
Join Date: Jun 2012
Location: Calgary
Posts: 2,893
mrhasan is on a distinguished road
Default

Quote:
Originally Posted by daplatapus View Post
Lookin' good! Always a good feeling doing stuff like this yourself and having it work the first time. Congrats.
Not sure by the pics, but just a teeny suggestion: You may want to provide some support for some of that plumbing. Install support blocks under the return plumbing so that the weight of the piping full of water isn't torquing on the bulk heads. For the drains a hangar strap across the piping where they elbow under the stand would be easy too.
Other than that, well done.
Thanks for the suggestion I will add some supports for the pipe but will have to figure out how.
__________________

You wouldn't want to see my tank. I don't use fancy equipment and I am a noob
Reply With Quote
  #49  
Old 04-02-2013, 07:40 PM
kien's Avatar
kien kien is offline
¸.·´¯`·.´¯`·.´¯`·.¸¸.·´¯`·.´¯`·.´¯`·.¸¸.·´¯`·.¸¸. ><(((º>
 
Join Date: Apr 2009
Location: Calgary, AB
Posts: 7,665
kien will become famous soon enoughkien will become famous soon enough
Default

Quote:
Originally Posted by mrhasan View Post
Had a check valve but forgot to place it
Have you installed the check valve? If not, then are you planning to? Looking at your sump there doesn't look like a lot of room for back flow in the event of a power failure? Hard to see in the pic to determine for sure though. Did you design the sump with room for back flow in the event of a power failure or were you going to rely entirely on the check valve?
Reply With Quote
  #50  
Old 04-02-2013, 08:03 PM
mrhasan's Avatar
mrhasan mrhasan is offline
Member
 
Join Date: Jun 2012
Location: Calgary
Posts: 2,893
mrhasan is on a distinguished road
Default

Quote:
Originally Posted by kien View Post
Have you installed the check valve? If not, then are you planning to? Looking at your sump there doesn't look like a lot of room for back flow in the event of a power failure? Hard to see in the pic to determine for sure though. Did you design the sump with room for back flow in the event of a power failure or were you going to rely entirely on the check valve?
Nop not installing check valves. I won't be getting any sort of back siphon since the return nozzles remains above the water level while running; it gives a very pleasant waterfall sound (not the irritating one). And I have simulated many power failures till now and the maximum level (after like 30mins of keeping the pump off) is like this:


So there's still room for around 2/3 gallons I presume. The DT looks like this after power failure:

__________________

You wouldn't want to see my tank. I don't use fancy equipment and I am a noob
Reply With Quote
Reply


Posting Rules
You may not post new threads
You may not post replies
You may not post attachments
You may not edit your posts

BB code is On
Smilies are On
[IMG] code is On
HTML code is Off
Forum Jump


All times are GMT. The time now is 05:54 AM.


Powered by vBulletin® Version 3.7.3
Copyright ©2000 - 2024, Jelsoft Enterprises Ltd.