
|
|
|
#92
 11-05-2013, 03:16 PM
|
|||||
|
|||||
|
Seeing as golfing, fly fishing and camping season have come to an end, I figured I would give my build thread a bit of an update.
It has been a fairly rough summer in the reef as I pretty much let it do its own thing for the past few months. I continued to do 50 gallon water changes every 4-6 weeks and topped off the dosing salt containers with fresh mix when needed but other than that, I hardly put my hand in the tank except for cleaning the glass every few weeks. The SPS corals have pretty much been at war all summer as most have grown into their neighbours usually leaving one colony the victor and the other severely damaged. I'd say at least 50-60% of the SPS corals have also browned out significantly due to decreased tank maintenance but predominantly from the fact that 4 of the 12 T5 ballasts in my fixture burnt out on me between May and now. So the tank has basically been running at only 2/3 of the PAR that the corals are used to and the result is not very pretty. Last year I also replaced 2 of the ballasts so in total, I've had to replace 50% of the ballasts in this fixture in 3 years. Even though the first 2 ballasts died on me after the 1 year warranty, Sfiligoi was good to deal with and sent me replacement ones for free. But obviously there is an issue here seeing as there is no way these ballasts should be dropping like flies after only 3 years of use, especially since this is a high end fixture which cost over $2000 new. Based on the fact that Sfiligoi added a 2nd set of 8 x 50 mm fans to the opposite end of the fixture on the Stealth T5 models the year after I purchased mine, overheating of the internal components is likely the cause for the excessive ballast failure rate. It would have been nice if this would have been dealt with like a recall and current owners of older models would have been sent a kit to install the 2nd set of fans themselves. This however was not the case so I decided to make some serious mods to this fixture to better suit my reef tanks needs. I had ordered some DIY LED supplies on a few black Friday sale last year as I was planning on swapping out 4 of the T5 bulbs for LED strings to try and increase PAR, cut down on electricity, cut down bulb change costs and get some shimmer back into the aquarium. I knew that this would be a huge undertaking so I was not looking forward to this project and this was part of the reason I prolonged doing it until now. After seeing how rough many of my beloved colonies looked, I finally took the plunge and removed my Sfiligoi Stealth fixture from the tank earlier this week. Step 1) Remove the 4 ballasts and associated wiring for the 4 bulbs that will be replaced with LED strings. I also replaced the burnt out ballasts with the 4 ballasts that were removed to make room for the LEDs. In order to get to the ballasts on these lights, you have to remove the bulbs and then the individual reflectors to gain access. 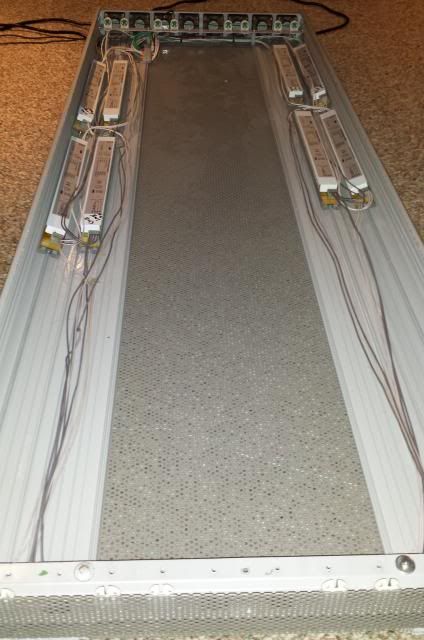 Step 2) Install more active cooling. I added 6 x 100 mm fans which I wired into the old moonlight (removed due to having burnt out as well, common theme hey) 12V power supply. Since the fans were too big to mount on the far end of the fixture, I mounted them on the top of the fixture similar to how ATI powermodule fans are mounted. I also have them mounted so that they will pull hot air out of the fixture and vent it through the perforated top of the fixture. 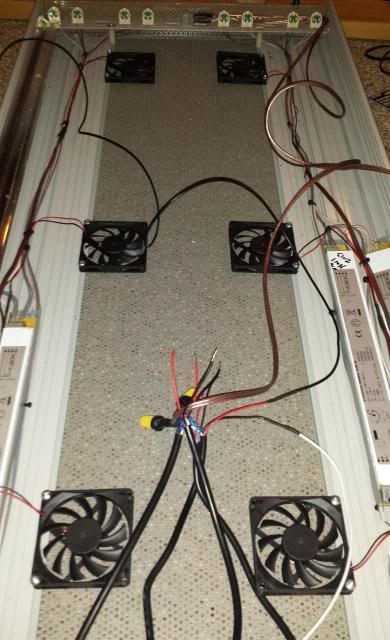 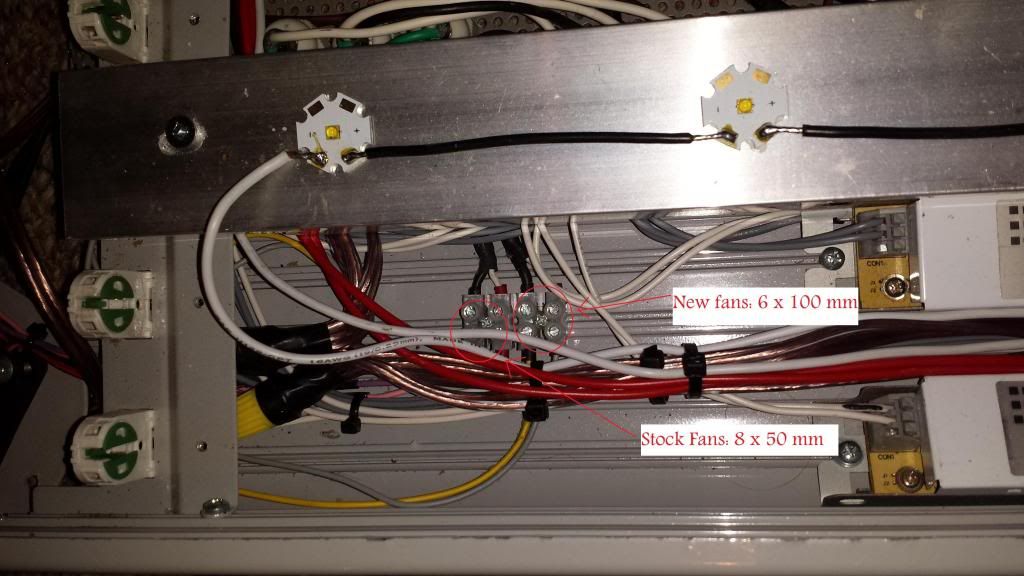 Step 3) Mount LED drivers 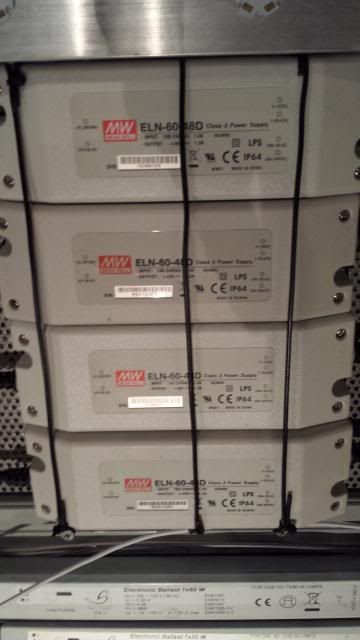 Step 4) Wire LED drivers to 110V power. This fixture came with 3 power cords, each of which operated 4 x 80 watt T5 ballasts. I removed the stock wiring and wired the 4 LED drivers into the 3rd power cord that I had my white T5 bulbs running off of previously 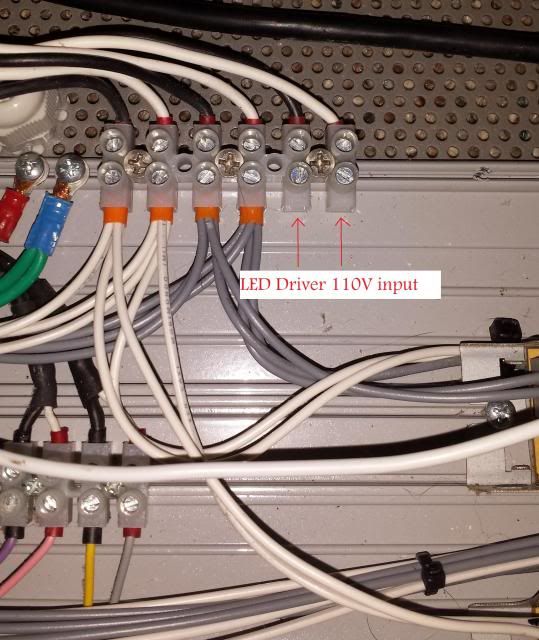 Step 5) Replace 2 burnt out fans and rusted fan grills (I replaced all the grills, not just the 2 shown in the pic). I'm guessing this is the reason that a few of the ballasts ended up croaking on me. The 2 fans on the far end of the fixture had died but that didn't explain why the other 2 ballasts on the opposite side of the fixture also grenaded on me... 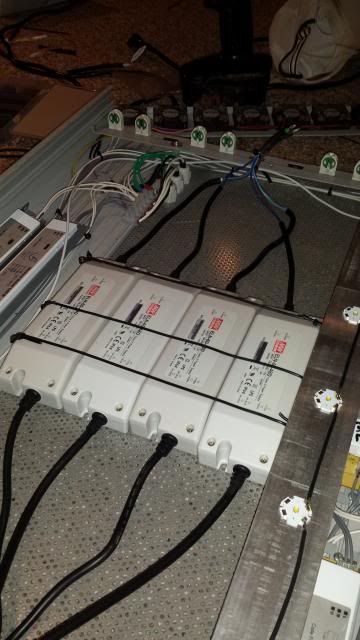 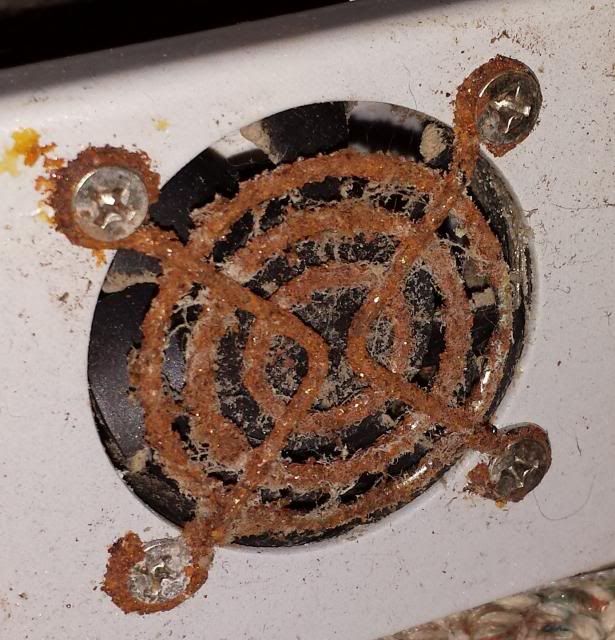 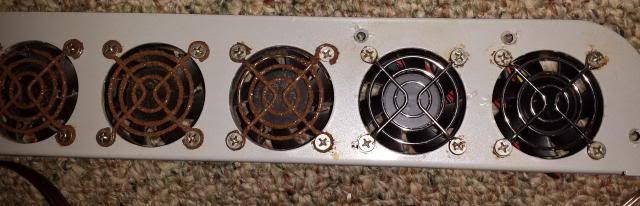 Step 6) Wire in potentiometer for dimming. I had already pre-soldered a 10V power supply to a dimming pot so all I had to do was drill a hole through the end of the fixture to mount the dial. Here is a pic of where the pot is mounted for easy adjustments. I still need to pick up a new knob cover as the black and green dial just doesn't jive with the silver and grey of the Sfiligoi fixture. 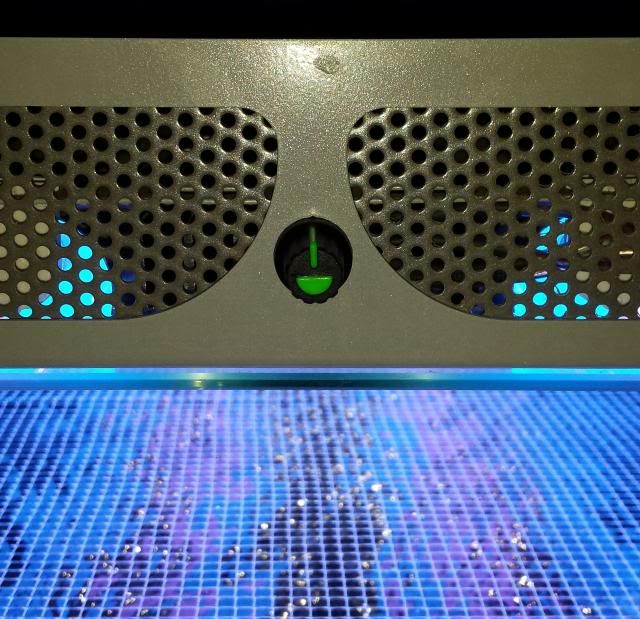
__________________
Do or do not....there is no try. 
|
|
#93
11-05-2013, 03:34 PM
|
|||||
|
|||||
|
You have a very nice tank, with lots of nice corals. Hope you get it back on track quickly. Good luck with your new lighting.
__________________
Reef Pilot's Undersea Oasis: http://www.canreef.com/vbulletin/sho...d.php?t=102101 Frags FS: http://www.canreef.com/vbulletin/sho...d.php?t=115022 Solutions are easy. The real difficulty lies in discovering the problem.
|
|
#94
11-05-2013, 04:21 PM
|
|||||
|
|||||
|
great work on that fixture. scary stuff all these blown ballasts. after i sold mine the new owner had similar issues if i recall correctly.
shocker that the grill rusted so bad... your tank is open top right? and it's pretty mean to not post a fts under the new light...
|
|
#95
11-05-2013, 04:31 PM
|
|||||
|
|||||
|
Step 7) Notch heatsinks. The 2 outside heatsinks profile's were too tall to fit inside the fixture with the glass shields in place so I had to notch the ends of the heatsinks as well as both sides of these heatsinks to accomodate the T5 ballasts below them and the LED drivers beside them. I didn't snap pics of the notches cut out for the ballasts and LED drivers as they weren't very asthethically pleasing.... The central heatsink which had 2 strings of LEDs mounted side by side with the moonlight seperating them had a thinner profile and gladly didn't need any modifications.
Before 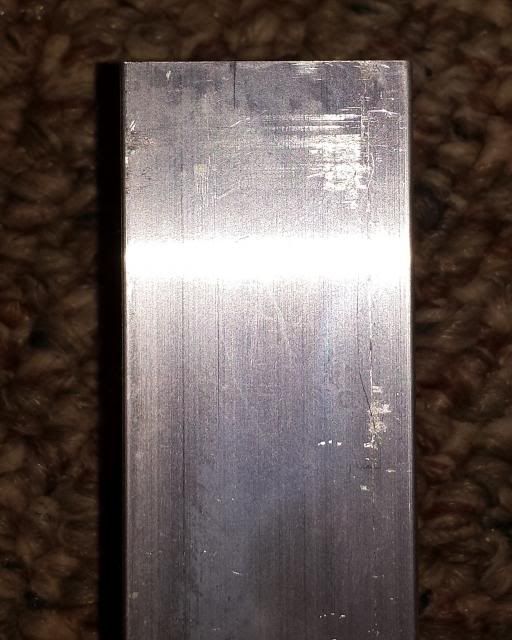 After 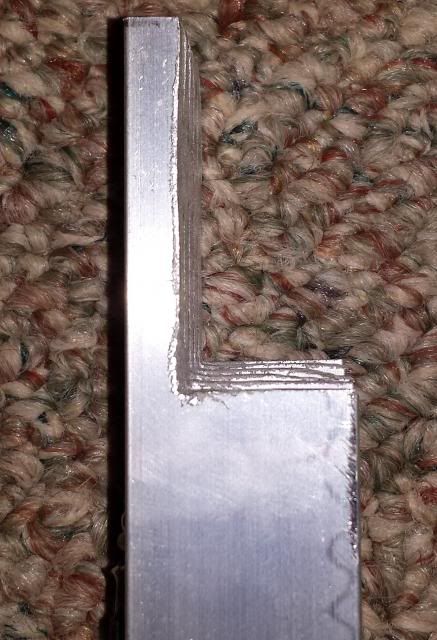 Step 8) Mount LED strings on heatsinks to fixture. After removing the T5 endcaps from the aluminium channel on each end of the fixture, I drilled a small hole through the end of each heatsink and bolted them to the existing channel. I then wired the LED strings (14 x 3 watt CREE XTE cool whites) to the 4 LED drivers. 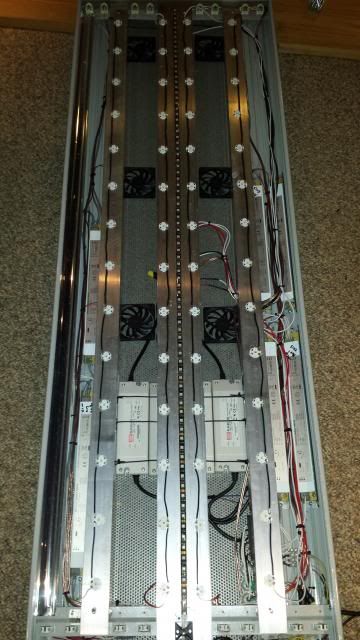 Step 9)Wire in moonlight lighting and install T5 bulb reflectors. I replaced the old 3528 blue led moonlight with a waterproof 5050 SMD blue led string that was mounted directly to the heatsink. I also have a potentiometer wired inline to dim the moonlight which I'm hoping will also help to keep the LEDs cooler and prolong their life. After firing them up, I noticed that 3 of the 5050 chips in the center of the string did not want to come on but I did not feel like replacing the whole string for this faulty section of the strip. The moonlight strip has 83 5050 chips on it each consuming 0.24 watts of power so I used a 1.7 AMP 12 V power supply seeing as I needed 1.66 amps to power this string properly. I am currently running the string at the dimmest possible setting and will not run it at full capacity as this would definitely decrease the lifespan of the moonlight. 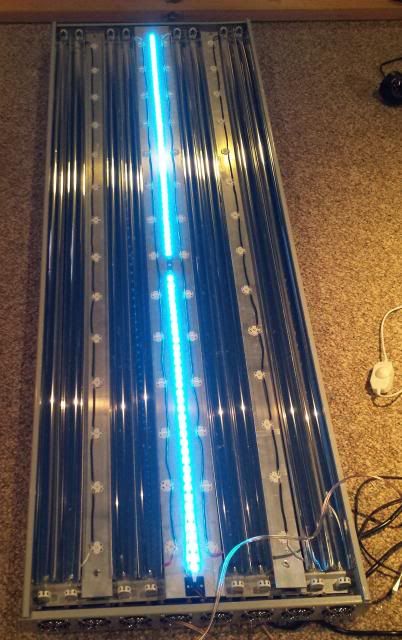 Step 10) Test LEDs. In reality, I did this step much earlier but also did it again at this stage. The first time I tested the LEDs, all 4 strings came on but at ~1% of their total brightness no matter where I set the dimming potentiometer. I actually had to turn the lights off in my basement to see if the LEDs were on or not. This was then followed by ~3 hours of troubleshooting/random cursing. The first thing that I tested was the built in pot in the meanwell drivers. This can be turned down or up to modify the max amperage output of the driver so that you don't burn out your LEDs as the max output of these drivers is 1.3 Amps. I had previously opened up all of the drivers and turned the built in pots as far as they would go clockwise but I thought I may have turned them all the way down by mistake. After putting the unit back together, I fired it up with the same result of the LEDs barely lighting up. Seeing as that didn't work, I tested each LED string independently with a 700 mA non dimmable meanwell driver to make sure I didn't have any cold solder joints. All 4 strings light up perfectly and I proceeded to see spots for the next half hour. I then assumed the problem was coming from the dimming feature of these drivers as the non dimmable driver fired the LED strings just fine. I removed the dimming + and - leads from all 4 drivers and used a 9V battery to give a reference voltage so my LEDS should have come on at 90% intensity. After plugging in the string, I got the same result of the LEDs coming on at 1% intensity. I didn't even bother checking the solder joints at the dimming pot as this obviously wasn't the problem. At this point I proceeded to stop troubleshooting the fixture for a while and focused all of my energy entirely on randomly cursing until I felt slightly better about myself. After that much needed break, I completely took the fixture apart removing all the heatsinks (which was a PITA to do as the nut securing the bolt to the aluminium channel is near impossible to hold in place with your finger). Once I had the heatsinks out I immediately noticed the problem. The neutral lead of the 110V line into the LED drivers had popped out of the stock fixture's port. It was a tight fit as I soldered all 4 of the neutral lines coming out of the LED drivers together and the "plug" I had made was now slightly larger than the stock plug as the wiring Sfiligoi used was thinner than the meanwell's wiring. My new "plug" had fit into the stock socket however when I secured the heatsink in place above this wiring, it obviously just popped out of place. After really jamming the neutral line back into the socket and securing it much tighter than I had originally, I installed the heatsinks again and wired the dimming + and - leads of the LED drivers back to the dimming pot. I plugged the 10V power supply for the dimming pot in as well as the 110V line for the LEDs and crossed my fingers. Finally! We have light! I didn't even mind seeing spots at this point I was so happy the LEDs were actually working and the dimmer was operating fine as well. 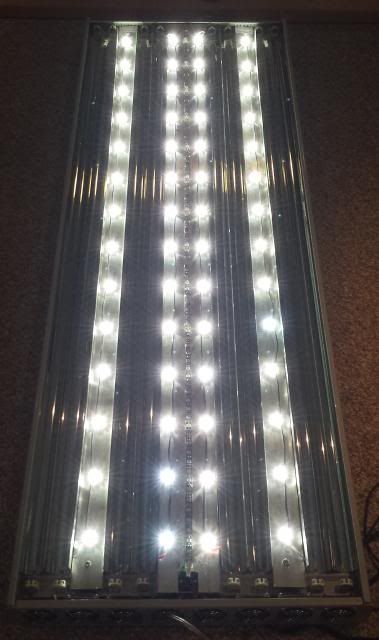 Step 11) Replace T5 reflectors (again) and test T5 bulbs. I thought I was homefree at this point but as my luck would have it, only 7 of the 8 T5 bulbs lit up. FRAK! After trying a different bulb, I decided another short bout of random cursing was necessary. I then followed the wiring from the T5 endcap to see which ballast was causing the issue after removing the 2 reflectors that were directly overtop of the ballasts on that side of the fixture. I luckily had 2 extra brand new ballasts that I had ordered from Sfiligoi when they had sent me the 2 replacement ones for free. I replaced the faulty ballast, put the reflectors back in place and all 8 T5 bulbs fired for me. Hazaa! 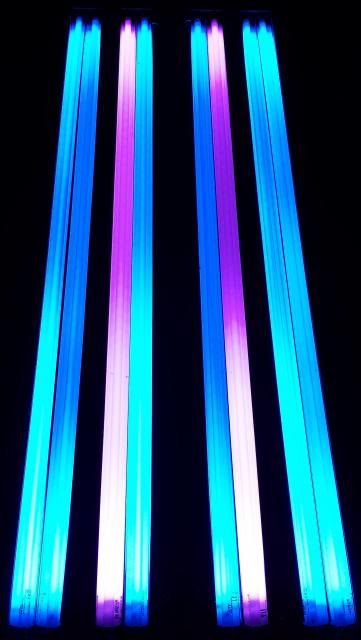 Step 12) Fire up LEDs, T5s, and both sets of fans, just to make sure... 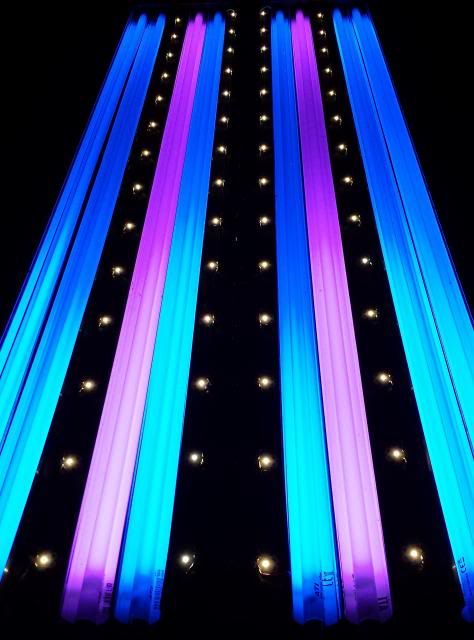 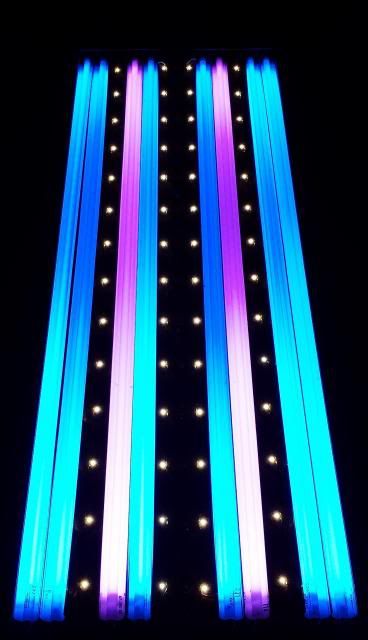 Step 13) Clean and replace the starfire glass inserts that protect the bulbs and hang it back over my tank. With the 3 heatsinks installed, this fixture is now ~50 lbs heavier than it used to be so I placed 2 pieces of 2x4s over the tank to make sure I don't have any unexpected surprises while I'm away at work if the aircraft cable suspending the fixture decides to break. Step 14) Drink a victory beer and relax for an hour by catching up on the Walking Dead. Overall, the project took me ~14 hours to install the LEDs, add the fans, replace the broken fans and grills and replace the burnt out T5 ballasts. I'm sure I could have had it done in ~8 hours had that neutral line stayed in place as opposed to me having to troubleshoot every aspect of the wiring. It took another 2 hours or so to mount the LEDs to the heatsinks with thermal epoxy and to tin and solder all of the LEDs and wiring for the 4 LED strings. At present, I am running 6 ATI Blue plus bulbs and 2 ATI purple plus bulbs in addition to the 56 x 3 watt Cree XTE cool white LEDs. I set the LEDs to the lowest brightness possible using the dimming pot and will slowly ramp up the intensity over the next few weeks in order to acclimate the corals to their new source of light.
__________________
Do or do not....there is no try.
|
|
#96
11-05-2013, 04:53 PM
|
|||||
|
|||||
|
Quote:
Quote:
Thanks for the compliments on the fixture. It was a ton of work and in hindsight I'm not sure if I would do it again from all the unnecessary stress and the time it took. I'm only off work and at home for 48 hours every 7-8 days. The rest of my time is spent several hours away in SE Sask so when I am at home, I typically have an overwhelmingly large amount of tasks to accomplish in a short period of time. I'm hoping that all my work will pay off in the long run seeing as the current trend is to supplement LED lighting with T5s. I figured this would be the best compromise I could make at the moment and there is definitely enough room left on the heatsinks to accomodate more LEDs if deemed necessary in the future. I'm not surprised about the ballasts failing in your old fixture as well. My old 48" Sfiligoi stealth was the same generation as my current fixture and the new owner had said that 4 of the 8 ballasts had died. He was going to sell it to another reefer to gut for a LED build until I told him Sfiligoi had replacement ballasts available that were easy to replace and actually not that bad of a price. My tank is an open top with the fixture sitting ~9" above the water line. I'm pretty angered about the grills rusting and actually just being there in general. My old Sfiligoi stealth didn't have these ghettotastic grills on the back side. It simply had the same perforated aluminium insert that was present on the opposite side of the fixture. It looked way better but I'm guessing the engineers at Sfiligoi thought that it hindered airflow too much hence the change to the open hole/grill configuration. If they were going to use grills, then they at least should have got some custom stainless ones built in order to prevent rust instead of using cheap computer parts. Seeing as the next years models came with 2 sets of fans, I'm guessing changing to the open hole/grill setup didn't resolve any of the heating issues anyway. All they succeeded in doing was making the fixture look bad. It's like putting black steel rims on a Ferrari... As for the FTS, I spent all of my spare time fixing this light fixture so I didn't even have time to clean the algae off my glass on days off. As you can tell, I carefully cropped the tank out of the one photo showing where I mounted the dimming potentiometer I'm hoping next time I'm home, I can do another water change, clean the glass and do some much needed pruning to some SPS colonies as well as my current crop of hair algae and caulerpa.
__________________
Do or do not....there is no try.
|
|
#97
11-05-2013, 05:07 PM
|
|||||
|
|||||
|
wow that sounds like a whole lot of NO FUN. hopefully this thing actually works for an extended period of time now. and yeah those grills are crazy ugly. mine had the nice mesh grill as your previous fixture had.
|
|
#98
11-09-2013, 07:38 PM
|
|||||
|
|||||
|
Well as per request, here is a FTS showing how rough a lot of the corals are looking after their 4-5 month lighting shortage. I ended up losing about a dozen of the more delicate frags I had and I'm going to have to do some serious pruning of some of the larger SPS colonies as a few of them suffered from some substantial die off.
Left side 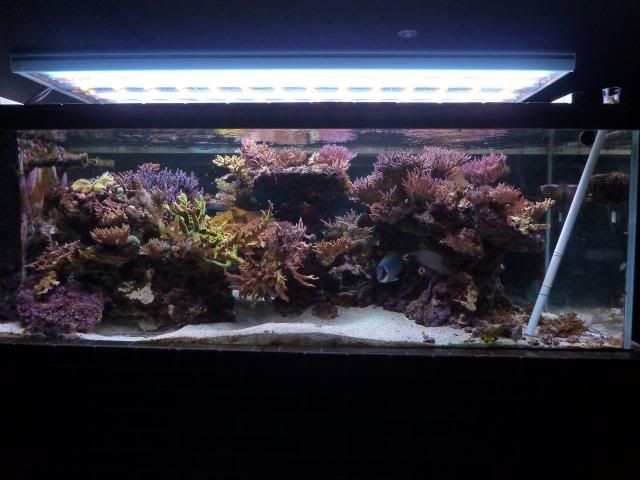 Right side 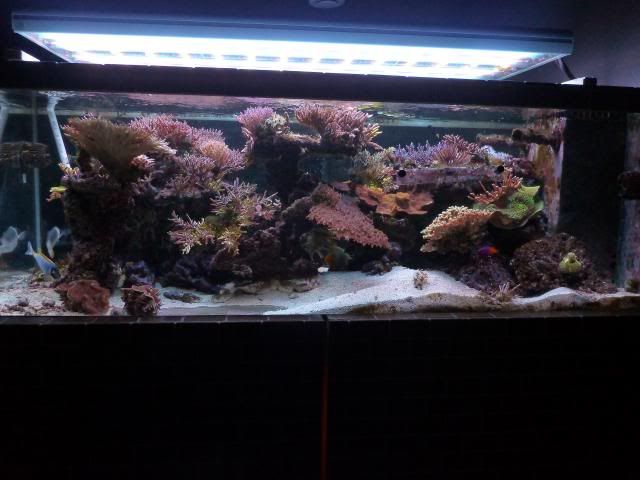 Here are a few close ups of some of the corals. Most have lost a substantial amount of colour but the odd colony or frag looks just as good as they did prior to this summer. You'll have to try to mentally block out any valonia or aiptasia from the photos as I'm going to have to add some critters to help win the war against these pests. Rainbow monti frag and bonsai from aquarium illusions 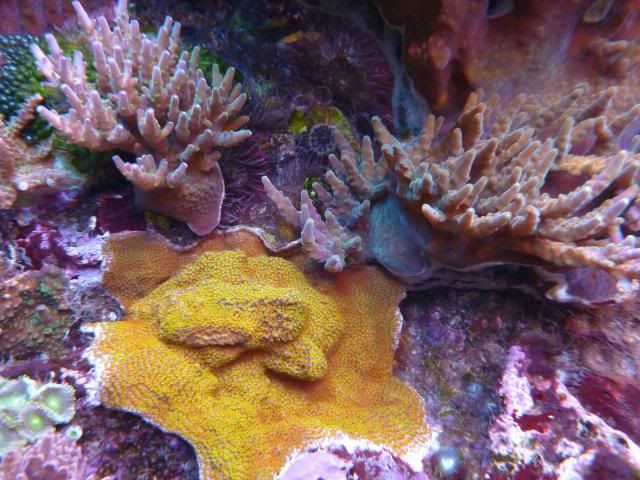 FAL blue dragon 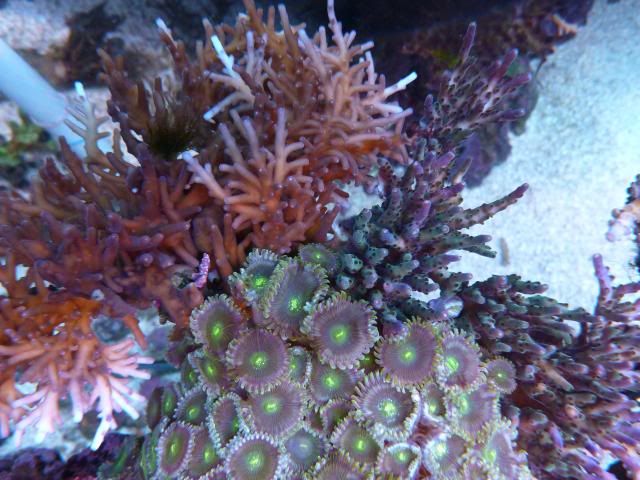 Stardust PE palys and Reef Shoppe Tri-color nana 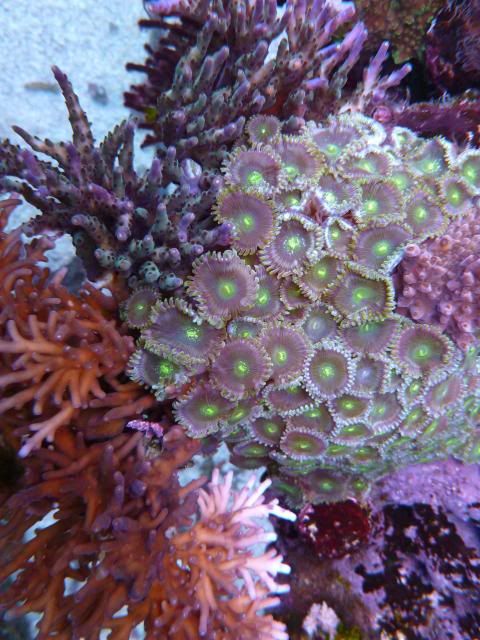 FAL purple tabler 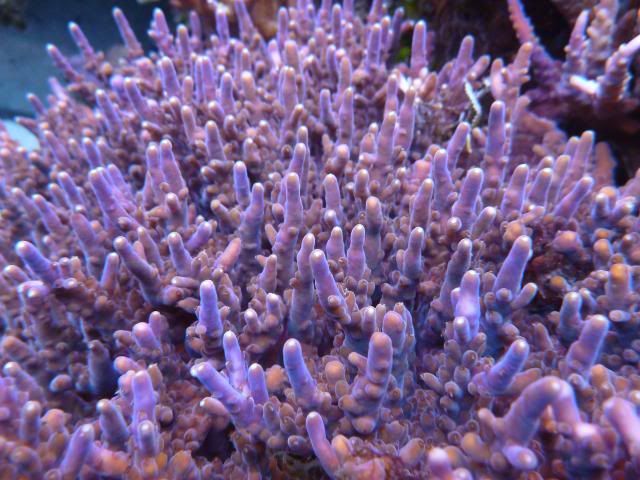 Seacare bonsai 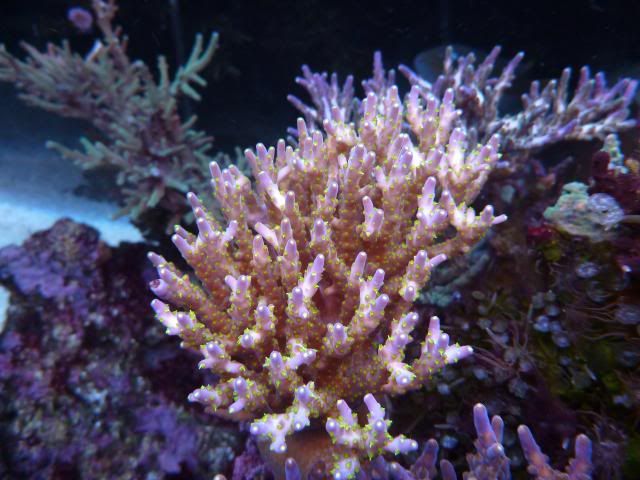 Tyree pink lemonade - this guy started out as a 1/8" nub I got from a good friend 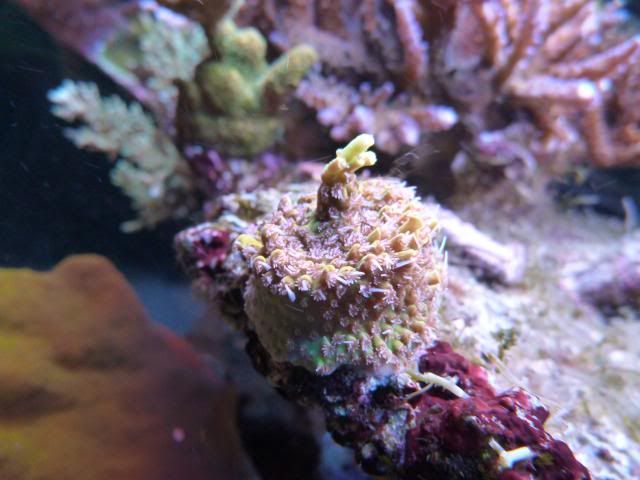 FAL unknown millepora 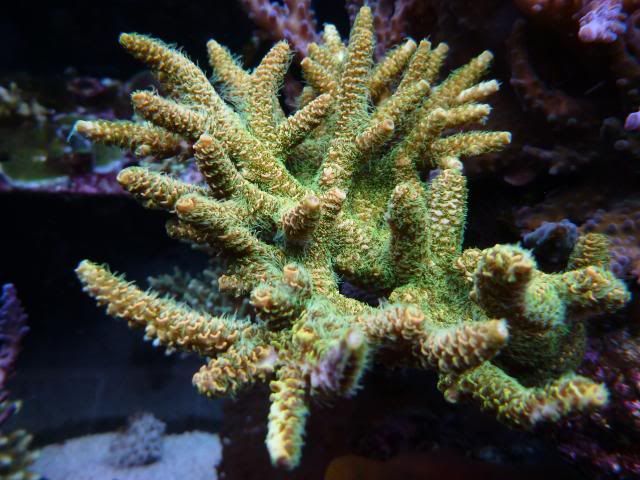 Cali tort 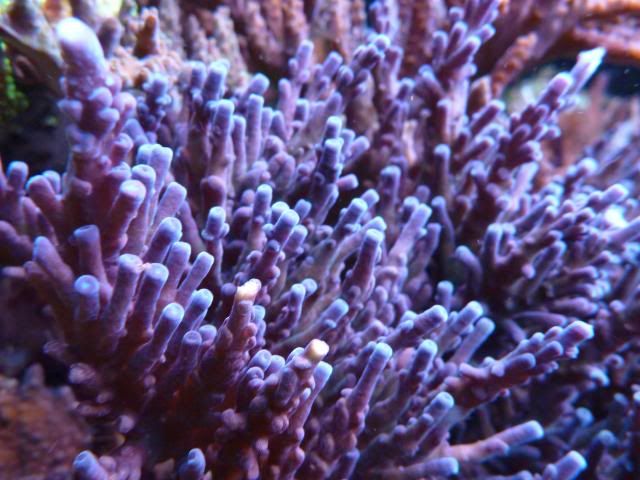
__________________
Do or do not....there is no try.
|
|
#99
11-09-2013, 07:49 PM
|
|||||
|
|||||
|
Cali tort forest - my colony and 2 frags decided it was in their best interest to combine power rangers style into a giant colony
 Aussie pocillipora 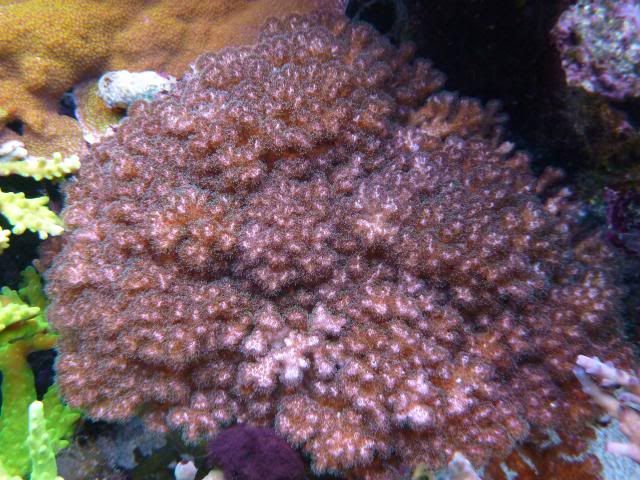 Tri-colour bird frag 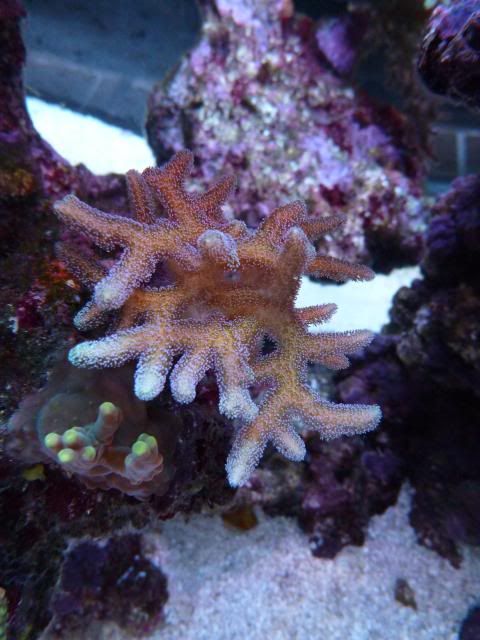 Coralmaster purple valida - this guy has really lightened up and lost a lot of its color during the summer months  Rainbow monti vs A. vaughni 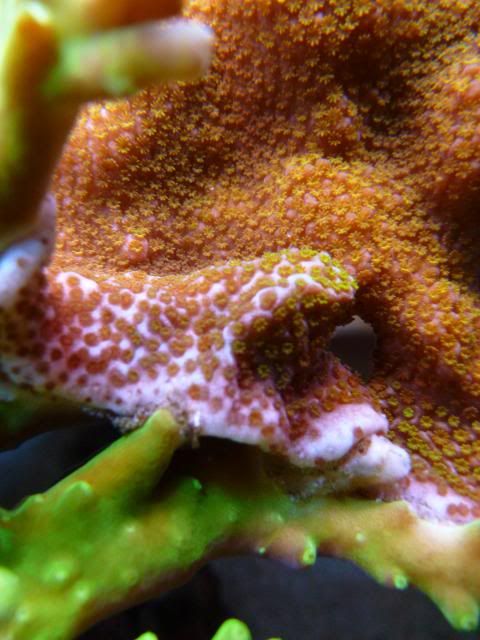 FAL banana lokani 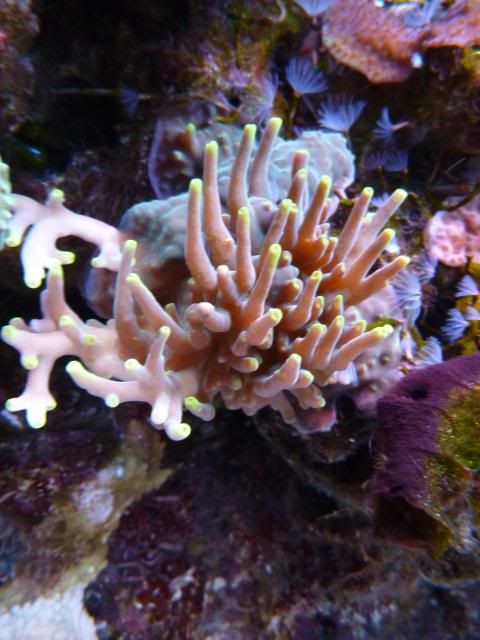 Reef Shoppe Tri-colour nana 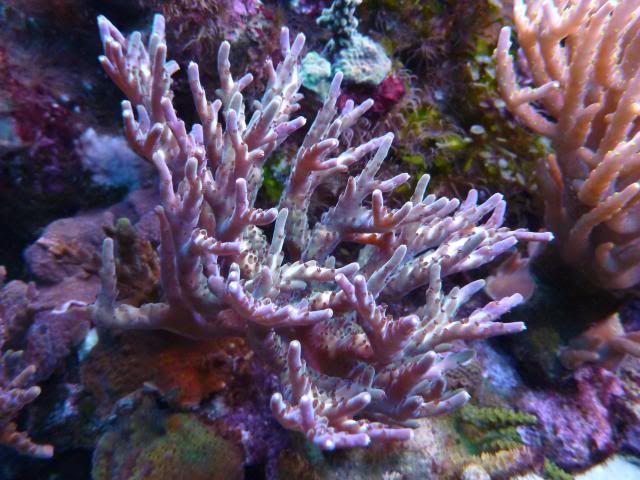 Loripes 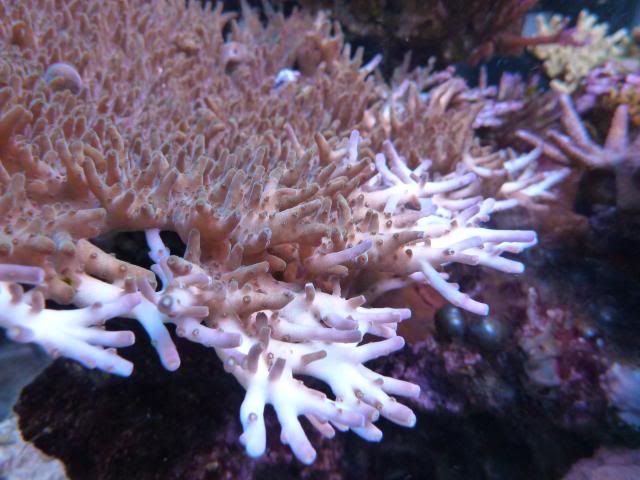 My poor browned out efflo. It's gonna take years to get this guy looking good again. 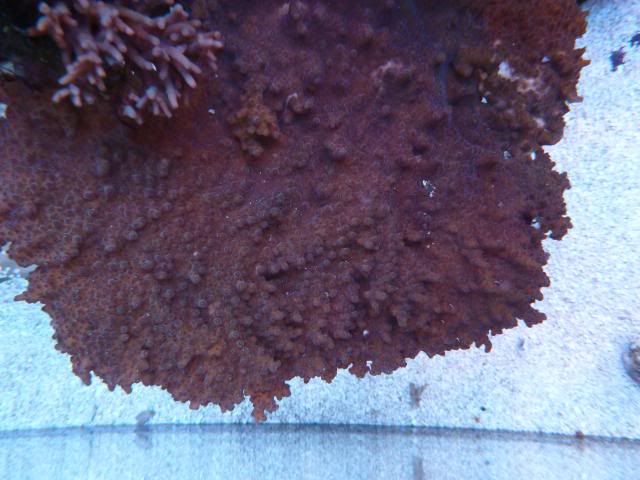 Bottlebrush acro. About 2/3 of this colony STN'd on me due to lack of light as well as algae encroachment. 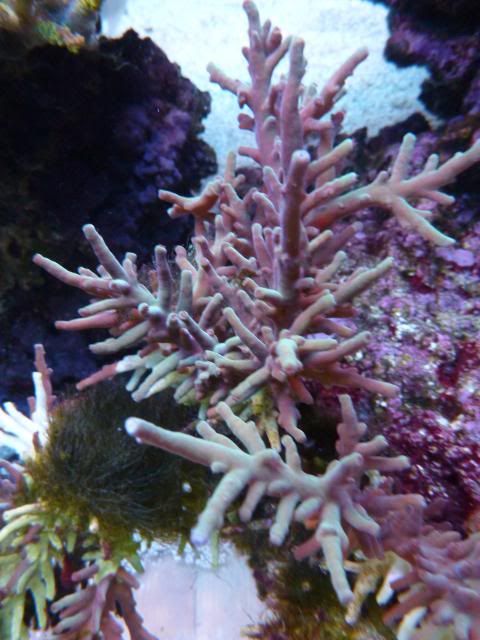
__________________
Do or do not....there is no try.
|
|
#100
11-09-2013, 07:54 PM
|
|||||
|
|||||
|
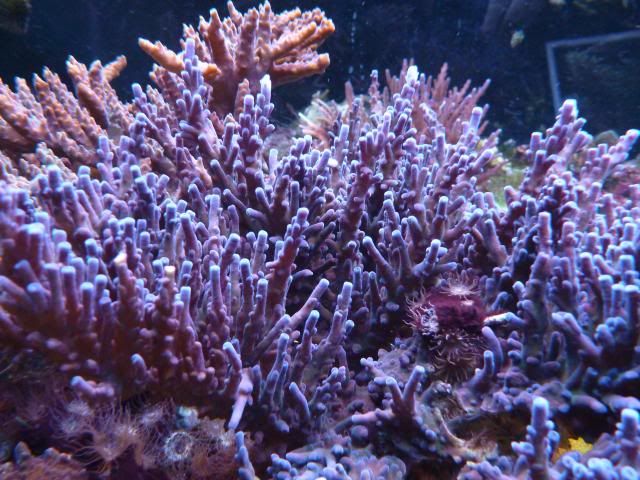
FAL unknown deepwater acro
 Coralmaster rainbow stylo. Also lost a lot of colour as it is very low in the tank 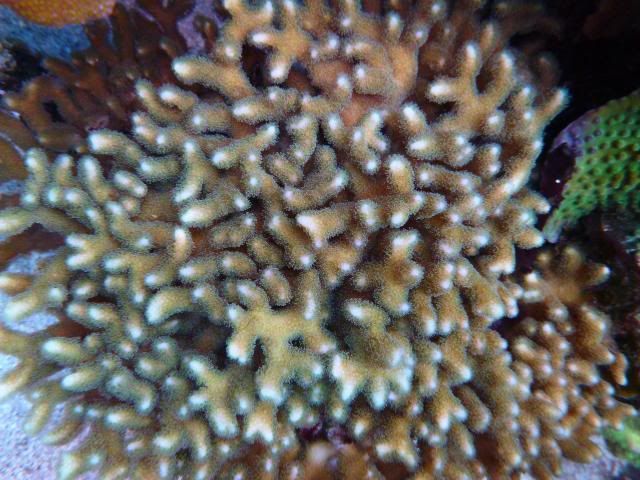 Coral warfare on the frag rack 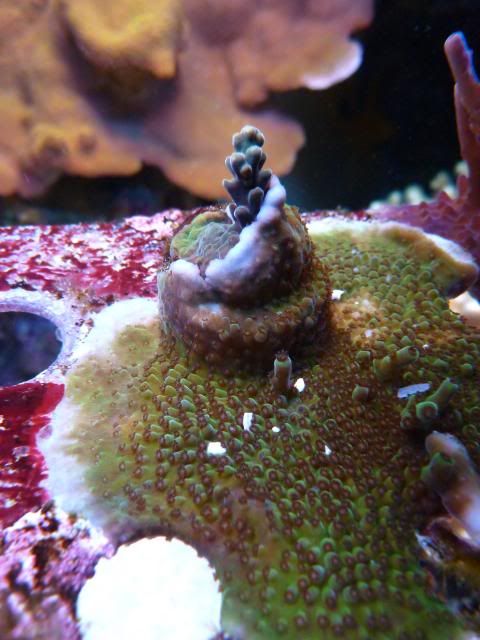 Rainbow monti taking over most of my rock work 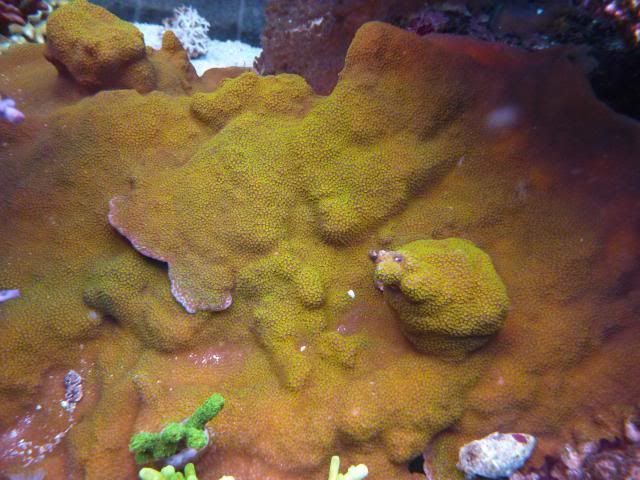 FAL ultimate monti 
__________________
Do or do not....there is no try.
|


 Linear Mode

