Canreef Aquatics Bulletin Board  

Go Back   Canreef Aquatics Bulletin Board > General > DIY

Reply
 
Thread Tools Display Modes
  #1  
Old 07-13-2007, 02:12 AM
SuperFudge's Avatar
SuperFudge SuperFudge is offline
Member
 
Join Date: Aug 2001
Location: Chilliwack.B.C.
Posts: 741
SuperFudge is on a distinguished road
Default A Sweet lil frag tank

Heres a few pics of it being built and filled.


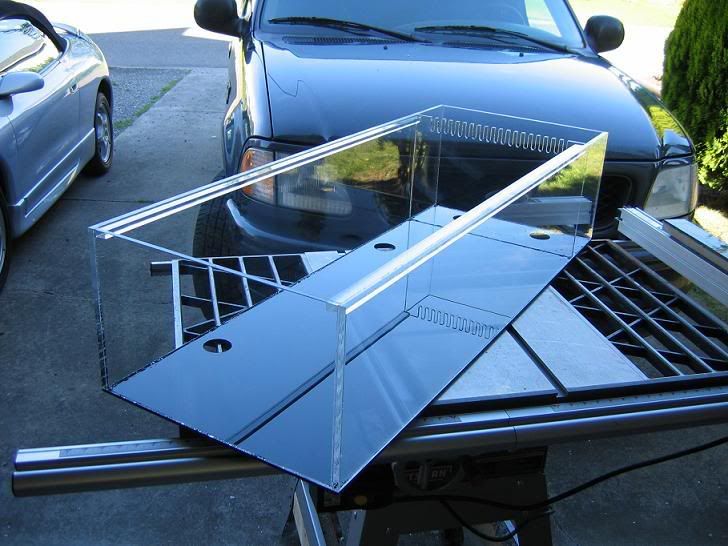
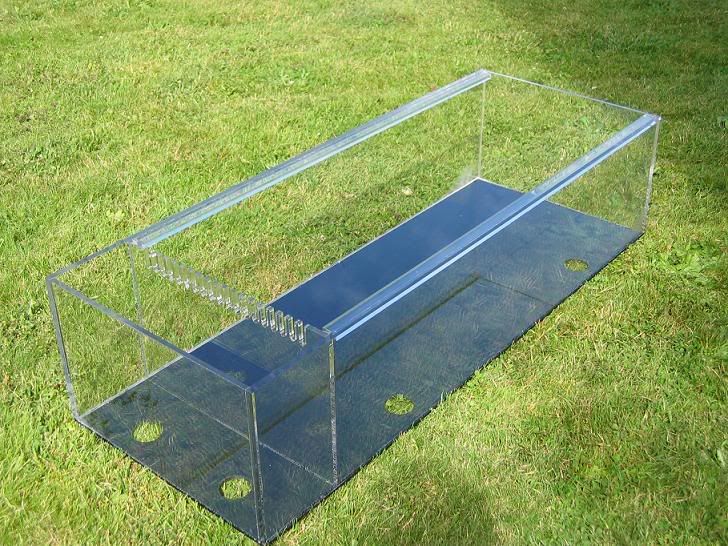
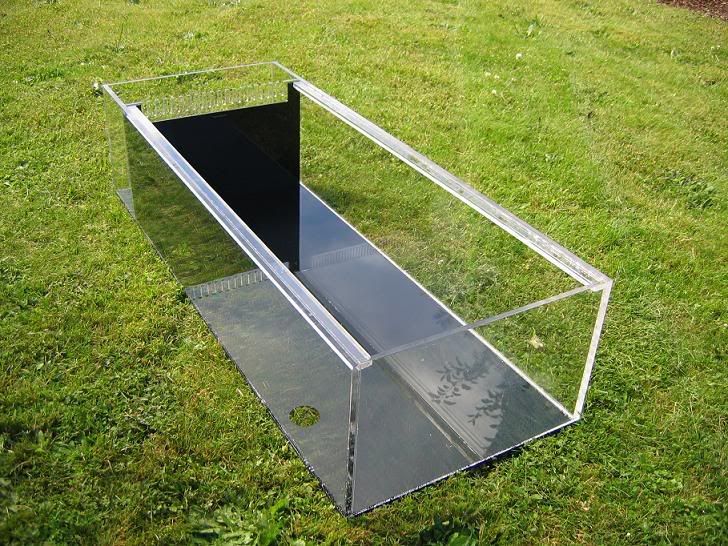
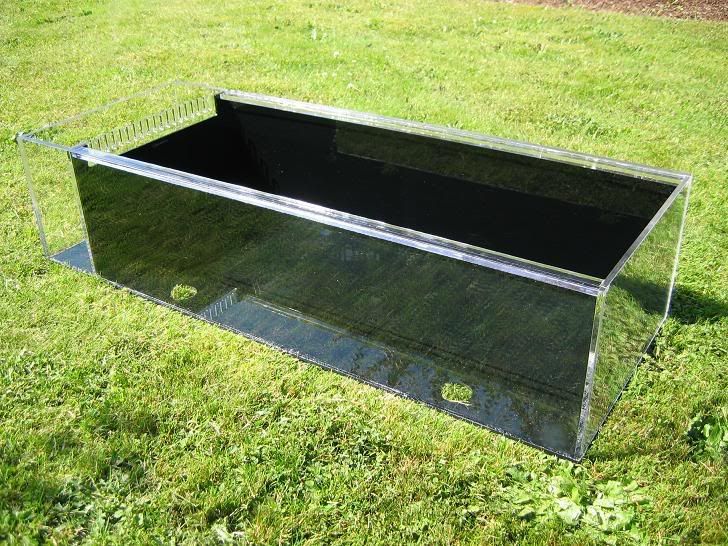
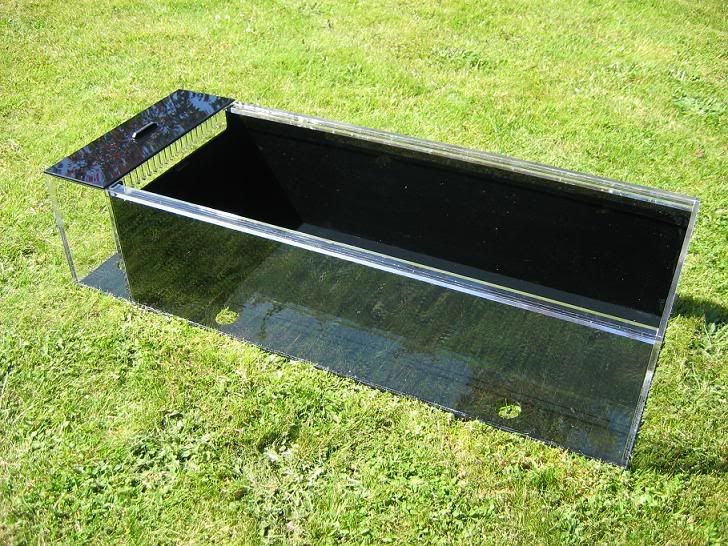
Sorry bout the dark pics....


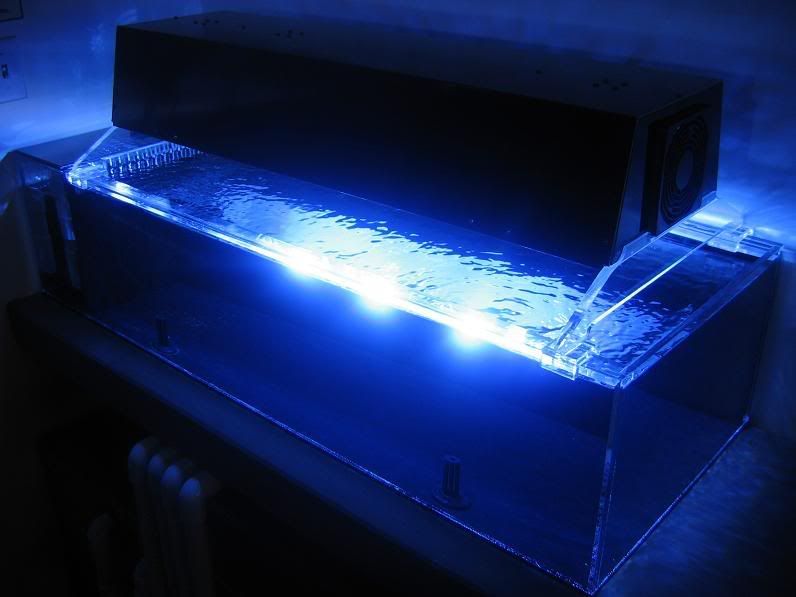
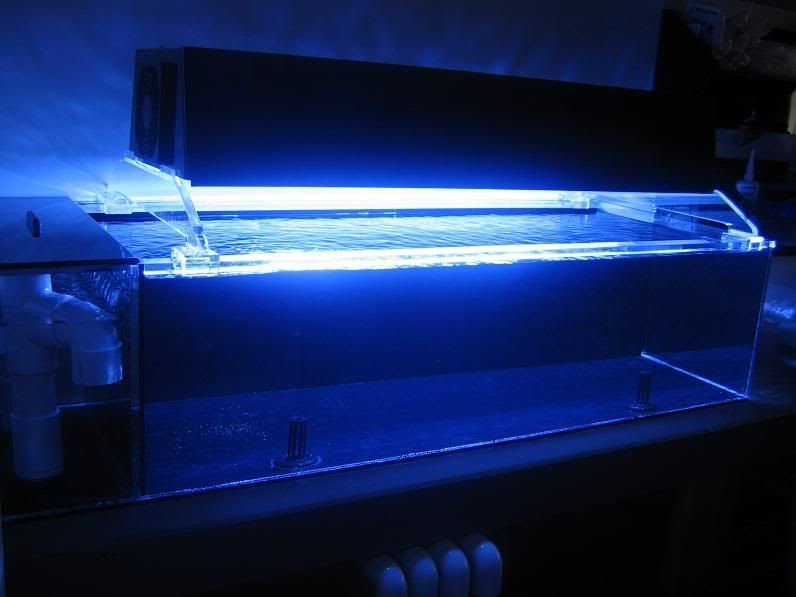
It is fed only on overflow water on its way down to the sump...i was very pleased with the flow i can get through it without the use of any pumps.

Lighting is 2x 175w hamilton 14k`s, well see how this works.


Now, whered that robot fragger i built go to now ...


Marc.
__________________
Confucious say : Things that come to those who wait, will be things left over by those who didnt.
Reply With Quote
  #2  
Old 07-13-2007, 02:28 AM
Zylumn Zylumn is offline
Member
 
Join Date: Mar 2007
Location: Calgary , NW
Posts: 274
Zylumn is on a distinguished road
Default

LOL We knew you could do it!! (robot fragger)
by the way nice frag tank.
Reply With Quote
  #3  
Old 07-13-2007, 03:13 AM
Snappy's Avatar
Snappy Snappy is offline
Member
 
Join Date: Jan 2005
Location: Calgary, Alberta
Posts: 4,675
Snappy is on a distinguished road
Default

very nice Marc. I hope to see it in person soon.
__________________

Greg
Reply With Quote
  #4  
Old 07-13-2007, 03:15 AM
Jason McK's Avatar
Jason McK Jason McK is offline
Member
 
Join Date: Mar 2003
Location: Ladner,BC
Posts: 3,032
Jason McK is on a distinguished road
Default

Nice Marc. WOW those are such clean lines. Nice glue job on the seems

J
__________________
My old Tank Shut down Jan 2011
New 220G build about to start
Reply With Quote
  #5  
Old 07-13-2007, 03:29 AM
niloc16's Avatar
niloc16 niloc16 is offline
Member
 
Join Date: Mar 2006
Location: mission,bc
Posts: 1,299
niloc16 is on a distinguished road
Default

marc that is AWESOME. but i have to say i wish you would have let me see 'my' frag tank before you showed it to everyone!

amazing job again superfudge. you definitely are saltwater super hero
__________________
Colin

my tank setup
Reply With Quote
  #6  
Old 07-13-2007, 03:55 AM
Redrover's Avatar
Redrover Redrover is offline
Member
 
Join Date: Sep 2006
Location: Abby, BC
Posts: 288
Redrover is on a distinguished road
Talking

Hey Marc nice job, one thing where's the dog, when he get's older he'll never fit...A little cold water and me things he'll go for it
Laterrrrrrrrr:RJ
Reply With Quote
  #7  
Old 07-13-2007, 05:46 AM
Delphinus's Avatar
Delphinus Delphinus is offline
Member
 
Join Date: Dec 2001
Location: Calgary
Posts: 12,896
Delphinus has a spectacular aura aboutDelphinus has a spectacular aura aboutDelphinus has a spectacular aura about
Send a message via MSN to Delphinus
Default

How do you get the edges so nice and polished like that? Any tips?
__________________
-- Tony
My next hobby will be flooding my basement while repeatedly banging my head against a brick wall and tearing up $100 bills. Whee!
Reply With Quote
  #8  
Old 07-13-2007, 01:03 PM
SuperFudge's Avatar
SuperFudge SuperFudge is offline
Member
 
Join Date: Aug 2001
Location: Chilliwack.B.C.
Posts: 741
SuperFudge is on a distinguished road
Default

Thanks guys,

Jason, the seam work i still need practice on, still too many bubbles for my liking....but i used the pin method on this one, it seemed to work well.

The joint is filled with glue when its actually lifted about a 32`nd of the panel its being glued to, then pins are removed after the glue has tacked up a few seconds.

Tony, theres two methods that i use to polish, first i always joint or route all finished edges before they are installed.

Depending on the piece and the type of acrylic, i may use the novus 3 step polishing compounds and a buffer wheel on my bench grinder...or i may flame the edges, using a propane torch.
when flaming you have to be careful, because you cannot glue too near that area afterwards, the acrylic will craze.

Marc.
__________________
Confucious say : Things that come to those who wait, will be things left over by those who didnt.
Reply With Quote
  #9  
Old 07-13-2007, 02:09 PM
Delphinus's Avatar
Delphinus Delphinus is offline
Member
 
Join Date: Dec 2001
Location: Calgary
Posts: 12,896
Delphinus has a spectacular aura aboutDelphinus has a spectacular aura aboutDelphinus has a spectacular aura about
Send a message via MSN to Delphinus
Default

I've never really had much luck with flaming. I guess you need a practised hand - I ended up overheating a spot and it bubbled up on me.

This pin method sounds interesting - I can't quite picture it, how do you remove the pins, do you just fill the pinholes with weldon 16 to make them invisible?

Sorry for the hijack BTW - tank looks great.
__________________
-- Tony
My next hobby will be flooding my basement while repeatedly banging my head against a brick wall and tearing up $100 bills. Whee!
Reply With Quote
  #10  
Old 07-13-2007, 02:26 PM
Aquattro's Avatar
Aquattro Aquattro is offline
Just a guy..
 
Join Date: Aug 2001
Location: Victoria, BC
Posts: 18,053
Aquattro is a jewel in the roughAquattro is a jewel in the roughAquattro is a jewel in the roughAquattro is a jewel in the rough
Default

Tony, you use the pins as shims between the two pieces, there aren't any holes afterwards. This works well for larger sheets and gives a really nice joint.
__________________
Brad
Reply With Quote
Reply


Posting Rules
You may not post new threads
You may not post replies
You may not post attachments
You may not edit your posts

BB code is On
Smilies are On
[IMG] code is On
HTML code is Off
Forum Jump


All times are GMT. The time now is 10:34 PM.


Powered by vBulletin® Version 3.7.3
Copyright ©2000 - 2024, Jelsoft Enterprises Ltd.