 |
|
#11
|
|||||
|
|||||
|
If the sump fits your stand, and you generally like it, use it
The only couple things I'd do to mod it are; 1 - I'd make an acrylic filter sock tray and put it where the black media box would sit. Now you have removable socks I cut my tray with a jigsaw before removing the plastic film and it stopped the saw from gumming up with hot plastic All I do is lift the socks out and put clean ones in 2 - I'd put a tall baffle before the short one (next to the sponge in the pic) This will act as not only a bubble trap, but will allow for much more water volume. Then all you have to do is play around with your skimmer by adjusting it's height with a stand of sorts until it's happy The water spilling over the new baffle will carry air with it once it gets a biofilm buildup. This will hit the bottom of the sump and be stopped by the short baffle and shouldn't make it's way to your return pump It's not an ideal design, but will save you reconfiguring your sump completely And I'd recommend you test the new baffle with some silicone. This way you can remove it if you need. Once you like it, cut it out and properly glue it with acrylic glue And if you want an even better bubble trap, but lose another inch or so of skimmer area, a second baffle will work better. The first baffle is off the bottom by an inch, and the second one is on the bottom and is the same size as the first, so it's now an inch shorter top to bottom Make sense ? Of course, you want the added baffle to be shorter than the top of the sump by about a quarter inch or so, and you can have your 'power off' level lower than this - based on how much water flows back to your sump when all pumps are off etc I played with my sump for weeks before I was happy with it Re-plumbed/baffled/sock trayed it 3 times before I was happy So you may want to test your's out for days before you decide it's going to work for you Last edited by gregzz4; 11-24-2013 at 03:35 AM. |
|
#12
|
||||
|
||||
|
gregzz4, I really like what you did for your sump. I read through a bit of your build and see you are running all those heaters for redundancy. How are you running that many heaters off multiple gfci circuits and still controlling them with your controller?
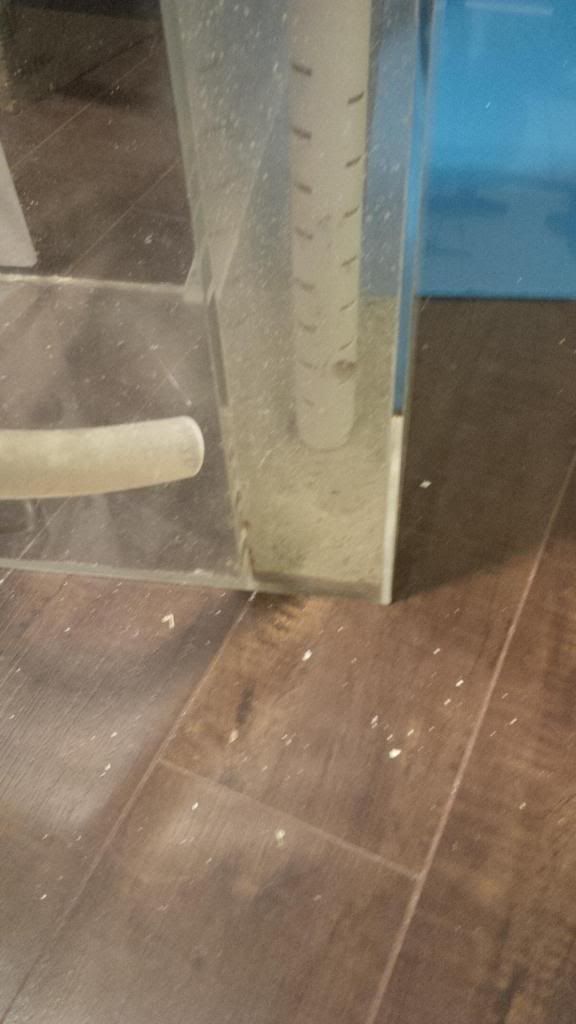
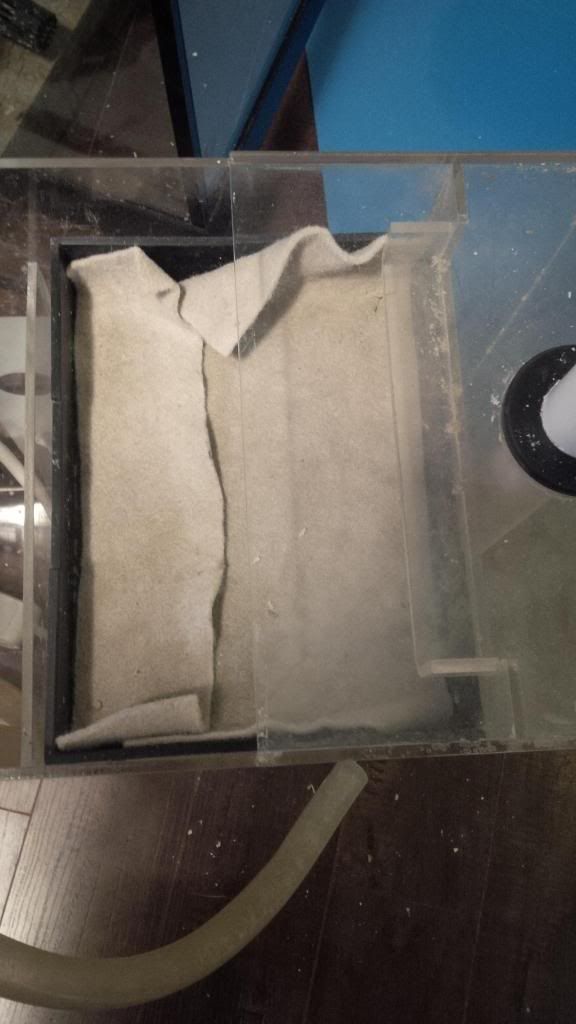
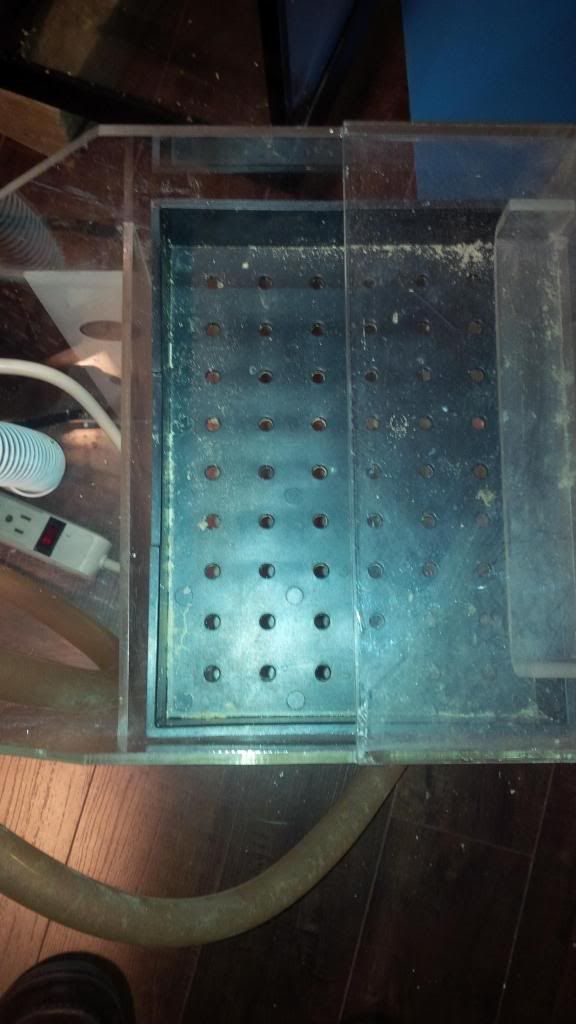
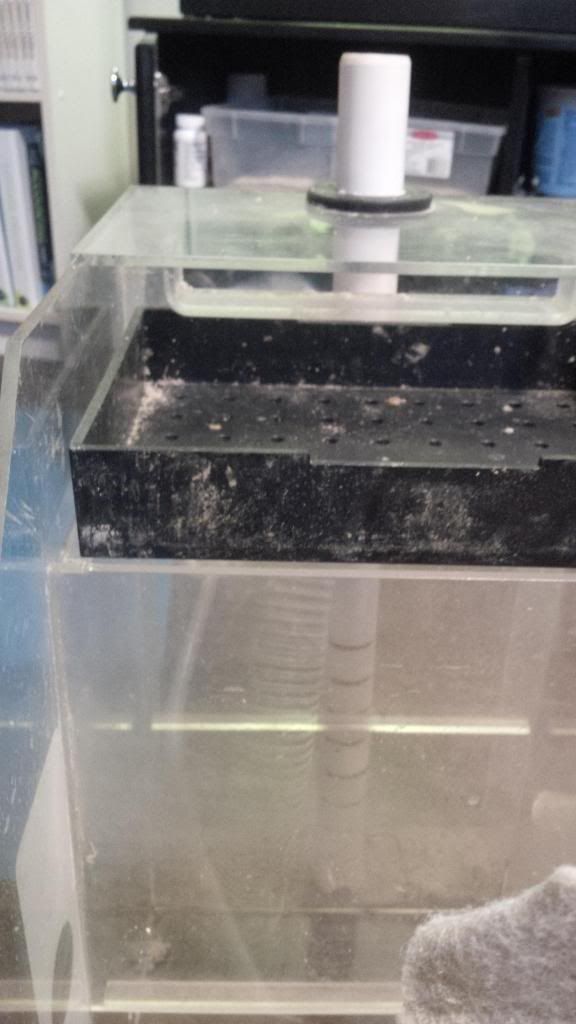
hillegom, thanks for the link. I already read that though and most others I can find. The problem is they are all very vague. They tell you to make sure of this and that but not how to make sure. Maybe more pictures will help. [IMG]  [/IMG] [/IMG]This is the build up in the first chamber, which is why I was going to remove it. Now I'm thinking maybe I will leave it and cut in an access from the top so I can suck that out every now and then with a shop vac. Seem like an ok idea? [IMG]  [/IMG] [/IMG]Here you can see the previous owner used the old drip tray and placed filter floss in it. You can also see how the first chamber overflows into it. You can see that the top is one piece so hopefully cutting in access to the first chamber wouldn't weaken it. [IMG]  [/IMG] [/IMG]So I have a few options and what opinions. Do I keep the drip tray and run floss? Do I modify the drip tray by installing a filter sock and plugging the other holes? Do I build a tray for filter socks? If I build a tray do I make it as big or smaller than the drip tray? If I go filter socks does the water in the chamber need to be below the socks? [IMG]  [/IMG] [/IMG]Now in this one you can see that the top of the baffle is about the same height as the bottom of the drip tray. Would I need to lower that baffle to make this chamber work this way? It would be easy enough to cut a piece that will fit the bottom of this baffle and make this a full chamber. Although if I put cheato under the drip tray I would have to light the chamber from the side.
__________________
72g bowfront, t5. 29g JBJ nano cube, ATI 26HD. Livestock: clown fish, chromis, coral beauty. Corals: Toadstool, maze brain, candy cane, mushrooms (purple & green hairy), button polyps, green zoas, GSP. |
|
#13
|
|||||
|
|||||
|
My filter socks are completely submerged. I think it keeps them quiet
I'd remove the drip tray completely as it's too high to have submerged socks. Doesn't the tray just lift out ? Put the new baffle in I was talking about and then decide what height you want the sock tray to be at. Use the return pump to circulate the sump alone to see how things are going to work For your sock tray, I'm thinking you'll want to use verticle legs on the bio-ball shelf support pieces to support the sock tray. You can adjust the legs to get the tray height you want once the new baffle is installed For the baffle, I suggest you start with a piece of glass for testing. Use silicone to seal it up Once your happy with how it works, you may want to install a permanent one using acrylic and glue it in. But, keep in mind that once this is done, it will be nearly impossible to remove later I say this as silicone doesn't hold glass on acrylic very well and could let go at some later time You won't need or be able to grow chaeto right away, so worry about it later once you're happy with the way the sump is running. And ya, you can light it from the side |
|
#14
|
||||
|
||||
|
I never thought of running the sump without the tank, that is a good idea. I'm re-finishing the stand and was kind of waiting on that before experimenting.
How high would you recommend the filter sock tray? Would you make the tray the full size of the compartment? The sides of the sump are 3" verticle and 2" diaganol from the top of the baffle that the drip tray sits on. Would it be possible to keep the socks that high? Is there a downside to having them that high? From what I've read bubble trap baffles should be 1" appart. I have 2" between the baffles where the spong sits. If I close in the one baffle to the bottom and cut it out around the same hight as the other one I could drop one from the top in between the two and make an actual bubble trap. Each side would be 1\16" shy of the 1". Will doing that work, or will it restrict flow too much?
__________________
72g bowfront, t5. 29g JBJ nano cube, ATI 26HD. Livestock: clown fish, chromis, coral beauty. Corals: Toadstool, maze brain, candy cane, mushrooms (purple & green hairy), button polyps, green zoas, GSP. |
|
#15
|
||||
|
||||
|
If I make acrylic baffles and put them in place temporary with silicone that will later be removed, does it stil need to be aquarium safe silicone? Will it be easy to remove or will I need silicone remover?
__________________
72g bowfront, t5. 29g JBJ nano cube, ATI 26HD. Livestock: clown fish, chromis, coral beauty. Corals: Toadstool, maze brain, candy cane, mushrooms (purple & green hairy), button polyps, green zoas, GSP. |
|
#16
|
||||
|
||||
|
You will have to use aquarium safe silicone, after all, your aquarium water will end up going through there.
If you are only trying out the sump without tank water, then IF you remove ALL traces of silicone then it will be ok. But for how much, 2-3 $ it would cost extra for aquarium safe silicone, do you want to chance it? Its easy to remove silicone from plastic, you do not want to use any remover, might melt the acrylic. |