
|
|
|
#152
 04-06-2012, 03:03 AM
|
|||||
|
|||||
|
Quote:
__________________
260g mixed reef, 105g sump, water blaster 7000 return, Bubble King SM 300 skimmer, Aqua Controller Jr, 4 radions, 3 Tunze 6055s,1 tunze 6065, 2 Vortech MP40s, Vortech MP20, Tunze ATO, GHL SA2 doser, 2 TLF reactors (1 carbon, 1 rowa). http://www.canreef.com/vbulletin/showthread.php?t=50034 . Tank Video here http://www.vimeo.com/2304609 and here http://www.vimeo.com/16591694 
|
|
#153
04-06-2012, 05:13 AM
|
|||||
|
|||||
|
It's lookin' great from here. Only thing I'd suggest is, because you haven't drilled the rock, you might consider using epoxy to stave off the risk of rockslides.
That is, once you have your live rock in place and are happy with it. I used small acrylic rods and epoxy to attach my base rocks to squares of acrylic. I didn't want to cover the tank bottom with eggcrate. In my case, even just 1" of sand will cover what I have done.
|
|
#154
04-06-2012, 10:10 PM
|
|||||
|
|||||
|
Quote:
Quote:
hehe, beat you to it. Specific gravity = 1.025  It took a bucket and a third, plus 24 hours to add, dissolve, test, then add some more. It took a bucket and a third, plus 24 hours to add, dissolve, test, then add some more. Quote:
Yah I'm thinking I'm going to do that when i get the live rock. I'm hoping I'm able to open up the structure a bit, and I can banish some of the cycled marco rock to the sump and speaking of the cycle... It's started! I added enough pure ammonium chloride to get the ammonium up to 2ppm, and I've got 10 cocktail shrimp in a mesh bag in the sump. I then dumped in a 250ml bottle of Dr. Tim's 1 and only live nitrifying bacteria. I'm not convinced it will 'eliminate' the cycle, but I am expecting it to speed it up a little. Presently: Ammonia = 2.0 Nitrite = 0 Nitrate = 0 Phosphate = 0.10 (I assume it's leaching from my rock and sand) I didn't have time to test the other ions except Alk, and the salt mixed up to a dKh of 10.3 Next steps: 1. I need to sort out the remote R/O reservoir and top off system. The float valve for the R/O unit is right in the sump right now. That makes me hella nervous 2. The lights are scheduled for arrival in Calgary on Monday, and I need to get the hanging situation figured out soon. 3. The heaters. I have ordered 3 300 watt heaters, but the more I read about heaters, the less I think that was a good idea. I'm thinking I need a larger titanium heater that's controlled by a controller? Any thoughts? I've got two temporary heaters on the tank right now, a 300W loaner, and a fluval digital (e-series I think I can't remember the wattage) from my 90, but together they can't get the water past 23.5 degrees. 4. I need to set up my skimmer and reactors. The Deltec is sitting on the floor begging to go in the tank and suck out the cloudiness from my sand, but the water in the skimmer chamber is 19.5 inches deep. I have the egg crate and PVC I need to make the stand the skimmer will sit on, but it turns out I have neither the tools, nor the skill to cut 4 pieces of pvc the same length and with flat edges. I also don't have the tools I need to affix the egg crate to the legs. Does anyone know of a place where I can go to get PVC cut so that the ends are perfectly flat? My hand saw skills have no kung fu.
|
|
#155
04-07-2012, 11:18 PM
|
|||||
|
|||||
|
About cutting the PVC ...
Ask around your neighbourhood for someone with a mitre/chop saw. I ended up buying one of these as I had tons of cuts to make and didn't want rough edges 
|
|
#156
04-07-2012, 11:25 PM
|
|||||
|
|||||
|
As for your heaters ....
3-5 watts/g is a good idea. I don't know what your total water volume is or I'd suggest a heater group. I like having multiple smaller heaters so no single one can cook the tank if it is stuck on and I'm not relying so much on a few to do the job of many. I have my heaters connected to a controller and they are set 1-2 degrees above my target temp so they always engage. Also, this way if something goes sideways and they are all permanently on, there's less chance they will thoroughly cook everyone.
|
|
#157
04-07-2012, 11:43 PM
|
|||||
|
|||||
|
I ran my heaters one at a time in a bucket with a powerhead and a trusted thermometer to pre-set them
|
|
#158
04-08-2012, 11:24 PM
|
|||||
|
|||||
|
Quote:
Quote:
|
|
#159
04-09-2012, 02:15 AM
|
|||||
|
|||||
|
Here's the tank as seen from my desk
 I can't wait to get lights over it! I also got my new toy running 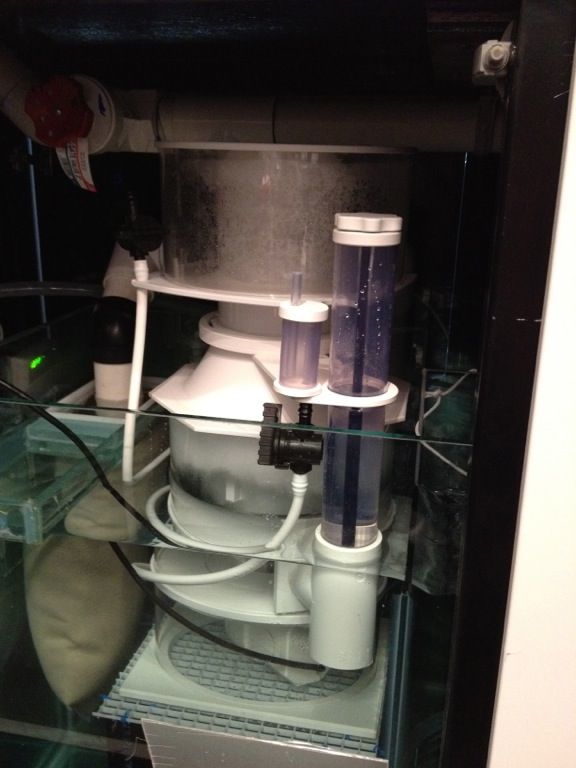 Hopefully it will pull some of the cloudiness out of the water over the next couple of days. The cocktail shrimp in the sump are starting to stink to high heaven. I've got the ceiling fan (which is unacceptably loud, we'll see what my options for fixing that are) running to keep the sump from gagging me every time I open the doors. Ammonia: 3ppm Nitirite: Between 0.25 and 0.50ppm Nitrate: Between 0 and 5ppm. API test kits are sort of crappy for that. It's closer to zero. The Dr. Tim's appears to have sped the process up at least.
|
|
#160
04-11-2012, 04:44 PM
|
|||||
|
|||||
|
I'm starting to think that 10 rotting cocktail shrimp might have been a tad excessive...
Day 5 of the cycle, and the shrimp in the bag are starting to melt. Ammonia: between 1 and 2ppm, but probably closer to 2 Nitrite: off the chart. It goes to 5ppm, and my vial is even darker and more brilliant than that. It's quite pretty actually. Nitrate: Between 10 and 20ppm So the bacterial conveyor belt is working, I think I've just overloaded it Oh well, the rocks will be more than able to support life when it's done. I'm picking up my lights today!
|


 Linear Mode

