Canreef Aquatics Bulletin Board  

Go Back   Canreef Aquatics Bulletin Board > General > Tank Journal > Canreef Nano Contest 2012

Reply
 
Thread Tools Display Modes
  #41  
Old 11-29-2012, 04:30 PM
yellowworld's Avatar
yellowworld yellowworld is offline
Member
 
Join Date: Jan 2011
Location: Calgary
Posts: 228
yellowworld is on a distinguished road
Default

So i got a bunch of stuff done last night, and there is a lot more to come today and the next day. I got the rest of my electronics mounted and ready to be wired up, my apex is online now and waiting to be programmed


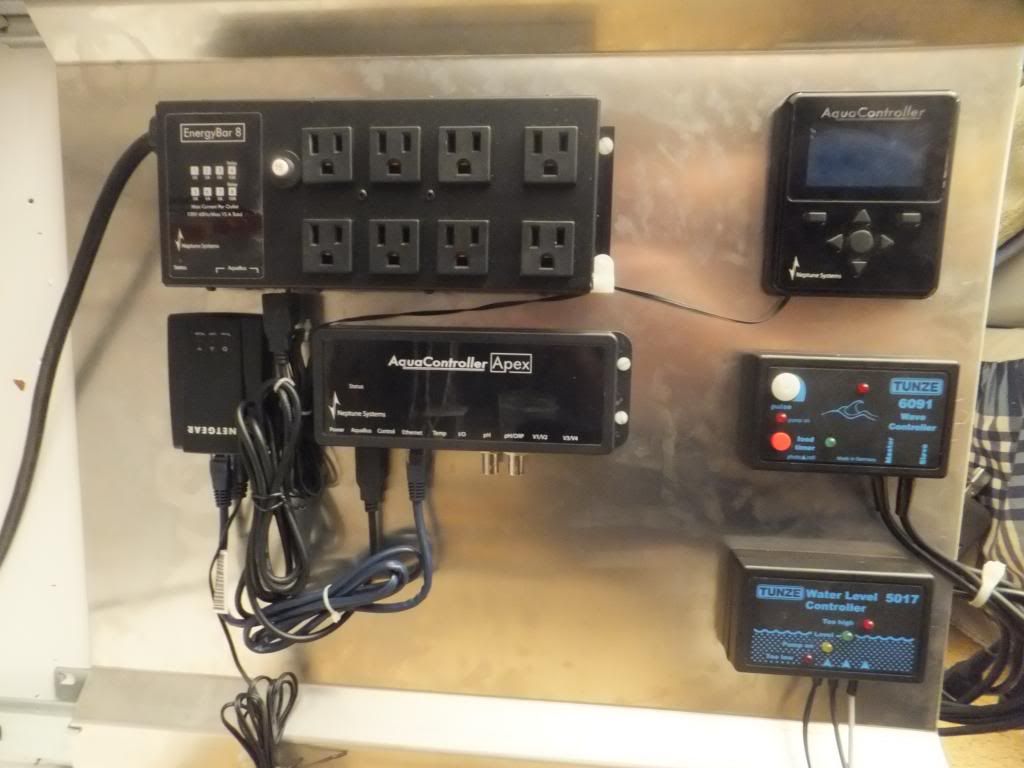
I also got my probes plumbed into my return line on the downside that will feed my fuge, i also finished that line as well too. believe it or not getting them to fit took me close to an hour and a half!!


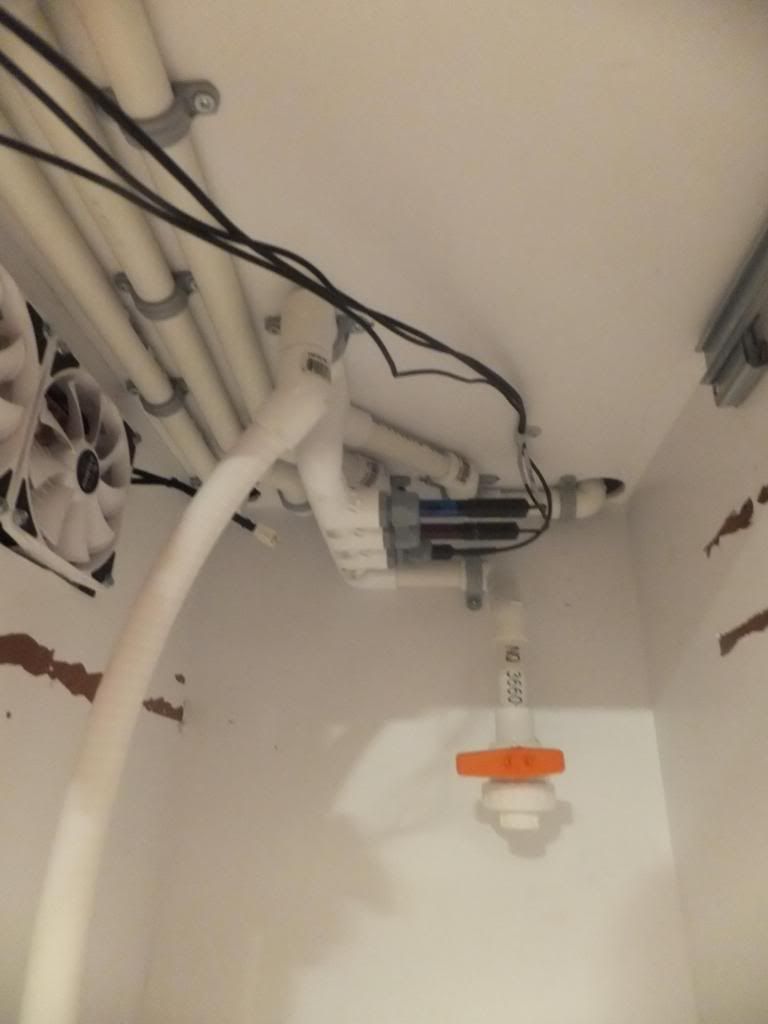
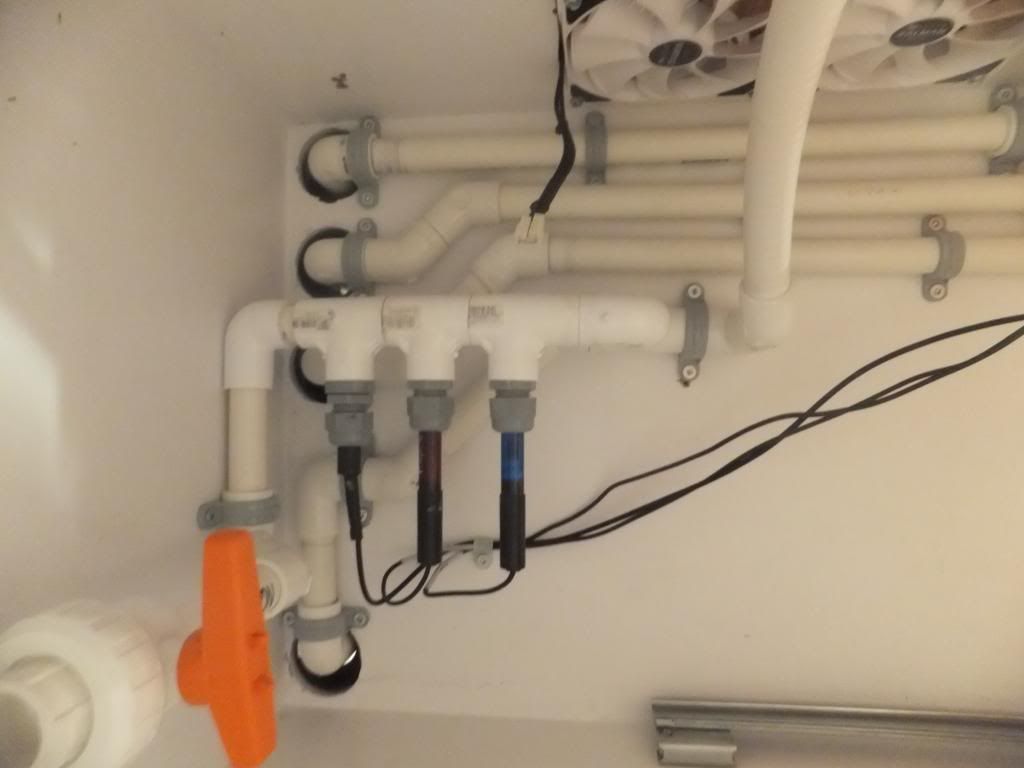
today ill be finishing the baffling in the sump and then wiring the cabinet with a GFCI plug to run everything!!
Reply With Quote
  #42  
Old 11-29-2012, 04:47 PM
Seriak's Avatar
Seriak Seriak is offline
Member
 
Join Date: Jun 2002
Location: Calgary
Posts: 954
Seriak is on a distinguished road
Default

Where did you get those in pipe probe holders? Your build looks amazing so far.
__________________
So many ideas, so little money!
Reply With Quote
  #43  
Old 11-29-2012, 04:57 PM
sphelps's Avatar
sphelps sphelps is offline
Member
 
Join Date: May 2006
Location: Lyalta, East of Calgary
Posts: 4,777
sphelps is on a distinguished road
Default

Don't let those probes dry out

Looks great so far, pretty elaborate for a nano
Reply With Quote
  #44  
Old 11-29-2012, 06:38 PM
yellowworld's Avatar
yellowworld yellowworld is offline
Member
 
Join Date: Jan 2011
Location: Calgary
Posts: 228
yellowworld is on a distinguished road
Default

Quote:
Originally Posted by Seriak View Post
Where did you get those in pipe probe holders? Your build looks amazing so far.
They are for conduit, they have a rubber o-ring inside and they squeeze tight when you screw the cap down, I had to drill then out just a little to get them to fit the probe but i got them at lowes
Reply With Quote
  #45  
Old 11-29-2012, 06:39 PM
yellowworld's Avatar
yellowworld yellowworld is offline
Member
 
Join Date: Jan 2011
Location: Calgary
Posts: 228
yellowworld is on a distinguished road
Default

Quote:
Originally Posted by sphelps View Post
Don't let those probes dry out

Looks great so far, pretty elaborate for a nano
OH crap! they have been out of water for about 2 days now while i fit them to the system...now what
Reply With Quote
  #46  
Old 11-29-2012, 06:40 PM
The Grizz's Avatar
The Grizz The Grizz is offline
Member
 
Join Date: Oct 2009
Location: 15 min NE of Red Deer
Posts: 5,470
The Grizz will become famous soon enough
Default

Is that a low flow line? Probes generally don't work correctly in a high flow.
__________________
Feed the bear goodies, make a new friend, don't feed the bear...............

8' - 165gal Reef
DIY LED's Build
2012 Nano Contest Winner
Febuary 2013 POTM Winner
300 gal + 60 gal Complete DIY Build
Reply With Quote
  #47  
Old 11-29-2012, 08:29 PM
yellowworld's Avatar
yellowworld yellowworld is offline
Member
 
Join Date: Jan 2011
Location: Calgary
Posts: 228
yellowworld is on a distinguished road
Default

Quote:
Originally Posted by The Grizz View Post
Is that a low flow line? Probes generally don't work correctly in a high flow.
Yes Sir!! that line is just going to be a trickle to feed my fuge,

does anyone know anything about my probes being out of water for the last two days? did i mess anything up??
Reply With Quote
  #48  
Old 11-29-2012, 09:12 PM
yellowworld's Avatar
yellowworld yellowworld is offline
Member
 
Join Date: Jan 2011
Location: Calgary
Posts: 228
yellowworld is on a distinguished road
Default

Alright guys! today has been a good start so far, I got all the glass for the sump ready and siliconed in place


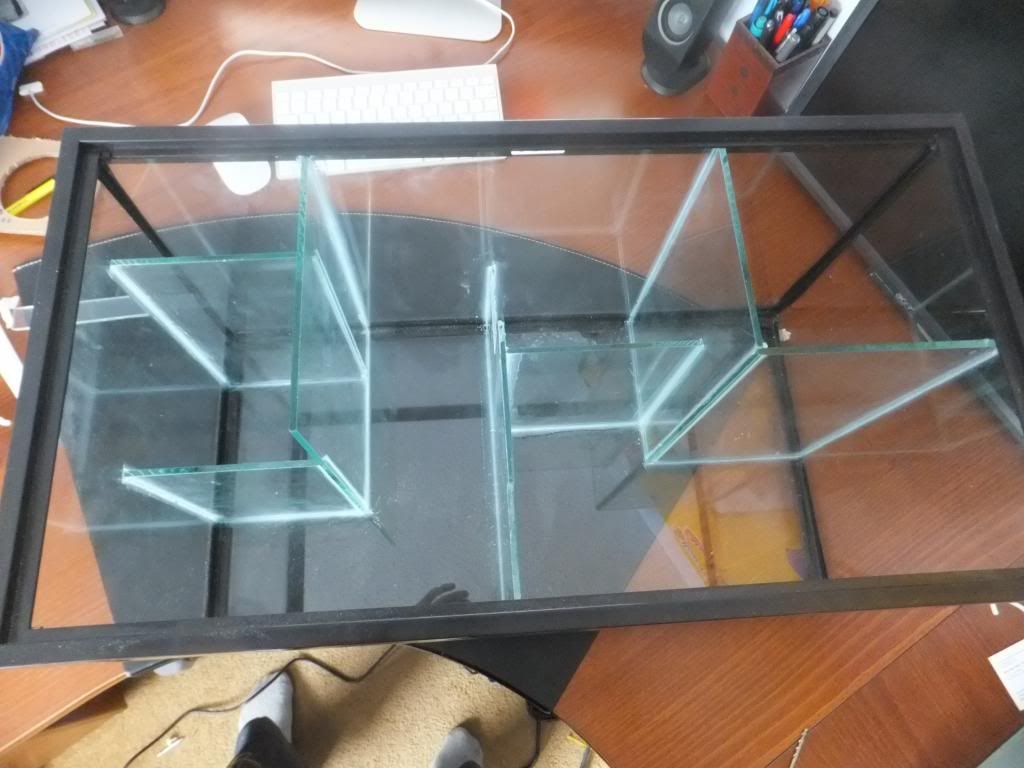
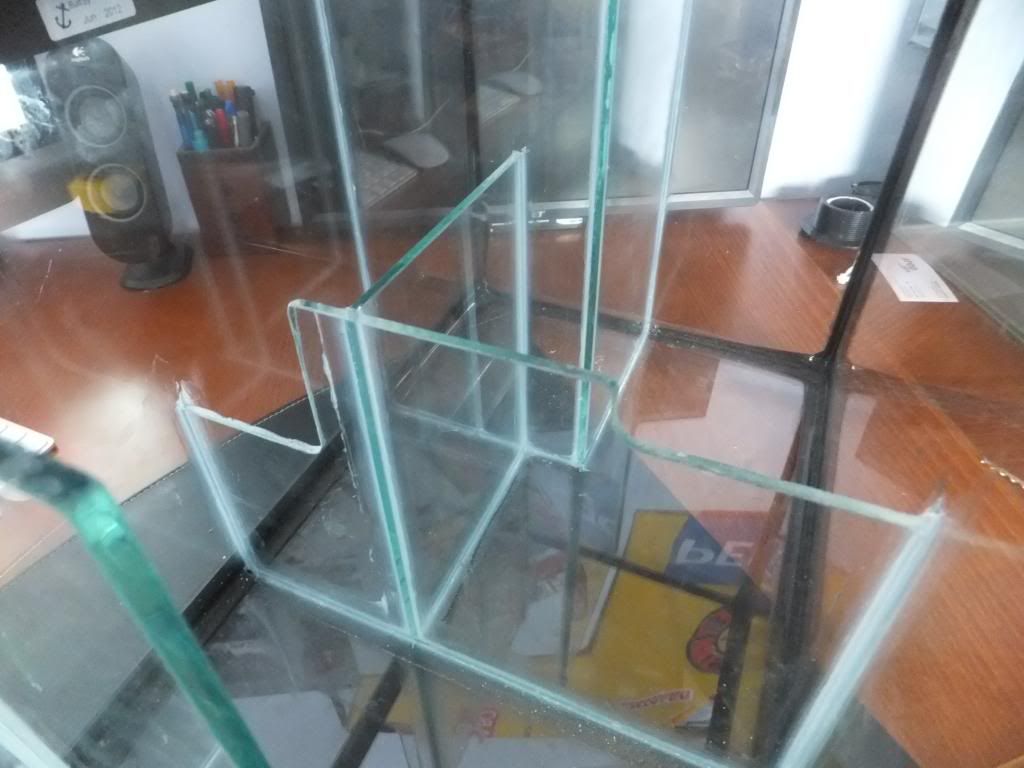
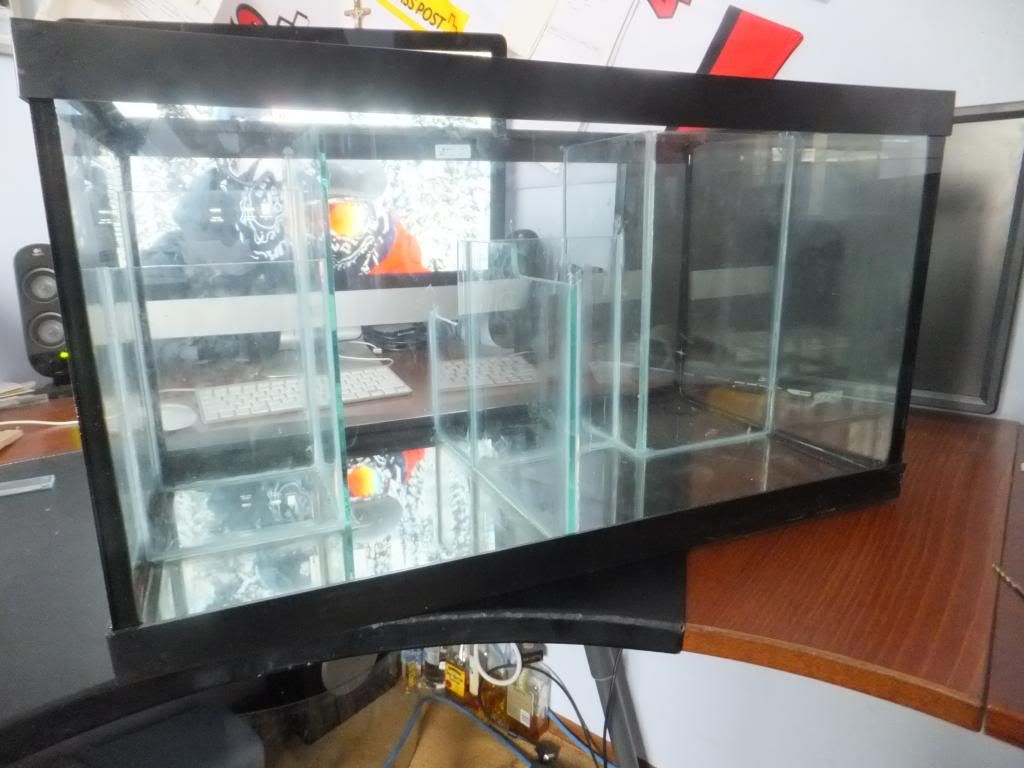
Then i got it put inside the cabinet and started putting my equipment in and sizing things up

1. Back right corner is the Tunze ATO


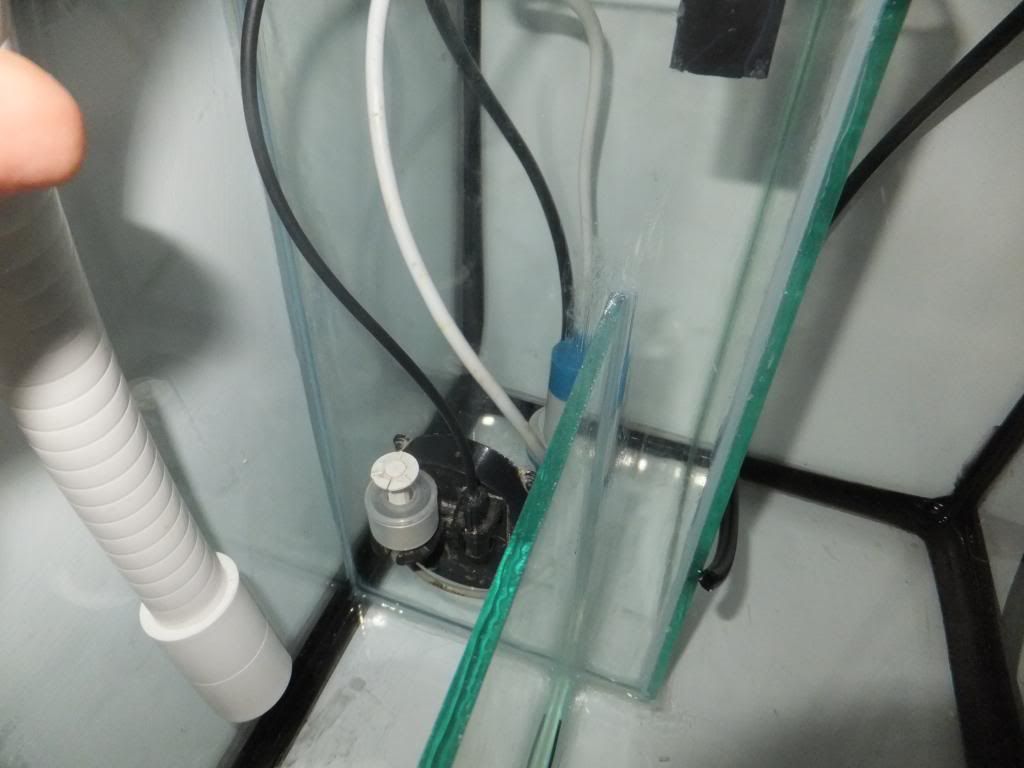
2. Right infront of the ATO chamber is the return pump, and to the right of the return and ATO is the fuge


3. Next came the skimmer


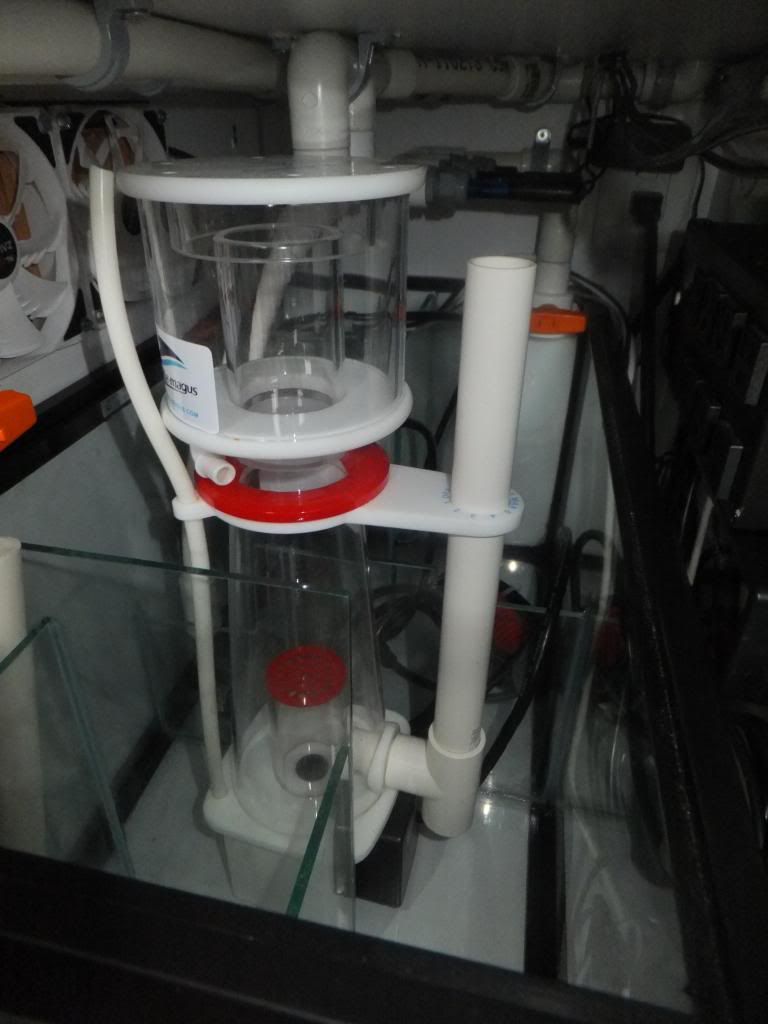
4. Then right at the front is the down pipes that feed the whole sump


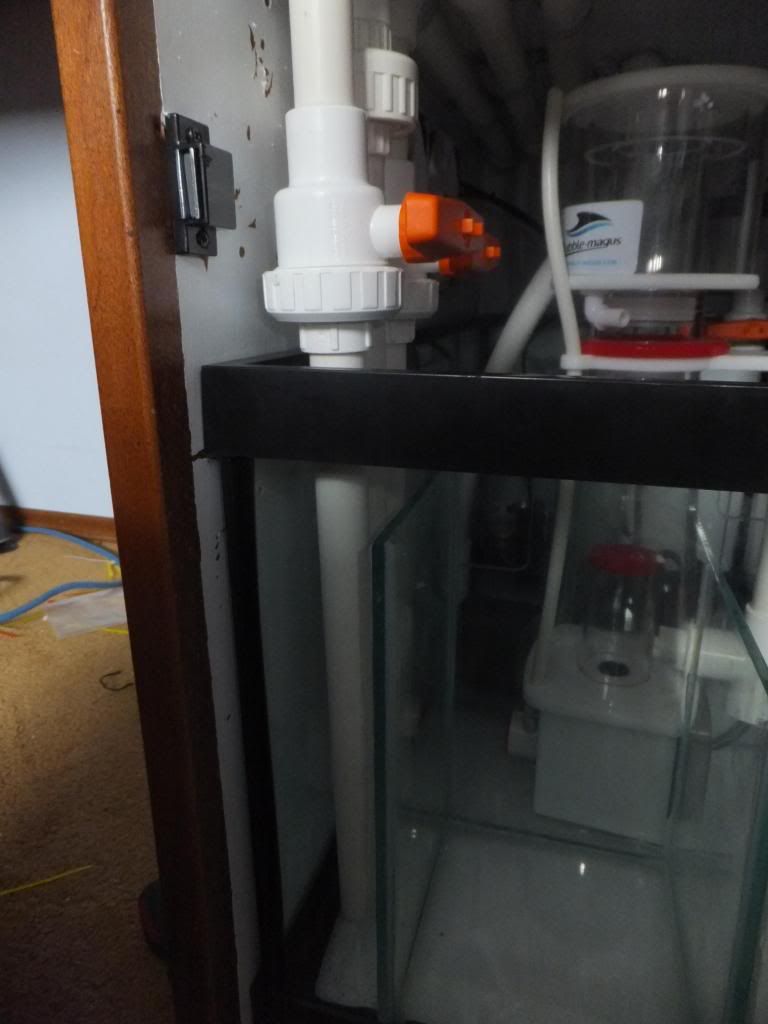
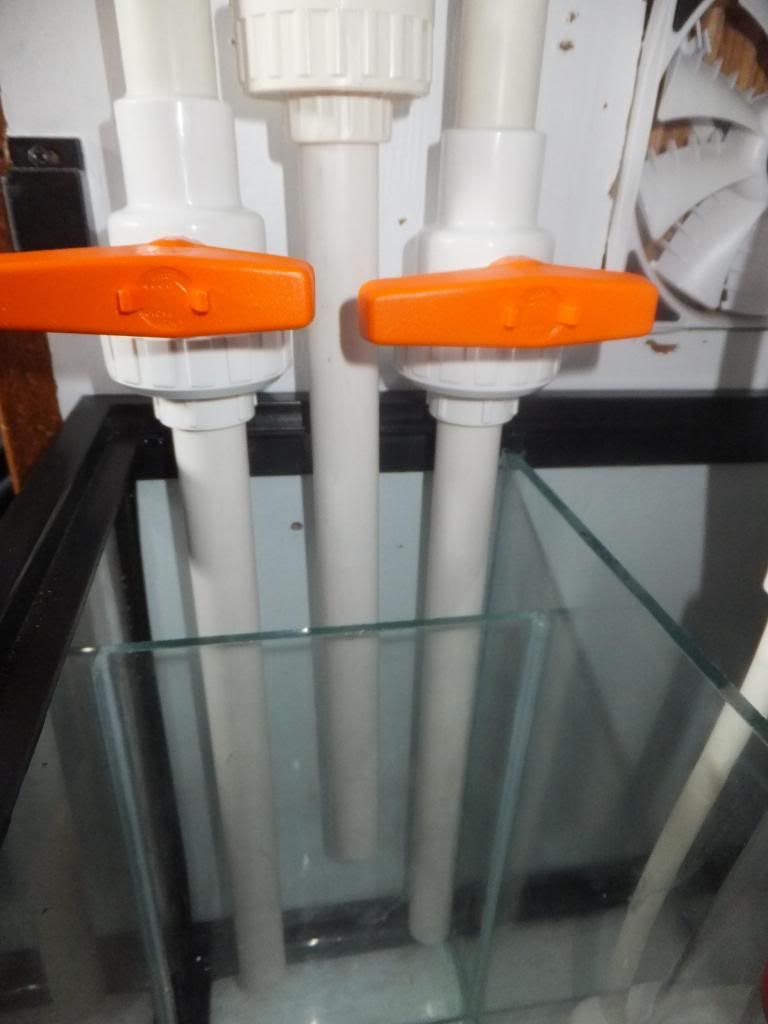
5. the only thing left to do is to cut a piece of acrylic to sit just on the otherside of the tubes to hold my filter sock, then its water time!!


While i had the sump out i took the chance to wire in my GFCI plug and then cut up an extension cord to wire the whole box to one single plug that i can plug into an existing outlet under my desk
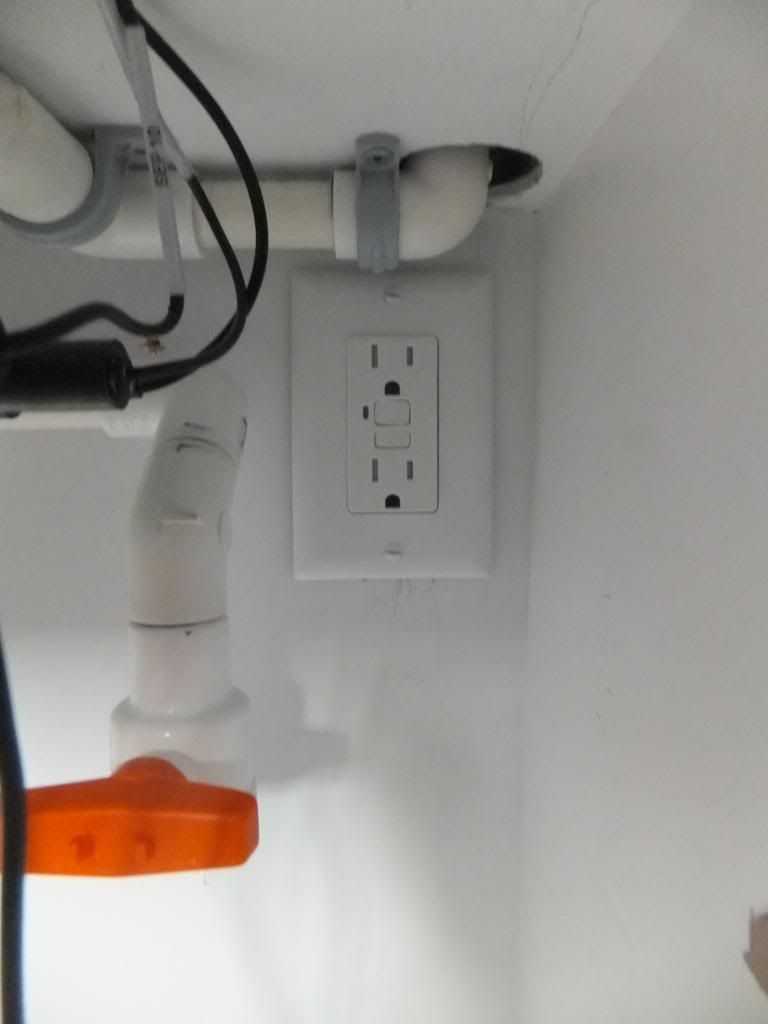
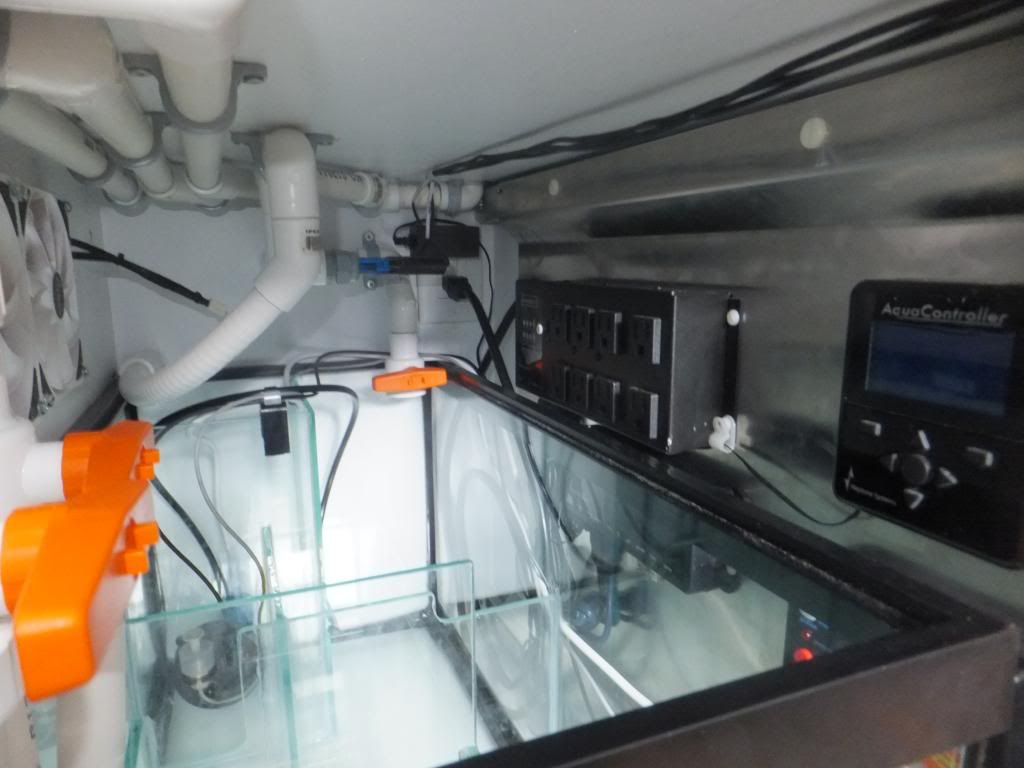
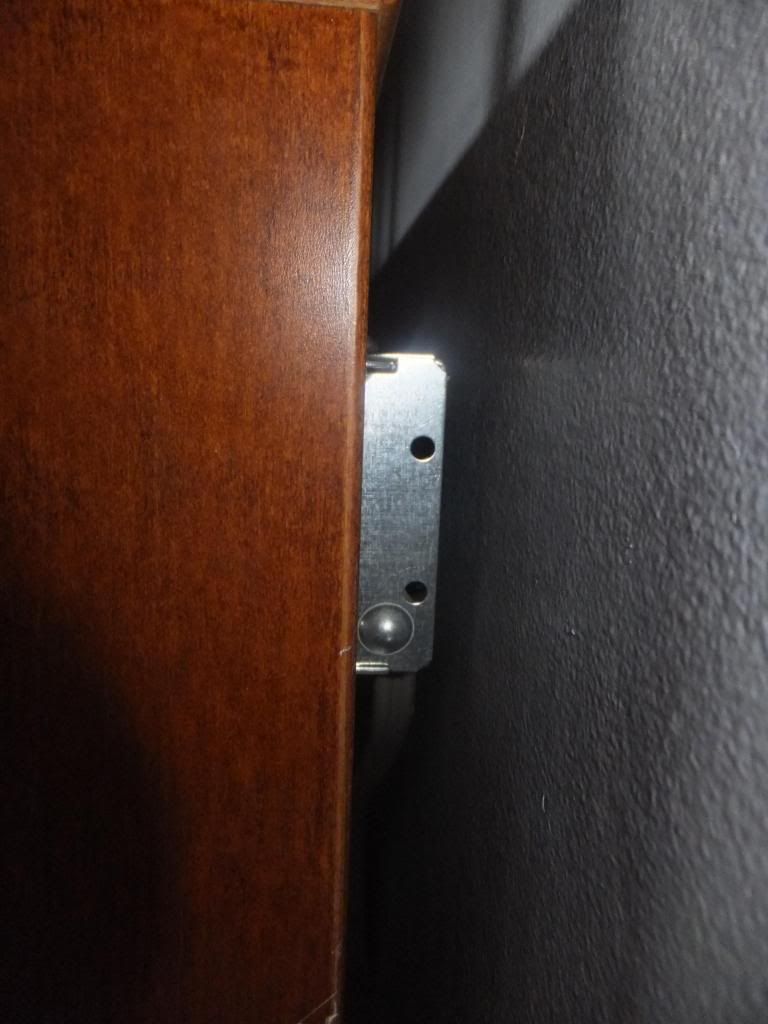
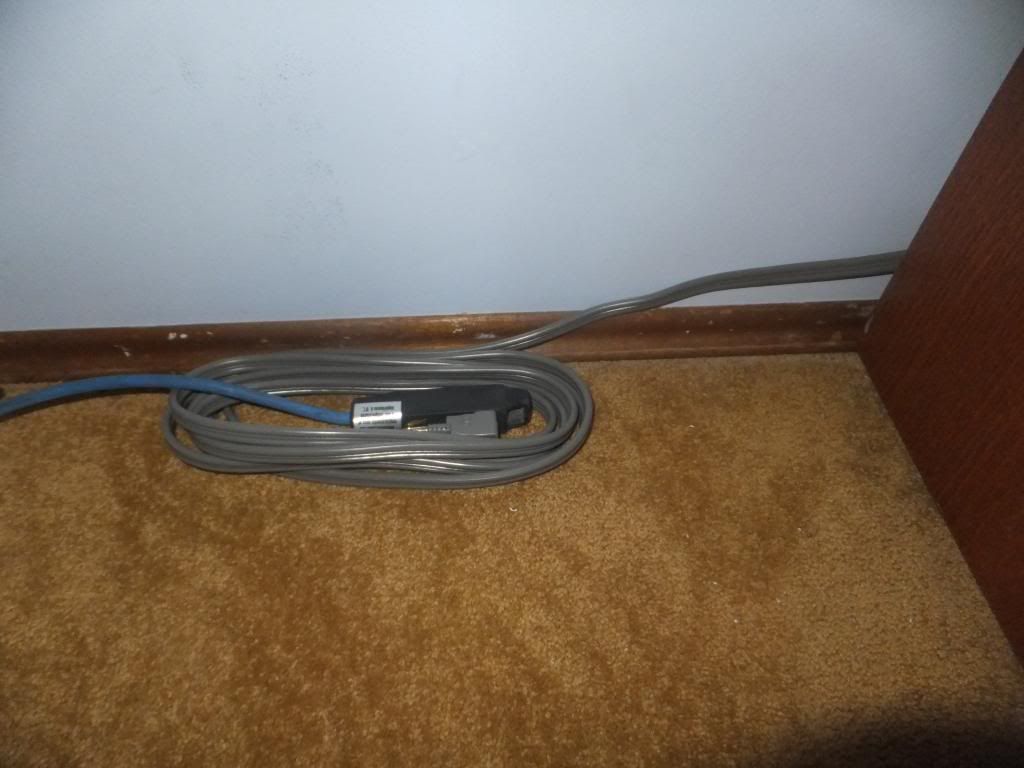


Reply With Quote
  #49  
Old 11-29-2012, 09:33 PM
FishyFishy!'s Avatar
FishyFishy! FishyFishy! is offline
Gold Member
 
Join Date: Sep 2010
Location: Calgary SE
Posts: 1,674
FishyFishy! will become famous soon enough
Default

Holy crap buddy! Thats some amazing DIY and design skills you got there! Looking fantastic.
__________________

They call it addiction for a reason...
Reply With Quote
  #50  
Old 11-29-2012, 09:43 PM
mrhasan's Avatar
mrhasan mrhasan is offline
Member
 
Join Date: Jun 2012
Location: Calgary
Posts: 2,893
mrhasan is on a distinguished road
Default

All these sweet stuffs for a nano! Total killer

(I am putting my bet on this build for the contest )
__________________

You wouldn't want to see my tank. I don't use fancy equipment and I am a noob
Reply With Quote
Reply


Posting Rules
You may not post new threads
You may not post replies
You may not post attachments
You may not edit your posts

BB code is On
Smilies are On
[IMG] code is On
HTML code is Off
Forum Jump


All times are GMT. The time now is 07:48 AM.


Powered by vBulletin® Version 3.7.3
Copyright ©2000 - 2024, Jelsoft Enterprises Ltd.