
|
|
|
#11
 04-02-2013, 06:22 AM
|
|||||
|
|||||
|
I gave the foam a day to finish expanding and cure and then took a sharp pointed knife and started cutting away the excess. I started with the back and sides because they dont take a whole lot of thought. Before starting on the front I placed the frame in the aquarium to ensure the back/side fit was okay. It was good so bit of a relief there . The egg crate is no longer flimsy at this point because of the foam structure but is still subject to slight bending. Easy to carry around but still needed to be fully supported underneath when worked on.
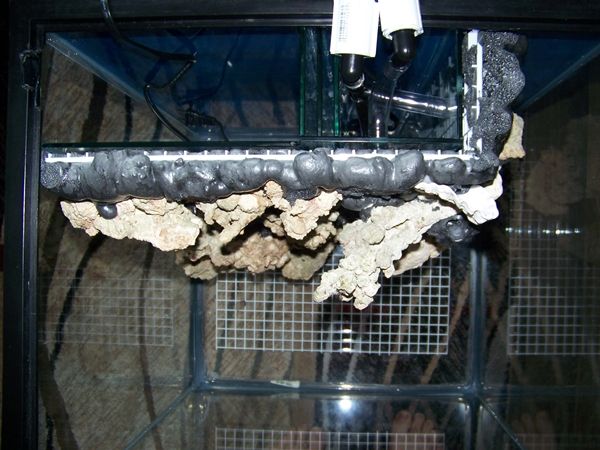 While it was in the tank I trimmed the top because I could use the tank frame as a guide on how much to cut away. It was then back outside to do the front. I wanted my end product to be as 3 dimensional as possible with the rocks standing out so I carved out a lot of the foam between and above them. I filled ¾ of the bathroom garbage can with the extra bits. 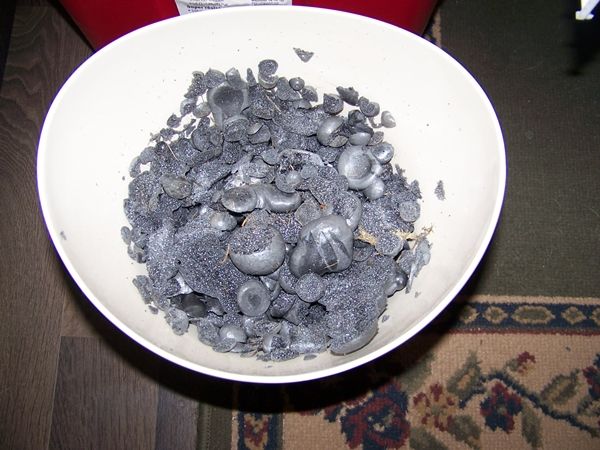 I left the most foam at the bottom of the rocks to provide extra support for their weight and just gently carved the foam shape to match the rocks a bit better than the intestine look. In a couple of spots I carved too much and exposed some small pieces of the zip ties which would have to be camouflaged later. Heres a close up of the foam once it is carved; no longer smooth skinned but rather exposed air pockets. 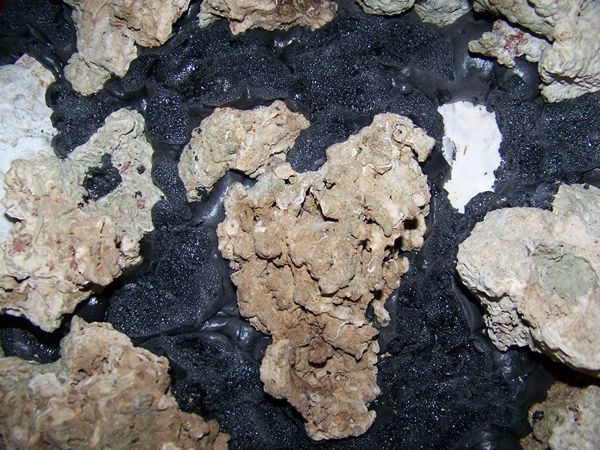 The next step once I was happy with the shape was to epoxy and sand. In preparation for this build I spent the most time researching the epoxies that other people had used. I know nothing about epoxy so had to reduce my search to 1) products that had been successfully used in a reef 2) products that were reasonably easy to locate and 3) products that didnt only come in gallon buckets. I ended up following some European reefer advice and went to the locally hobby shop to buy epoxy that would be used on model boats/planes. I used 1 ½ packages of this 30 minute epoxy to complete the job. 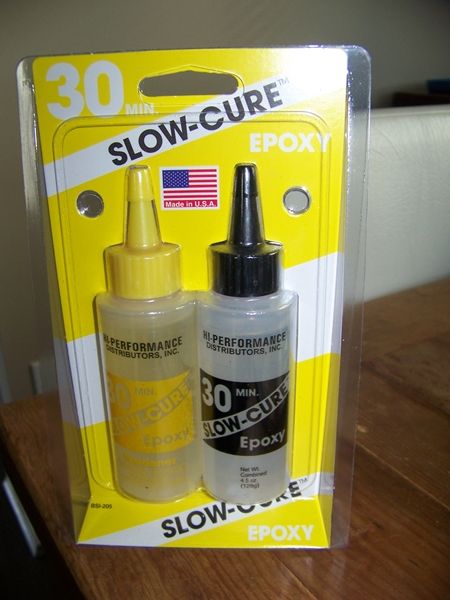 This same epoxy comes in different curing times like 5 minutes, 10 minutes, 20 minutes etc. labelled prominently on the package. When I compared the small print on the packages the curing time was directly proportional with its ability to used with water. E.g. the 5 min is no good for any water application, the 15 minute was water-resistant, and the 20 minute was the first one to state water-proof. Adding a little bit of security in my mind I went one better and bought the 30 minute blend. Then it was off to the dollar store to buy some bulk throw away paintbrushes to apply it with. Once you have used the epoxy the brushes are absolutely ruined so buy the cheapest ones you can find of suitable size. I ended up using 3 just to get this job done as they harden and become difficult along the way. The big brush on the right was not the right tool for the job - the smaller ones worked much better.  I had some sand from an old reef setup that I had rinsed a couple of weeks prior. It had been drying on a Rubbermaid lid in anticipation of this step. I mixed the epoxy a little bit at a time, coated it on to the foam one section at a time, and then liberally sprinkled sand all over it. Because of the shape of the background I had to keep rotating it in order to be able to sprinkle the sand and get it to stick. This was the longest part of the project taking me the better part of an afternoon but was also the most satisfying. Here it is drying on the back steps. 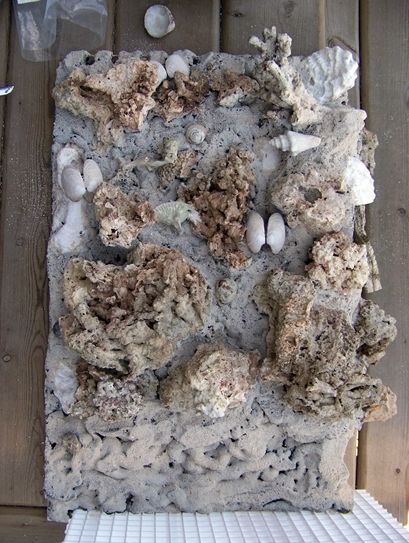 Next up is the installation and in tank shots. 
|
|
#12
04-02-2013, 01:10 PM
|
|||||
|
|||||
|
I think that looks good. Any chance of a side shot of the front panel to see the relief you were able to create?
|
|
#13
04-02-2013, 02:43 PM
|
|||||
|
|||||
|
Quote:
|
|
#14
04-04-2013, 01:21 AM
|
|||||
|
|||||
|
I've now got the background in place in the aquarium. I put a light bead of silicone around the back edge to hold it in place and gave it a couple of days to cure. Here's some pics from all angles of it in the dry tank.
From left side 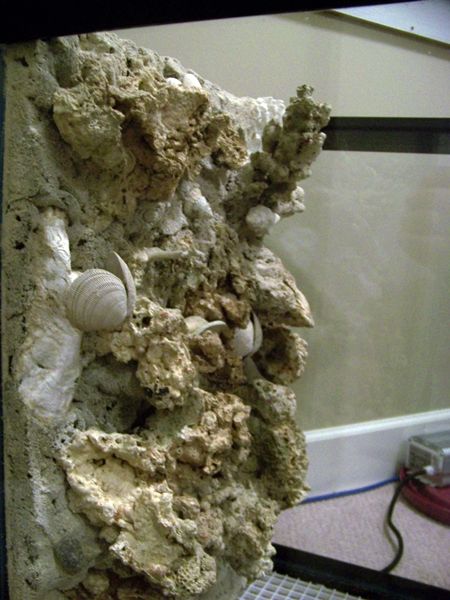 Top down angle 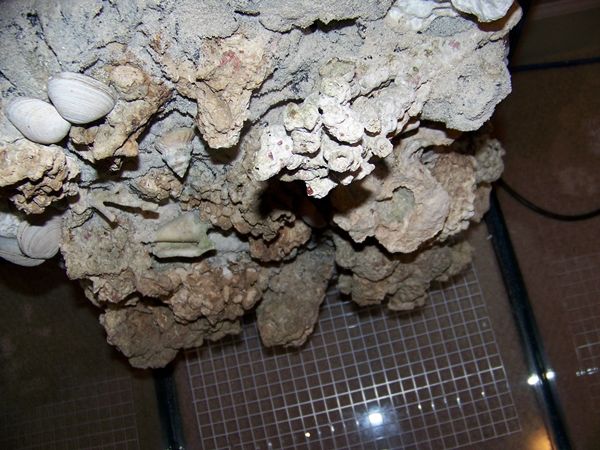 Close up shot 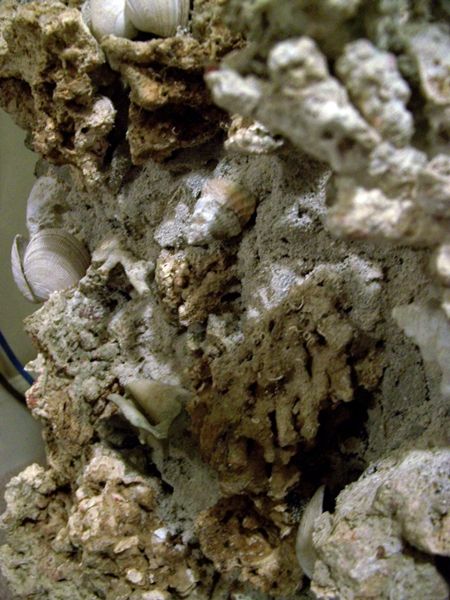 Looking straight down 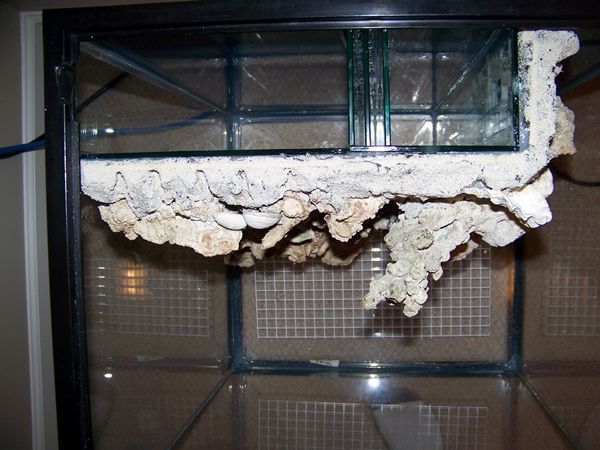 I forgot to mention that I had cut out overflows. Here's a close up look at them. 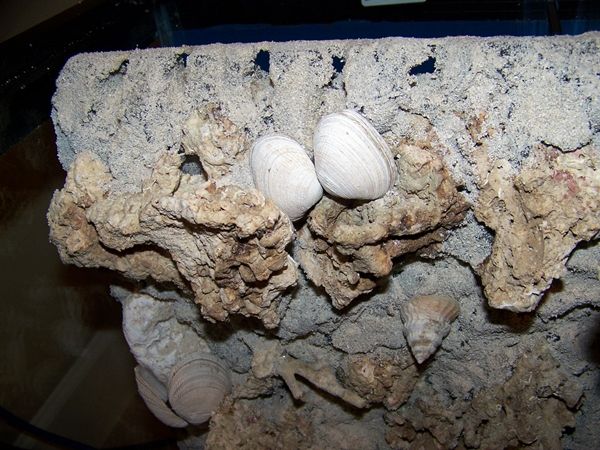 Here's a front on shot. The bottom portion will be covered by live rock placed on the base plate. 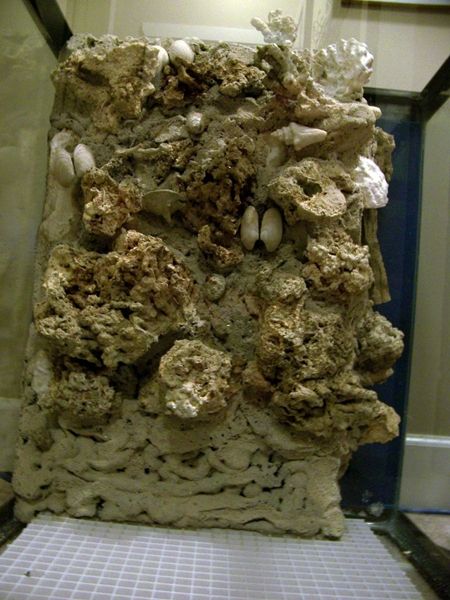 Overall I am pleased with how it turned out. Now looking forward to getting it wet.
|
|
#15
04-04-2013, 03:12 AM
|
|||||
|
|||||
|
I can't wait to see it up and running as well!
__________________
225gal dt with 100g sump. Mitras, vortechs, bubble king, AI Sol and Profilux. http://www.canreef.com/vbulletin/sho...threadid=84782 Will trade subs for frags My other summer hobby: http://www.edkra.ca
|
|
#16
04-04-2013, 04:31 AM
|
|||||
|
|||||
|
Very cool. I've been toying of doing this for my 210 instead of a painted background. Looks good, well done.
|
|
#18
04-05-2013, 01:58 PM
|
|||||
|
|||||
|
Quote:

|
|
#19
04-07-2013, 01:26 AM
|
|||||
|
|||||
|
So I've finally got some salt water in the glass box and it is cycling on a coffee table while I work on the stand. I built some tall live rock structures to stand in front of the wall using this:
 I don't have any lights yet so had difficulty getting good photos but here's a couple of wet ones using an Ikea bedside lamp. 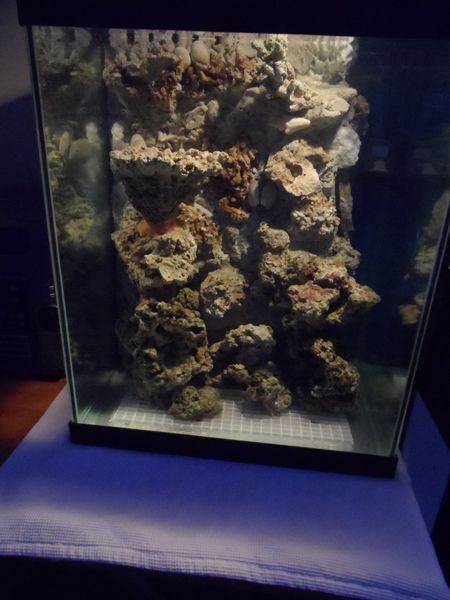 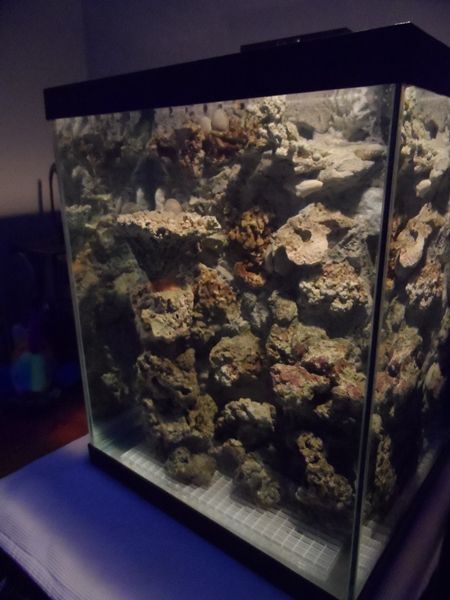 And top down so you can see that there is actually some swimming room. And even though it looks like the top of the bommie is close to the front glass it is at least 2 inches away. 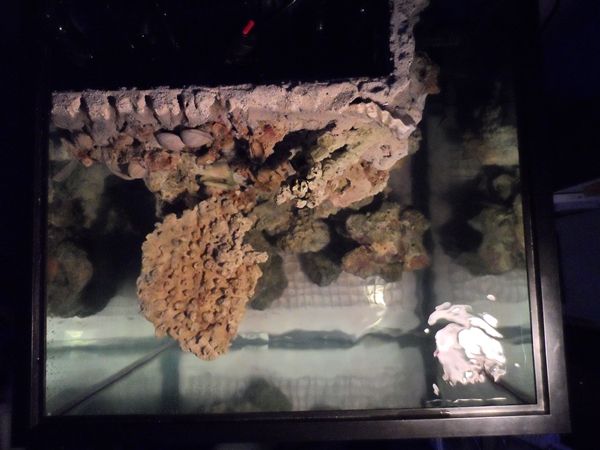
|
|
#20
04-07-2013, 04:25 PM
|
|||||
|
|||||
|
Here's where I am at with the equipment for this build:
Aquarium specs: 37 gallon Marineland column aquarium. 20 long x 18 wide x 24 deep, black trimmed. Converted to an All in One (AIO) with a 14 x 4 equipment/filter area with 2 returns along the back left wall. This leaves 32 gallons of tank space. Return pump: Tunze Silence 1073.008 (210gph). This specific pump was purchased for its extremely quiet operation and low electrical demand (8W). Flow: Not purchased yet. Thinking of 2x Hydor Koralia 550 on timers. Lighting: Not purchased yet but am going LED with this one. Filtration: I have an old Red Sea Prizm HOB skimmer which has sat in the garage unused for 10 years. I designed the AIO compartments to accommodate this and like its very slim profile. I will be using it until it gives me a reason not to. My stocking is very light compared to most so the skimmer is hardly a requirement for this tank. 1x Two Little Fishes Phosban Reactor 150 with phosphate removal media. Controller/Monitors: Reef Keeper Lite PinPoint pH and Temperature monitors Heating/Cooling: 500W titanium heater controlled by the RKL. Seems like overkill but i) I already had it on hand ii) my house gets cool (mid 60s F) at night iii) the return pump circulation is quite low Pacific Coast Mini Chiller (1/13HP) with 80gph throughput. Digital and adjustable so no need to run off the RKL.
|


 Linear Mode

