Another busy day and it's only halfway through the day!
The fan in the lights is way too loud and have to come out.
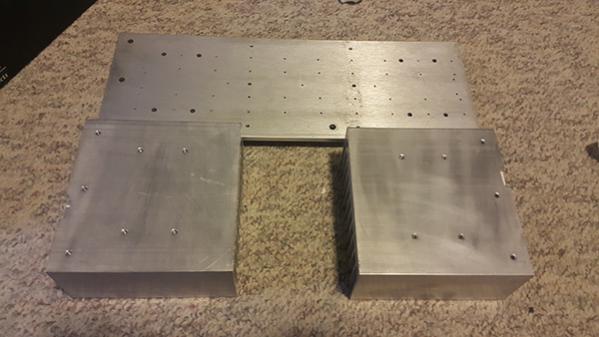
Time to disassemble, my favorite activity!
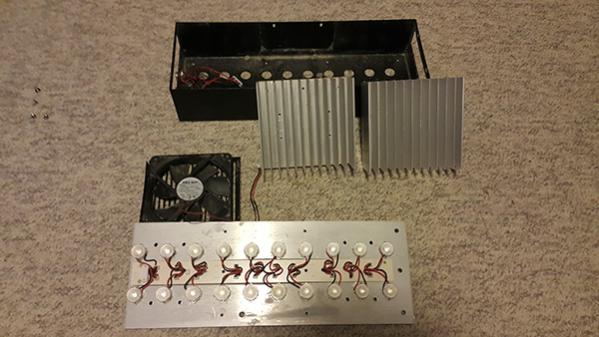
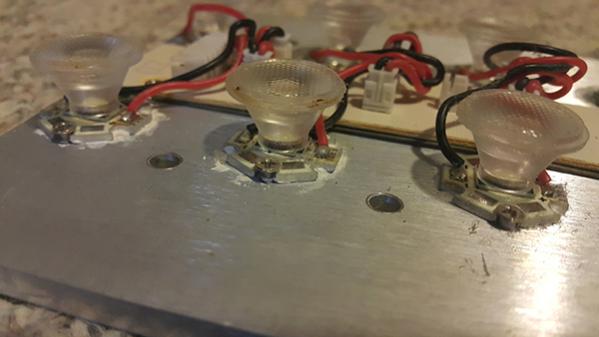
Here is a closeup of the 3W Cree LEDs, looks like they are quite easy to replace if a module fails or I want different colored LEDs. Right now there's 10 white LEDs and 10 Blue LEDs. Would any of you change out 1 or 2 of these for a different color?
If so which would you go with?
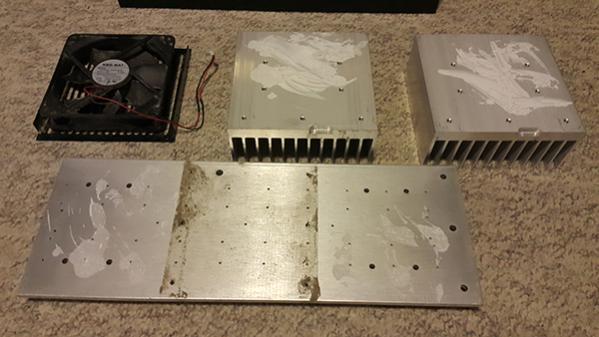
The thermal paste contact was quite poor from the factory... less than 30% of the heat from the main board was probably being carried to the cooling fins.
This won't do, so time to get modifying.
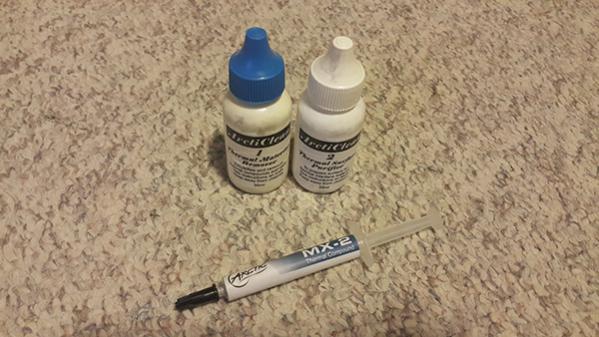
This is what I use to clean thermal compound off anything. It was for use in my computer build a while back but they have come in handy for many other unexpected applications like this one.
It comes in 2 stages and does an amazing job, you can simply use 100% rubbing alcohol to get similar results.
Will also be using some nice new thermal compound lying around from my last PC build as well.
Nice and clean
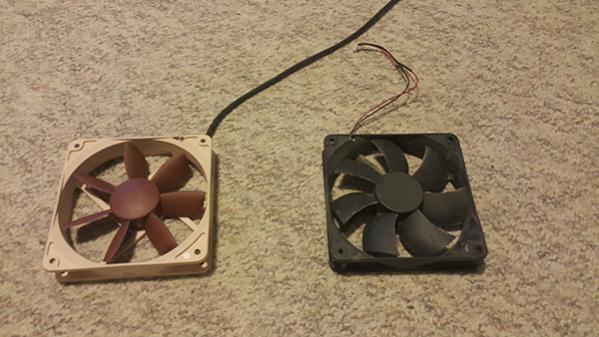
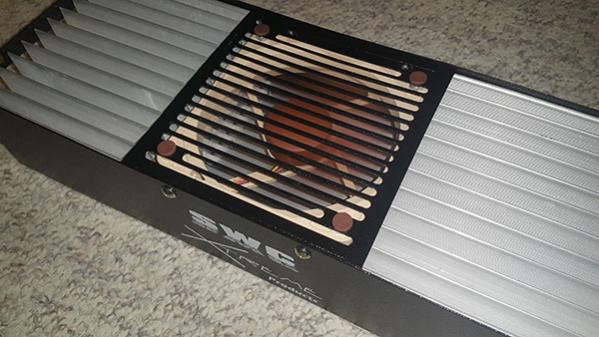
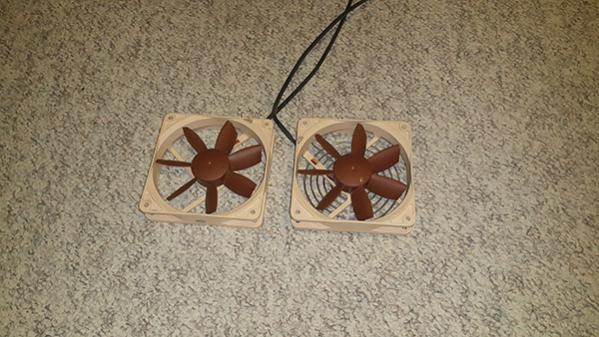
Luckily I had some fans lying around from trying out multiple fans to get the most optimal airflow in my PC. I will be using the Noctua NF-S12B for the lights. Anyone in the PC building community will know that Noctua is the undisputed leader when it comes to quiet performance fans. The NF-S12B was designed for airflow rather than static pressure like most computer fans are, which makes it ideal for this application. Since the density of the cooling fins are nowhere near the densities of computer radiators, getting more air flow through them rather than static pressure should be more efficient and keep them cooler.
Time to "simply" switch over the wiring from the old fan to the new.
You'll see why it wasn't so simple soon.
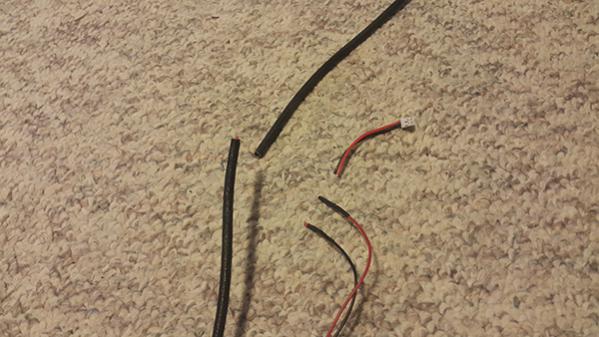
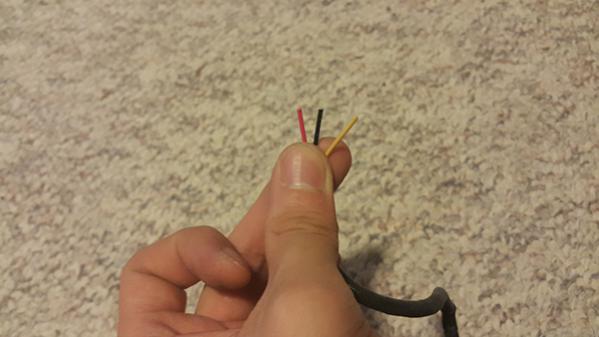
There are 3 or 4 wires depending on the fan. The only ones we want are the red power and black ground wires and I simply trimmed off the yellow. Rest are usually for variable fan speed signals from the motherboard of the computer.
Here it is soldered and heat shrinked. After assembling everything I was still able to hear the fan at 100% so I went back and added a resistor to keep the fan running at 50% but not shown here in the picture. Do you notice something weird?
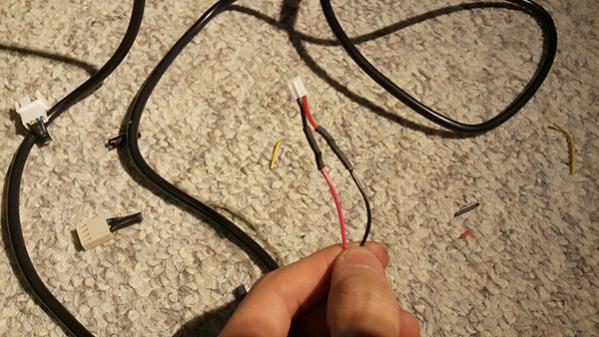
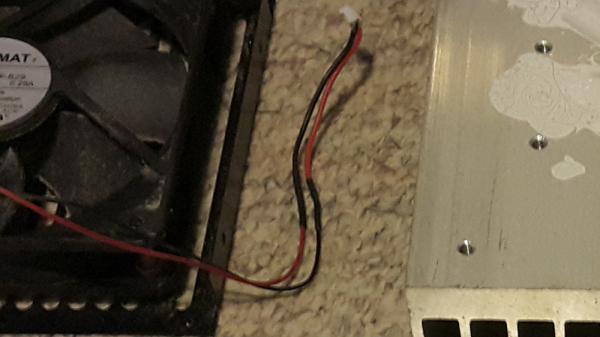
If you noticed that the power is connected to the black wire and the ground is connected to the red wire you are correct. If you look back at the original disassembly picture, someone at Cree or SWC thought it'd be a great idea to switch up the colors of the wires for the fan

I soldered everything like I supposed to the first time and went back to assemble the light and the fan wouldn't turn on no matter what. I thought I somehow broke something and pulled out my multimeter to check the voltage at every point on the circuit board. To my surprise everything seemed to be working right until I checked on the connector for the fan and saw that the polarity was reversed. That's when I looked back at the photos and realized the red wire was the ground and the black wire was the power for the fan connector

What should've been a 5 minute soldering job turned into hours of trying to troubleshoot a simple wire mixup.
Time to assemble everything back together, I wanted more thermal compound on these cooling fins but the tube came in small volumes since they were only really designed to cover a CPU. I actually emptied the whole tube here.
I used the rubber attachments provided by Noctua instead of the original screws to hold the fan to further decrease the amount of noise from the fan. Finally everything is assembled and running!
There's nothing quite satisfying like the sound of a silent fan operation hehe

I have 2 more of these fans lying around so I might use them to create some airflow in my sump area if the space permits inside my cabinet.
I also ran around 3 different RONA locations today to find all the plumbing parts I needed. I still need a check valve since neither RONA nor J&L carried any. Anyone know where I can find some locally? I also need a method of connecting soft tubing from my mag7 pump to one end of the 1" PVC pipe. What is the best method of doing this?
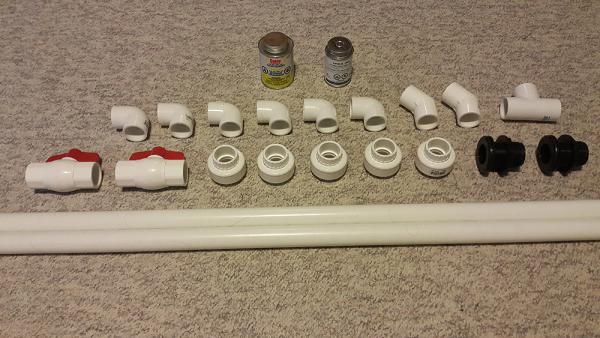
Also, does anyone in the Vancouver area have a hole saw that can drill a hole big enough for 1" bulk head to go through? This might be a bit of a stretch but I'm also looking for a 5" or 120mm hole saw to drill a hole for the circulation fans. If anyone has either of these tools and was ok to lend it to me for a bit it would be much appreciated! I checked up on these tools while I was at RONA and for the 5" one it was like $50+ before taxes

The only plumbing I've ever done was inside my computer but seems like the concept is pretty much identical

The cost of the PVC parts came out to more than I expected/wanted to.
I think I spent just around $80 for plumbing parts.
Total Cost: $560
My total budget I had planned for was around $600 until I start cycling and it's getting close!
The bulk of the equipment has been purchased now so I think I'm doing an OK job at keeping to budget. Usually when I enter a hobby I like to go all out. This one is just a bit too costly to do that, so this is the first time I've had to really keep track of my budget and it's proving to be a good learning experience.